Cameo’s events management mostly takes place in the Events & Bookings section of Cameo. However, one important element is the bookings form, managed from forms → form editor. This article assumes you know the basics of how forms work, and we’ll concentrate specifically on the booking form here. Note that permission must be granted to a Cameo user to access forms.
The principle behind the booking form is exactly the same as Cameo’s built-in equivalent – see Events Example 1 (unreserved seating) or Example 2 (reserved seating) for this. The main differences are:
- the form is intended for a customer to make their own booking
- it appears embedded in your organisation’s main website rather than in Cameo
- payment method(s) are included in the self-service form
The form comprises four or five main steps:
- event selection: select date, time and venue/resource for a repeated event, and/or from multiple events on offer.
- place selection: from whatever pricing categories and venue areas you have defined for the event, or specific seats from a seating plan if reserved seating is set up: see the examples for how to do this.
- identification: who is booking the tickets, how should they be received (if at all), can we contact them again in the future, and how would they like to pay.
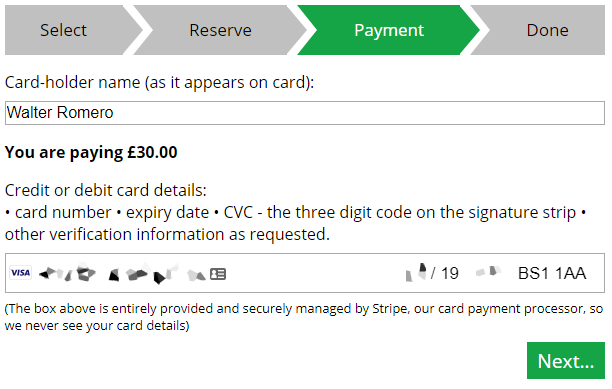
- payment (if not free). This is just like the stand-alone payment form.
- confirmation of booking
There are very many options in the form. But most are there to customise the text presented to the customer, which we’ll leave unchanged here. Let’s assume we’re going to book for Example 1 (screening of Casablanca at Camford Village Hall, which has unreserved seating and all the same price) – which, apart from free events, is the simplest possible case.
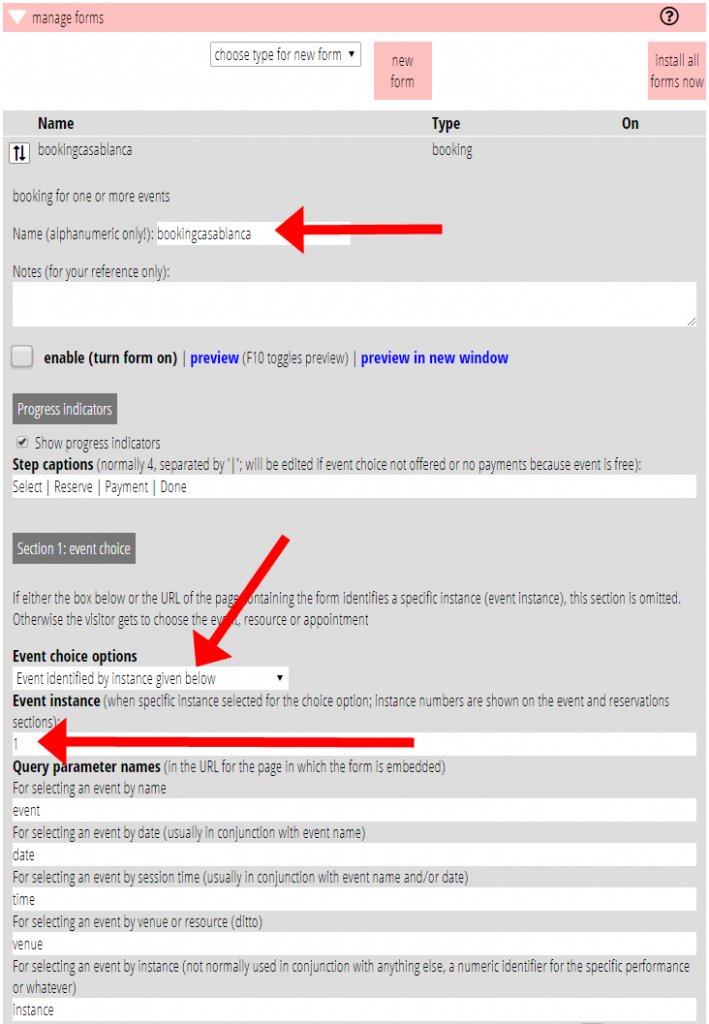
So, create a new booking form in forms → form editor; we’ll call it bookingcasablanca. We’ll choose Event identified by instance given below for Event choice options, meaning it will always book for that single event. We know from the Events section that this is event instance 1, so that goes in the Event instance box. As we’re not using the URL to identify the event in this example, ignore the Query parameter names. The idea is you’d link from, or embed within, a page set up manually about the event on your website, with a link such as Book Now! (If you had more than one event, they could all use the same form with a slightly different URL specifying the event instance, in which case choose Event identified by URL query parameters).
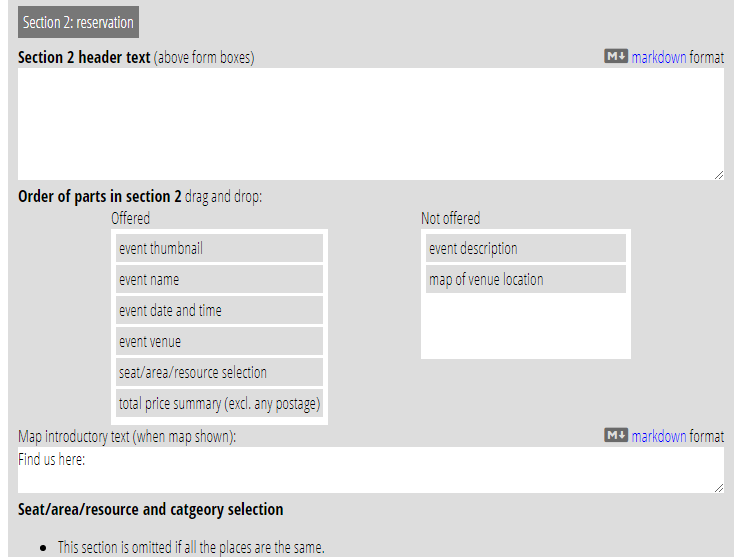
For section 2 choose what you’d like to appear on the form and in what order. If you’re embedding the form in a page about the event, you probably wouldn’t want to include the event details again, but if it is a separate page, confirmation is helpful. If a paid event (which our example is) a summary of the total price at the bottom is also reassuring. You will always want to include seat/area/resource selection. So let’s choose all but the detailed event description parts, like this:
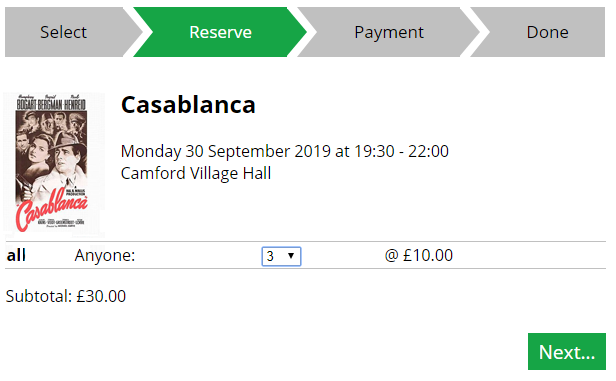
Here is what the form looks like so far (the appearance style depends very much on your website styling though). With reserved seating you would see a seating plan here to choose from.
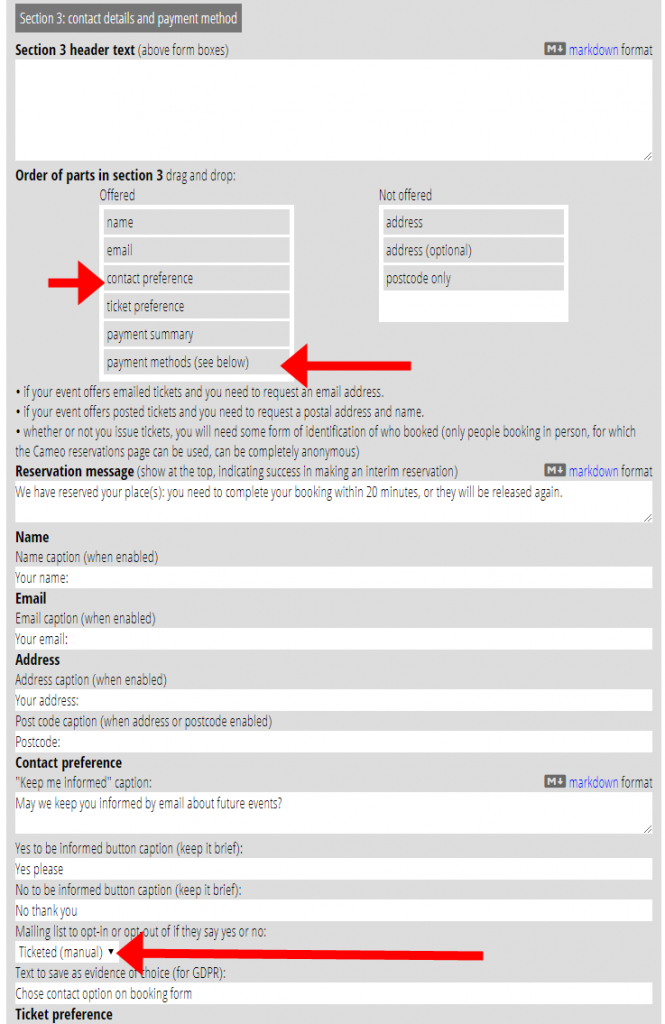
Similarly in section 3 we’ll choose what information we want from them. We’ll always want name and almost always email address. If tickets by post are not available we won’t need address.
Note that if they enter an email address that matches one we already know, we’ll link the booking to that membership record.
As this is a paid event, we’ll need a payment method. We’ll choose just Stripe for card payments, and nothing else, so there won’t actually be a choice offered here.
In order for payment method to appear, account credentials needed to be entered in the Organisation Settings’ Payment Methods section in Cameo; and the text that appears above the Next button comes from the payment-method-specific details defined at the bottom of the form.
For the May we keep you informed part to appear, there has to be a public mailing list defined and selected in the form set up for them to be subscribed to if they say yes (or opted-out from for an automatic list if they say no).
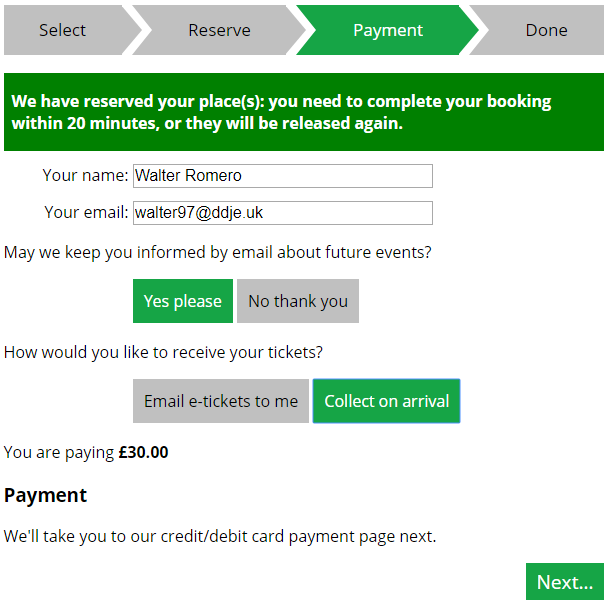
Here’s the relevant part of the form set up and what the end result looks like, followed by the payments page and the final confirmation.
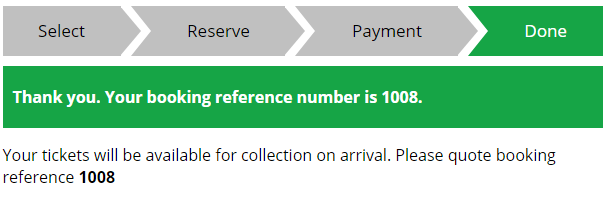
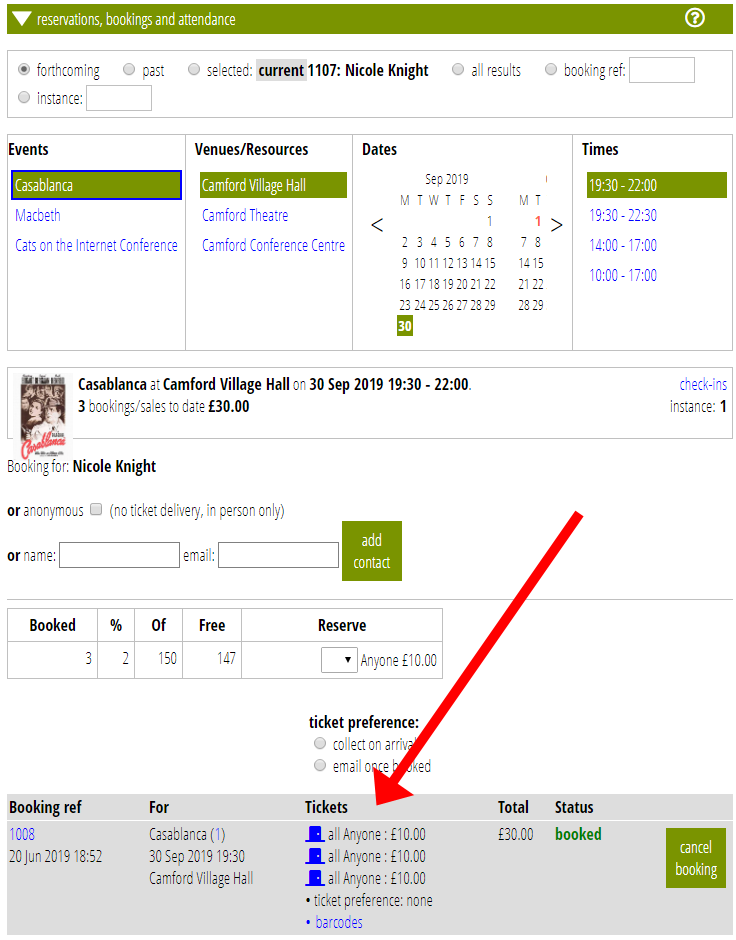
Finally, here’s the final booking as we see it in Cameo, in the Reservations, bookings and attendance section: