
This illustrates using Cameo’s events management for a one-off showing of the film Casablanca in Camford Village Hall, which has unreserved seating but requires tickets (all £10, bought online or on the door).
Contents
Venue
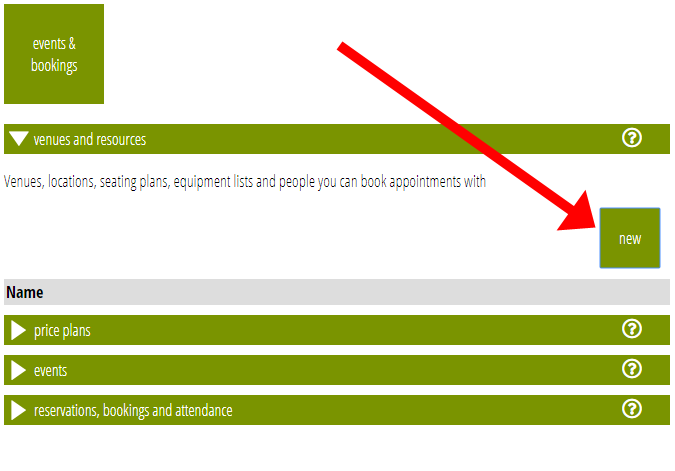
Start in the Venues and Resources section of Events and Bookings by adding a new venue. Managing venues (and price plans) separately means that when you show North By Northwest next month, you can just make a new event, sharing the same venue and possibly prices.
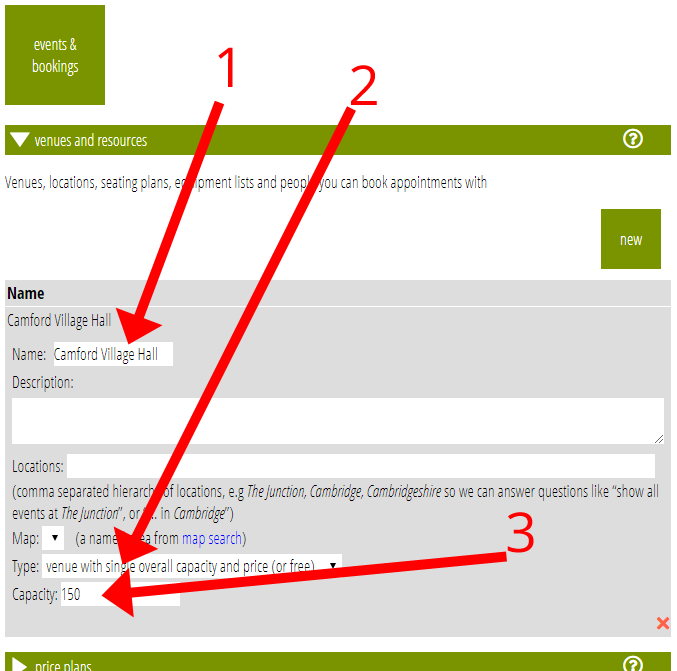
The essential things are to:
- give it a name: Camford Village Hall (people booking will see this name)
- choose the type: venue with single overall capacity and price (or free)
- having chosen that type, you now see a box for capacity. Lets say the fire limit is 160 people, and allowing 10 for organisers etc, we can set this to: 150
Price plan
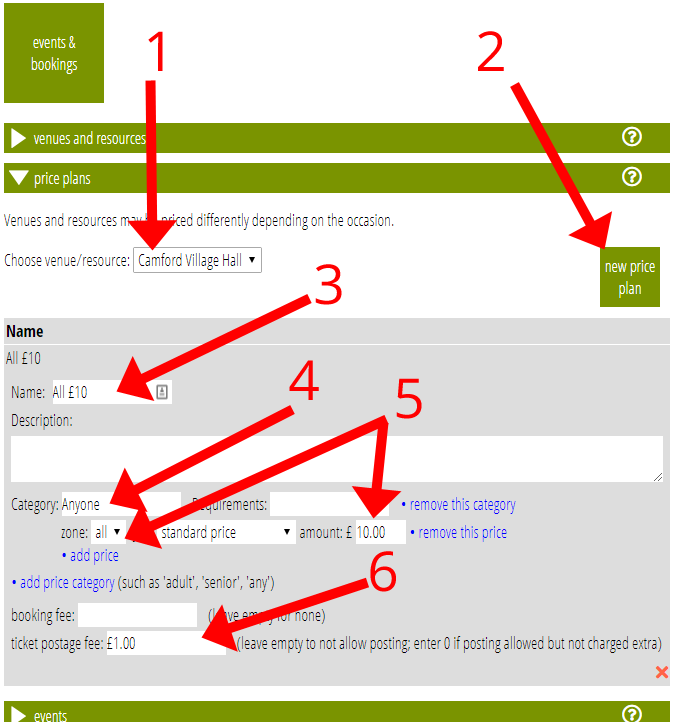
As we’re going to charge for tickets, we now need to set up a simple price plan where all tickets are £10. In Price Plans:
- Select the venue Camford Village Hall we just set up
- Click the New Price Plan button
- Give the plan a name: All £10. This name is just for your own reference.
- We only have one category of person and one price zone, so change the name of the category initially set up for you from Adult to Anyone. Purchasers will see this category name. Leave Requirements blank, we don’t need that here.
- Choose the price zone all, made for you because you said there was only a single overall capacity when you set up the venue. There are no offers or early pricing, so leave price type as standard price, and set the amount: £10.
- There are no other prices or categories, so that’s it. However, you can if you want add an additional fee charged on top of all the tickets bought as a booking fee and a separate charge for posting tickets if you are planning on doing that.
The event
Now Cameo knows where and how much, we can say what and when. In Events:
- click the New Event button and give the event a name: Casablanca. You could also provide a publicly accessible still, say (it will show it to you), and describe the film briefly if you want, for purchasers’ information.
- Give the date and time, say 30 Sep 2019 and 19:30 in place of the default (which is just set for a week ahead). The end time is optional and just for purchasers’ information.
- Say where: choose Camford Village Hall and the pricing we set up, All £10.
- We’ve no complicated things like time slots, sessions, repeating the event or extending to more than one day, so leave those options.
- Choose the ticket preference: let’s allow E-tickets where possible.
- That then allows you to offer a posting option, and to make a new set of templates for the tickets, which you can then customise as you wish (see help for the Events section for more information).
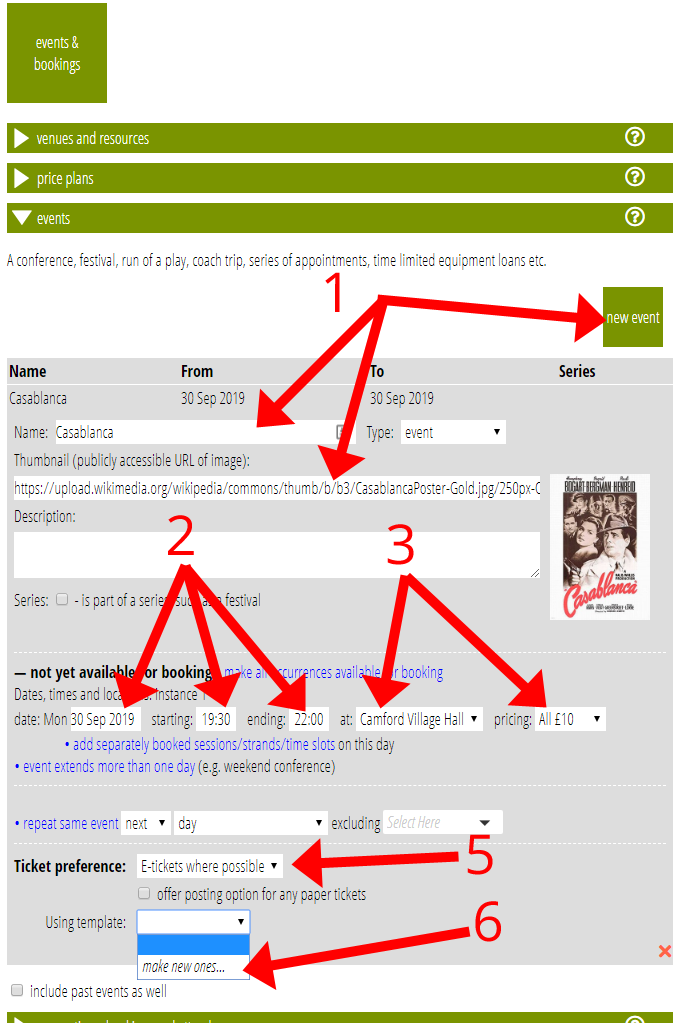
Finally, when you’re happy with everything, we can open it for booking by clicking make all occurrences available for booking.
Booking through Cameo
We can now take a booking within Cameo. Go to Reservations, Bookings and Attendance. There are four main parts to this section:
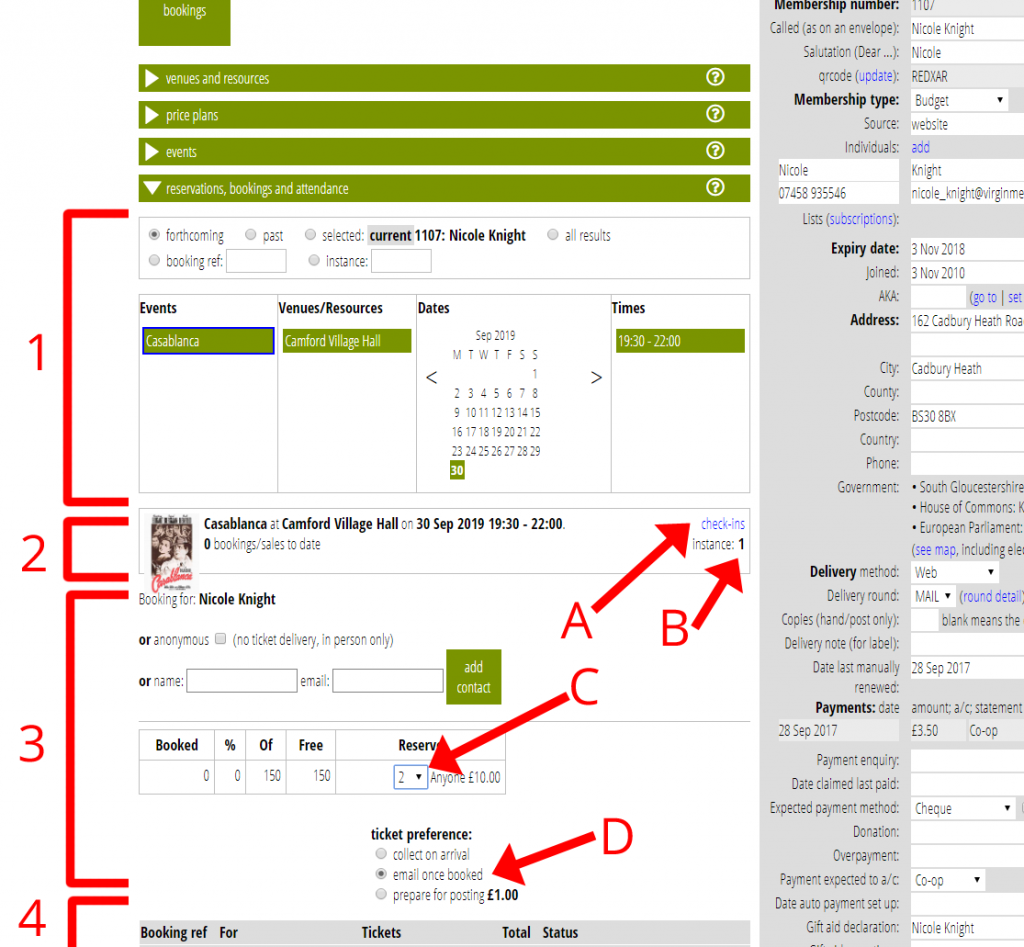
- A set of filters to locate the event (and performance if more than one) by a variety of criteria.
The top box selects only forthcoming events to start with, but you can choose past events, or by people who have booked (using the normal membership search), by their booking reference(s) or by the instance number that is assigned to each performance (see below).
The second box lets you narrow down the selected events by their name, venue, calendar dates and times. You only have to select as few items to end up with one event instance as are necessary. As we only have one event so far, it is already selected. - When the filter leaves only a single event instance selected, the next box summarises it, with the event and venue details, how many bookings have been made so far and how much revenue these have brought in to date. Notice particularly the check-ins link (A) and instance number in the right of this box (B). The check-ins link provides a barcode that authorises the Cameo Check.in app to check tickets for this event instance, and the instance number is a quick way of identifying the event (you can use it in the instance box in the filter above). The same numbers are also shown in the event set up. This is our very first one, so it is numbered 1 here.
- Below the summary is the place where you can take bookings. Bookings in person can be done anonymously by ticking the box, but usually a reservation will be associated with a member or contact record, one that either already exists and you would locate by searching for it in the usual way, or a new one which you can create just by entering name and email here (and then adding other details as necessary in the usual way: for example, you would need an address if tickets are to be posted). Below that we have a drop down menu to reserve up to 10 tickets in our Anyone category we made earlier, at £10. We can see there are all 150 available at the moment. As this event only has one category in one are of the hall, there is only two choices to make: how many seats to book (C) and the customer’s ticket preference (D).
- The part at the bottom shows any existing bookings, and controls relevant to it, not just for the specific event instance selected, but for all the events and instances when there is still more than one possibility. There are none yet. The buttons at the bottom are for attendance lists and bulk tickets (see later).
Let’s say we’ve set up a ticket desk at the previous month’s showing of Citizen Kane to sell tickets for this next show. As we only have one event so far, it will already be selected, so we will already see the booking part of the page.
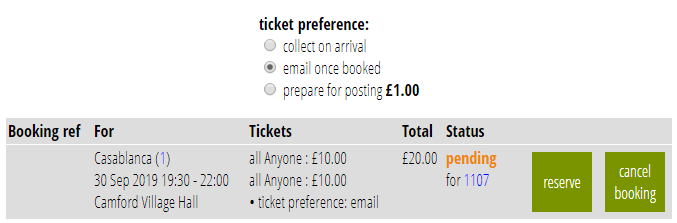
- Choose 2 for the number of seats required (C) and, say, email as the ticket preference (D). Once we choose the number of seats, our potential pending booking is shown at the top of the bookings list (4), showing the event details, the two tickets required, the total cost and who it is for.
Proceed now in two steps:
- Click the reserve button. This changes the booking status to reserved. That means no one else can book those places for 20 minutes, after which the reservation will lapse.
In this example, this hardly matters, but where the venue is close to full, or there are individually allocated seats, this reduces the likelihood of someone losing their place while you (or they) take payment. Where no payment is required, you can book immediately at this point, skipping the reservation step.
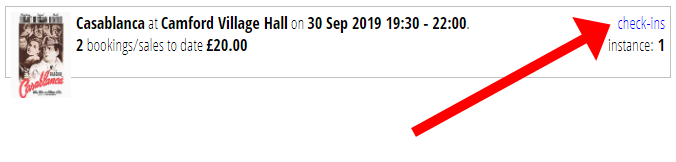
Notice we now have a booking reference number and the time at which the reservation was made and how long the reservation lasts. The button has changed to Finalise booking. Notice also the event summary further up the page has changed showing our 2 reserved places and the £20 expected revenue so far.


- The customer hands over £20 cash or you use your credit card terminal to take payment at your ticket desk.
- Once payment is complete, confirm the booking by clicking the Finalise Booking button. The status changes to booked and tickets are emailed.

Had you chosen instead collect on arrival for ticket preference, you could at this point print the tickets to hand to them, using the link in the booking summary.
Self-service booking
Setting up the self-service booking form deserves and article of its own.
On the door
- Shortly before the event, click the tickets for collection button to produce outstanding tickets, then go to the Letters section in Communications, open up the tickets produced and print them.

- Authorise stewards to check in people for this event using the Cameo check.in app (q.v.) while you have access to Cameo. Click the check-ins link on the event summary. If you are cancelling tickets personally, just scan the barcode off the screen. Otherwise, take a copy of it and print or email it to the stewards to use.
- Then, on the door, simply scan the ticket barcodes into Cameo Check.in as people present them, either on their phones or from the printed tickets they received or printed themselves.