Event bookings can have additional custom fields so that you can prompt for and collect structured information in the booking form that isn’t already built in to it. For example, consider an event that provides lunch: you can have boxes on the form for the customer to indicate any special dietary requirements and their drinks preference.
To start with, create a venue (or resource), price plan (if applicable) and event in the usual way. For example let’s invent an event Jordan College Lunch Club at Great Hall, Jordan College with a price plan called Lunch (dæmons included*).
Then create a booking form for the event. We’ll skip most of the booking form details, which are described elsewhere, concentrating just on additional fields.
You can have additional fields in either section 2, where the customer chooses their ticket, or section 3 where they enter their details. We’ll ask about diet and drinks preference in section 2 for Jordan College Lunch Club.
UPDATE November 2019: Cameo version 9 uses a new visual form editor, so while the principle of what follows hasn’t changed, you now add custom fields by clicking the seedling icon![]() .
.
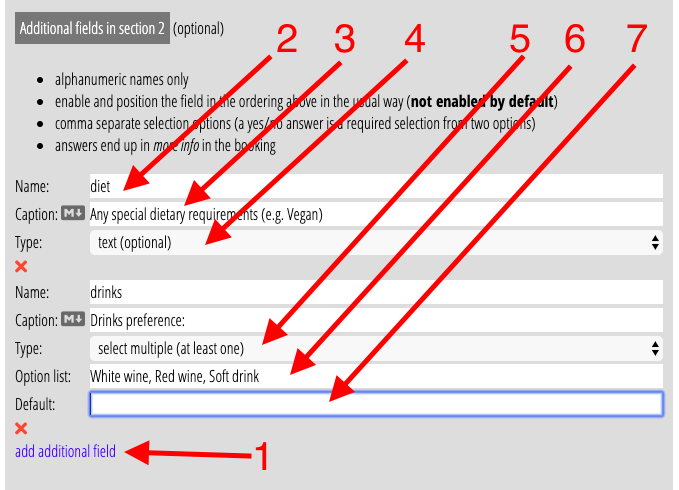
Click add additional field (1) for whichever is the most appropriate section. Then give the field an alphanumeric name (2: the customer does not see this name), a caption (3) and the type of field (4). Type can be
- text: a single line of text, either optional or required (the user must give something)
- paragraph: a large box to enter more text (again optional or required)
- select one: a set of buttons from which the customer must choose one (radio buttons). You’ll then need to give a list of values to appear on the buttons (6).
- select multiple (optional): as select one but they can choose more than one, or none.
- select multiple (at least one): similar but they must make at least one choice (5).
(It may be possible to add specific kinds of text at some stage, for example for dates, numbers or currency amounts, but these aren’t available at the moment; they would differ from text only in the error checking for format applied to them).
If you want to ask a yes/no question, use select one with those two choices. For all the select options you can also provide a default if you want (7), which will be turned on for them.
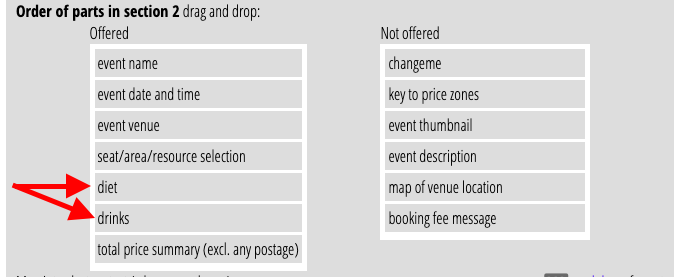
The new fields will show up not offered on the chooser for the parts of the section. You will need to position them in the offered column by dragging and dropping, as for the other fields, in order to see them.

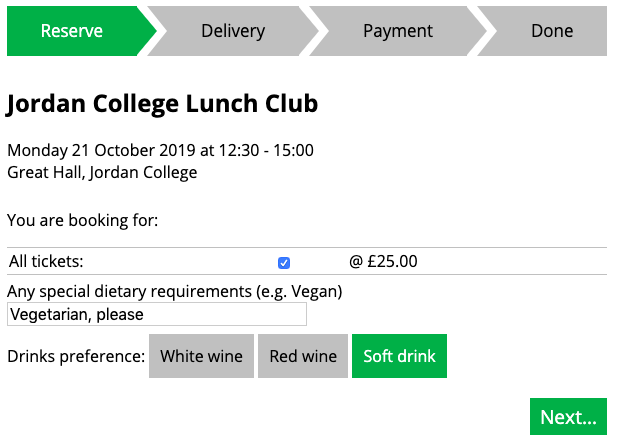
Here’s what it looks like in preview:
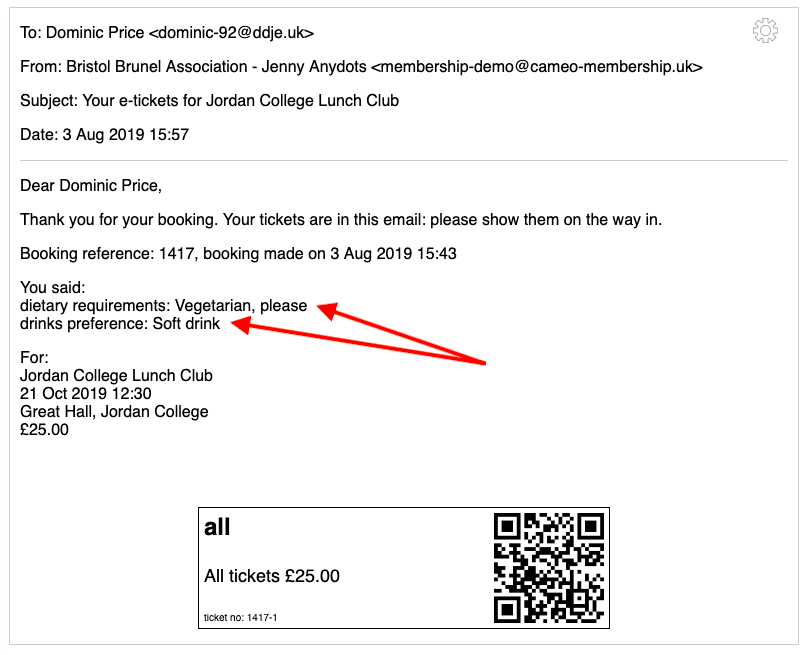
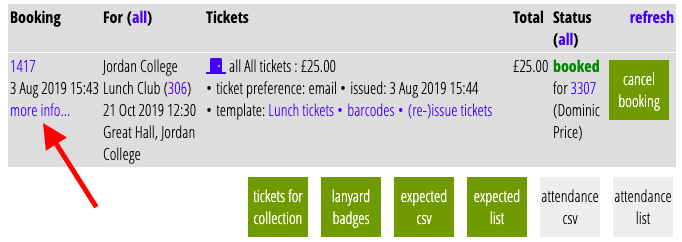
Here’s a completed booking. Notice the more info link. If we click it, we see what the customer entered for our two additional fields.
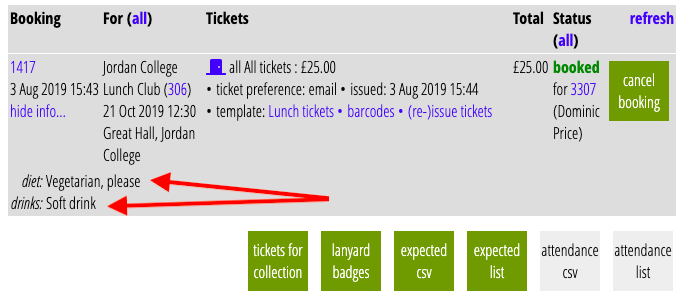
The values given for any additional fields are listed in their own columns in the expected and attendance CSVs for lists of bookings.
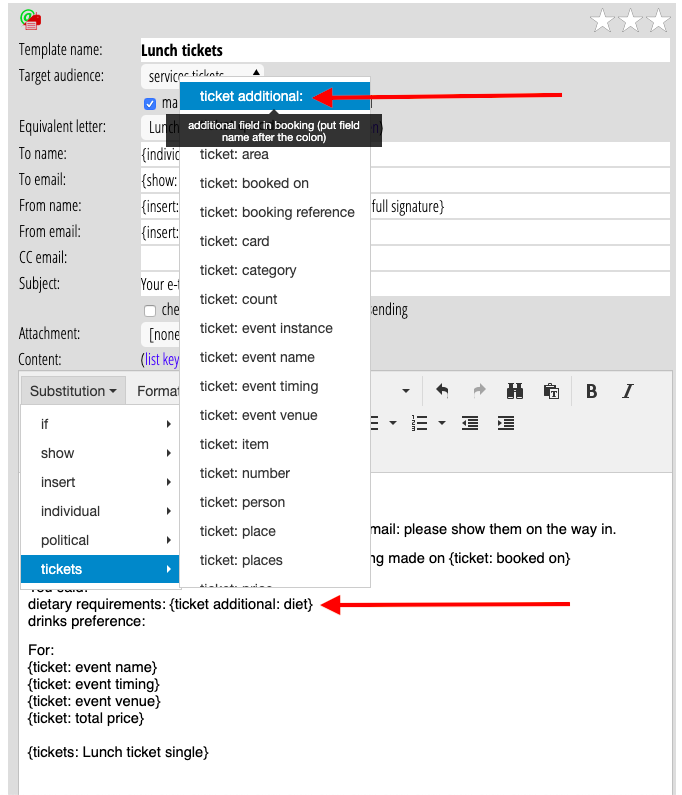
For tickets, badges, email receipts and expected or attendance lists, all of which use templates, the additional field values can be included using the {ticket additional:} substitution. You can insert the substitution from the substitutions > tickets menu in the template editor, but then you need to type the field name you want to display, after the colon. For example:
{ticket additional: diet}
Here’s an example email produced from that template (after inserting a second substitution for drinks) for that booking: