
Cameo can now piggy-back onto Xero automated bank feeds. Xero is a business accounting service which can now use the UK’s Open Banking initiative to obtain bank statement transactions from any bank that offers them. Cameo can fetch the previous day’s transactions from a Xero account once it has obtained them, so Cameo’s bank accounts are also kept up-to-date and in sync with Xero.
[UPDATE August 2023: the process of authorising Xero to share details is now enormously simplified]
[UPDATE January 2024: Open Banking feeds are now also available via Bank Account Data by GoCardless]
Contents
Set up
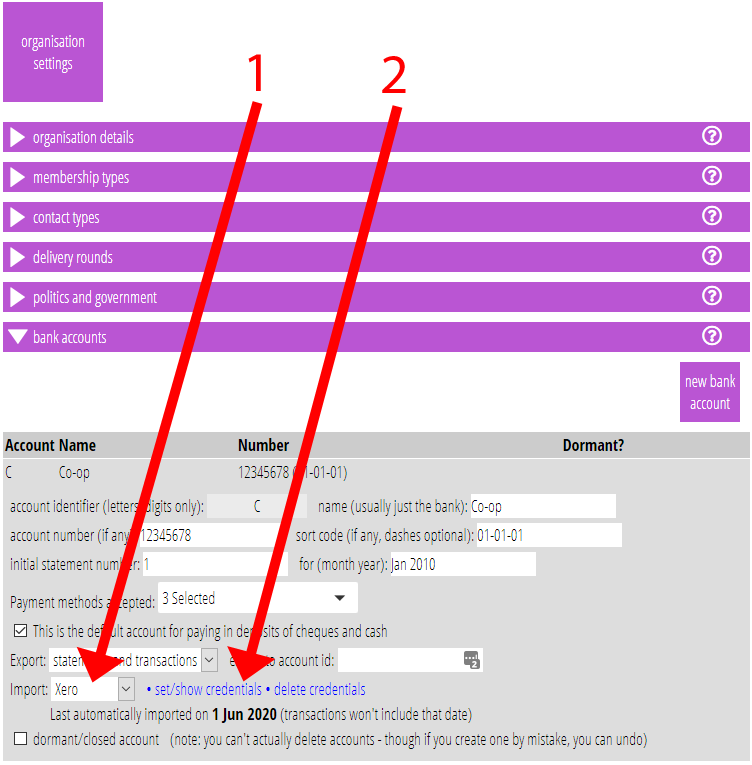
In principle, this is the same as the other three existing feed types in Cameo (for PayPal, GoCardless and Stripe): in the Bank accounts section of Organisation settings, select the import feed provider as Xero for the account or accounts serviced by Xero (Fig 1: 1), and provide credentials for access (Fig 1: 2).
Normally, Xero should be accessed from Cameo automatically daily. However, if the feed is not active for more than 60 days, the authorisation process has to be repeated. If it is done daily, as intended, it should continue indefinitely.
Credentials required
These items are required for the credentials box.
- account id: Identifies which account Cameo should collect transactions for, daily. This is the URL of the Xero page that displays the account, or just Xero’s ID for the account at the end of the URL (Fig 2).
- earliest date from which to obtain transactions. Most feeds will use an early start date if there isn’t a previous one, but Xero does not allow dates more than a year ago, so this tells Xero when to start, after which feed will be obtained for one day, daily.
- reconcile pattern (optional), a regular expression which, if it matches the transaction description, will mark the transaction as already reconciled (all outgoing payments are also pre-reconciled).

Obtaining authorization from Xero
Once you have supplied the details above, we will open a window for you to authorise Xero to allow Cameo to connect to it. You’ll need to log in to Xero if you aren’t already. Then select the Xero account which has the transactions in it that you want (usually, you would only have one choice). And confirm your permission.
Administrators can test immediately this in Import Statements in Accounting tasks. Otherwise, it should do the first download early the following day if the details have been entered correctly.
More than one account
If you need to add more than one account, you can do so on the same Xero feed.
Just enter the same credentials as the first in Cameo’s credentials box for the second account. But enter the account id for the different account.
Upload finalised transactions to Xero
Where available, you can also upload finalised account transactions to Xero. This requires separate authorisation and a separate Xero App for the purpose. Do this with an administrator login in accounting tasks → finalise accounts.
Adding credentials follows the same procedure. But you also need to provide some other account codes to tell Cameo where in Xero it should put the transactions.