
Individuals in a membership record can now have additional ways to address them: any number of additional fields for social media handles such as their Twitter name, and Facebook name, and alternative email addresses and phone numbers, collectively called handles.
Personal phone number for individuals has been removed, and any existing individual phone numbers moved to the new scheme. The email field is still there, as there usually needs to be a primary email address, but you can add additional email addresses.
Other than storing them for posterity, you can:
- search for them in various ways
- select them in a list
- substitute them in templates
- where appropriate, open their page on the service which the handle applies to
- include them in spreadsheets for import.
Contents
Adding a handle
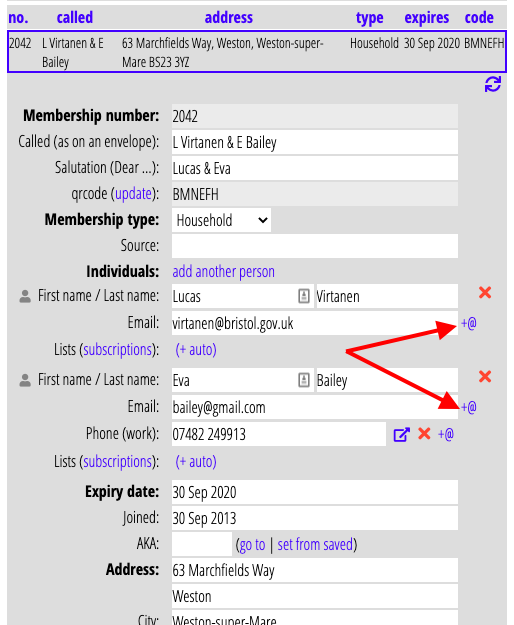
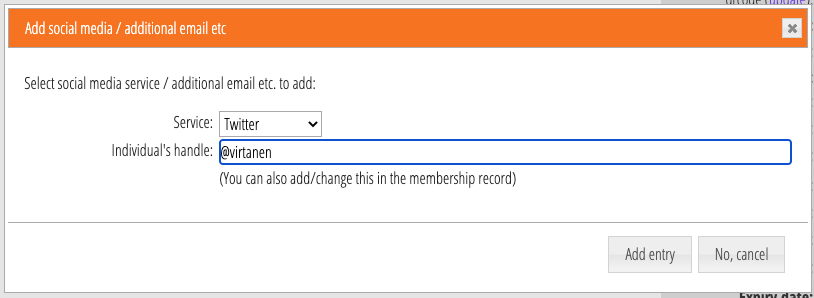
To add a social media handle, click on the new +@ button, next to an individual’s email address (Fig 1). This pops up a box where you can select a service, such as Twitter and provide the corresponding handle (such as @twittermonster; Fig 2), or a separate work email address.
If someone has more than one Twitter account, or multiple email addresses, or whatever, you can add more than one of each.
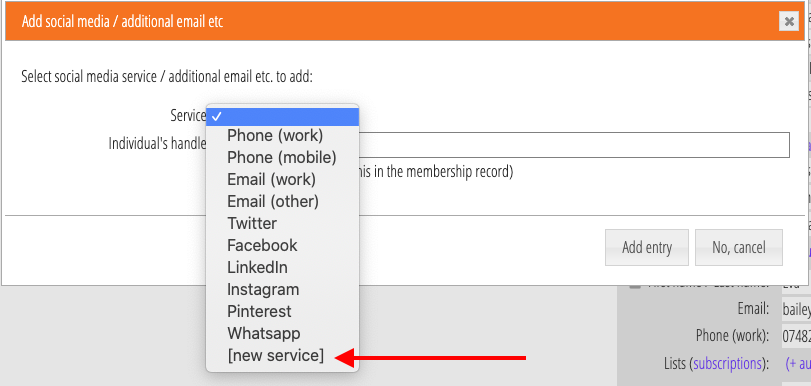
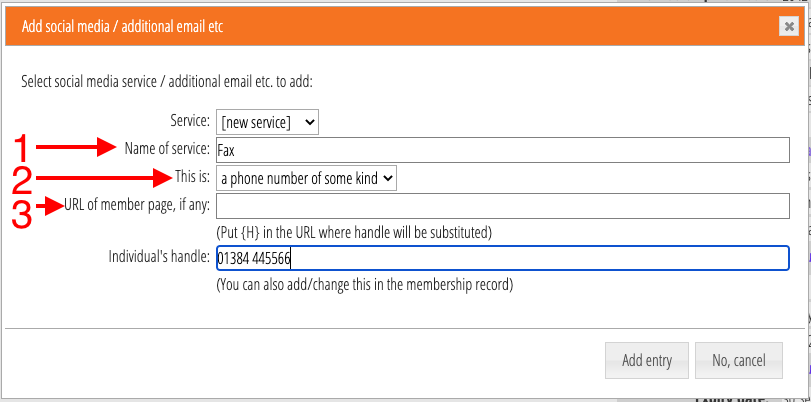
There is a set of well-known services already included, but if the one you want isn’t there, you can select [new service] at the bottom of the list of services where you can add others (for example, we don’t have Fax out of the box, but you could add it – Figs 4 – 6). You need to:
- name the service (Fig 5: 1),
- give its type (Fig 5: 2: this allows searching etc to be restricted only to certain types, and to better validate the data),
- optionally give a URL (Fig 5: 3), with {H} where the handle would go, so that the link to users page on that service is known.
Once added, it will be available on the menu for future additions.
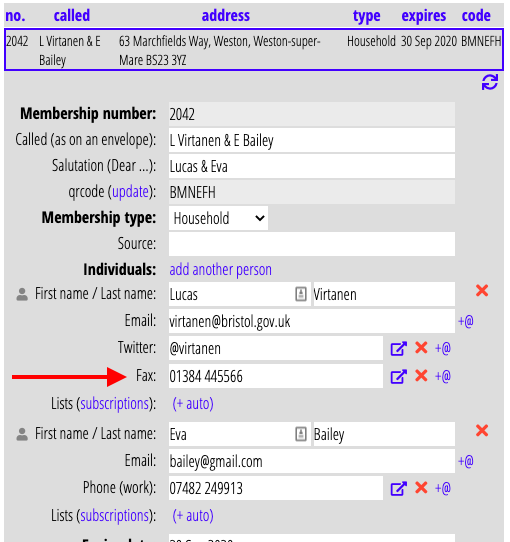
Displaying a handle
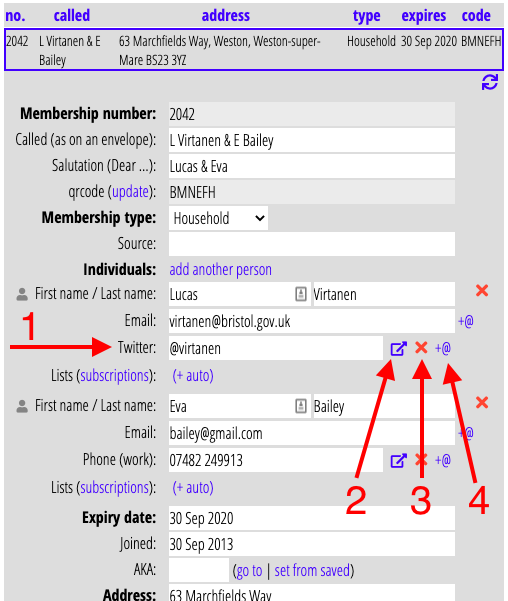
Once you have some handles, they are displayed just like the main email address, and just below it, with the name of the service as the caption. You can change it like any other field (Fig 3: 1).
There are controls to:
- link to the member’s page on that service (Fig 3: 2),
- delete the handle (Fig 3: 3), and
- insert another new one after it (Fig 3: 4).
Searching
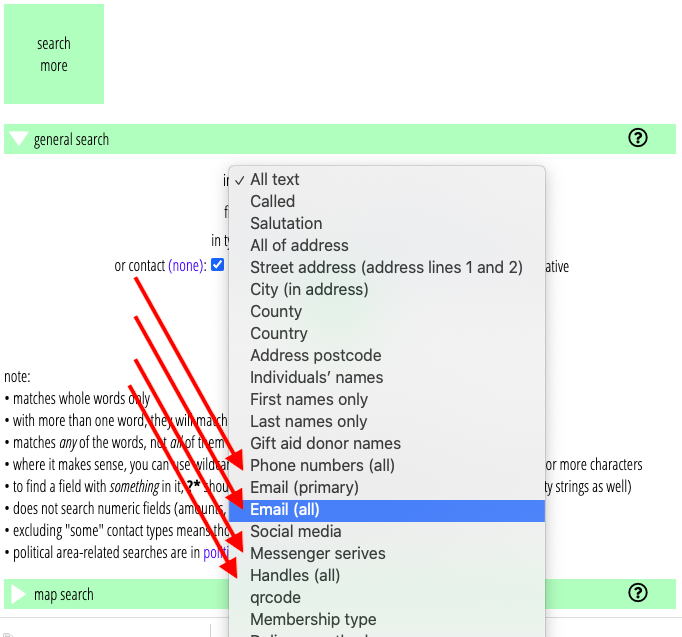
In General search on the Search more menu, you can look up memberships by handle:
- Phone numbers (all) looks for the search term in all handles whose service type is a phone number, as well as the main phone number field in the record
- Email (all) likewise looks in all handles marked as email addresses, as well as primary email addresses
- Social media looks in all handles marked as social media, like Twitter, so if you want to find someone by Twitter handle, this is the one to choose
- Messenger services likewise for messenger services
- Handles (all) looks in all individuals’ handles
- All text includes handles
Substitutions
There are three new substitutions which work with handles:
{individual: handle ...}where you choose the service to insert the handle for, so{individual: handle Twitter}would insert an individual’s twitter name (if there is more than one, only the first will be substituted). Because this is stored for each individual, you probably want to use a template which makes separate emails for each individual.{if: handle ...}to include what follows only if they have a handle with the selected service, so{if: handle Twitter}tests if they have a twitter name.{if: not handle ...}tests the opposite
List source
There is a new list source for automatic lists working with handles, called handles. When you choose this as the source, the list of services is offered for you to choose one or more from. The list then selects everyone who has handles stored for the selected services.
Importing memberships with handles
Import a spreadsheet with additional handles with a column headed with the name of the service (case, spaces and punctuation don’t matter). For example, to include Twitter handles, include a column Twitter for each individual, just like their email address, and put the twitter name in a cell in that column. For example (Arthur Franklin isn’t on twitter):
| Type | Contact type | Name | Name | ||||
| contact | Supporter | Rosalind Franklin | rf@ddje.uk | @rfranklin | Arthur Franklin | af@ddje.uk | |
| contact | Supporter | Marie Curie | mc@ddje.uk | @radium |