
Cameo now supports online merchandise sales. This uses:
- The existing section trading → inventory and stock, where you list the products for sale
- A form type shopping that provides a shoppIng basket
- A new section trading → online sales, where you manage sales (arising from the form)
- Integration with accounting everywhere needed, for things like reconciliation and book-keeping.
Contents
Inventory and stock
List details of products you might want to sell in trading → inventory and stock. Cameo introduced this in 2021 (see article). Product details you can provide include:
- Images (Fig 1: 1)
- Descriptions (Fig 1: 2)
- Price (Fig 1: 3)
- Quantity available (Fig 1: 4), and
- Default income account code (Fig 1: 5).
This primarily supported selecting line items for invoicing. Now, it also provides items for sale that customers can choose from in the shopping form.
For product selection, inventory items now also include:
- Variants (Fig 1: 6). This lets you offer a named product in a variety of styles. For example, one variant might be colour, and another size. While every stock item has a unique product code, items can share a name. In that case the customer would choose the named product from those on offer, and then, if they like the further detail, choose from among the variants on offer.
- Status (Fig 1: 7): just draft and live. Draft items are not offered for sale. You can make all product variants with the same name live (or not) at the same time.
- Not for sale (Fig 1: 8): a tick box indicating the item is not offered as a product to choose from directly. These provide things like postage and packing charges. Because these are “products”, this allows you to book them to separate account codes, define prices and so on.
- Tags (Fig 1: 9): which, apart from filtering by tag, also let you group items to offer in the shopping form.
Shopping form
You add and change the new shopping form type like other forms. Create a new one with the new form button in forms → form editor and adjust the details to suit.
product selection
Choose the products to offer from those in the inventory. Like the booking form, and other forms, you can do this with the query parameters control (![]() ) to offer:
) to offer:
- a single product or list of products by name (so each possibly has several variants),
- a single stock item by code (so just one variant), or
- those with selected tags (a range of products)
You can make this choice fixed, or select via a suitable URL to the page embedding the form (using query parameters). That means you can use a single form to offer a different product or range of products just by how you link to the page.
Like events, you can also use a personalised link in an email, which pre-fills some of the checkout details needed, like their address.
form steps
The shopping form comprises up to five steps:
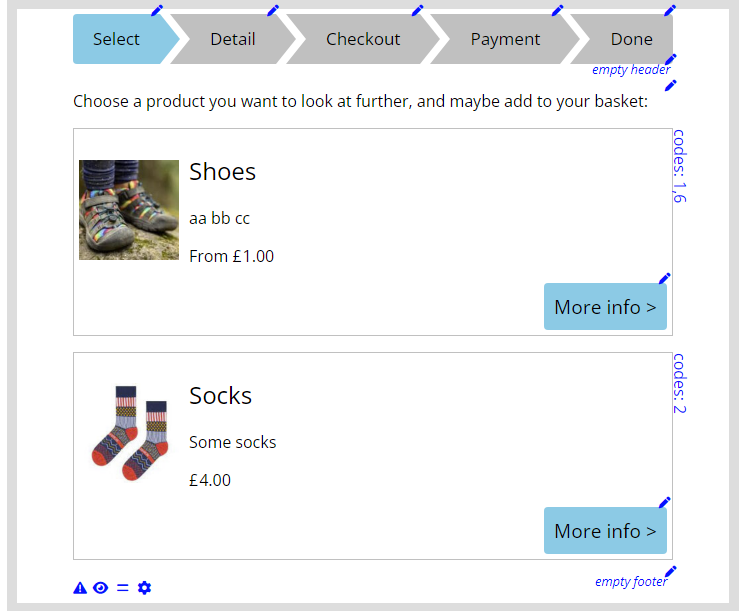
- Product selection (if there is more than one product to choose from; Fig 2)
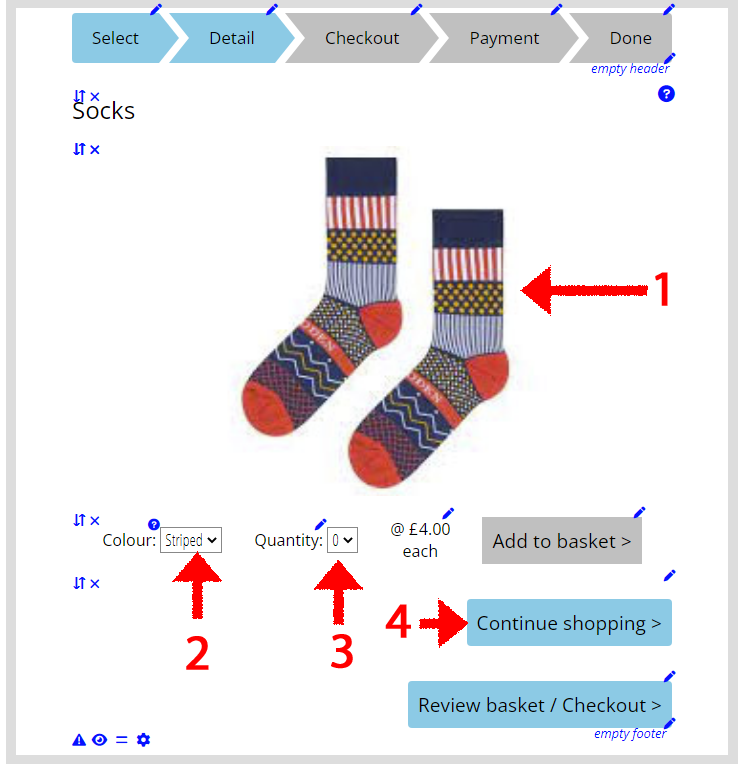
- Product detail (including an image carousel; Fig 3: 1), variant selection (if there is more than one variant; Fig 3: 2), and how many they want (Fig 3: 3); or continue shopping (goes to step 1; Fig 3: 4).
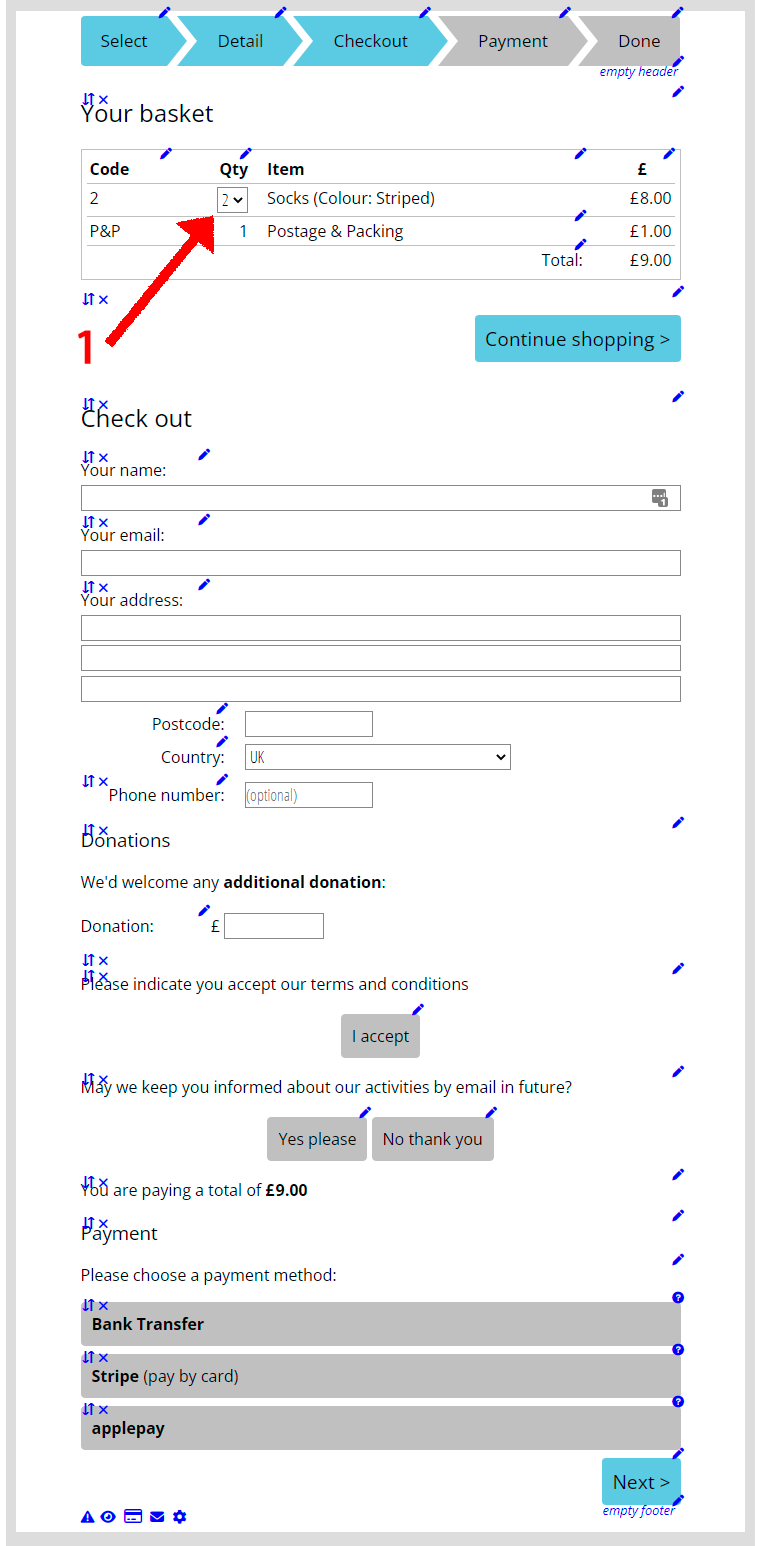
- Review order and check out (Fig 4): adjust quantities and/or remove items (Fig 4: 1), and check out, providing delivery details and selecting payment method; having reviewed, you can also choose to continue shopping (goes to step 1)
- Payment, just like all other forms which offer to take payment
- Confirmation
shopping basket
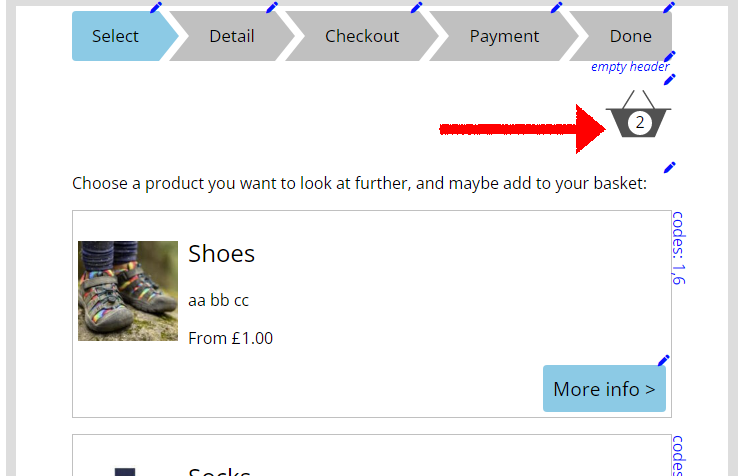
The shopping form provides a shopping basket (cart). When the customer adds an item to the basket, they see a basket icon at the top of the detail and selection steps (Fig 5), showing the number of items currently in the order. Clicking the basket is a short-cut to review basket and checkout, step 3.
settings
A setting (![]() ) at step 2, maximum number of any one product they can buy (cap) gives a cap on how many items someone can purchase at once.
) at step 2, maximum number of any one product they can buy (cap) gives a cap on how many items someone can purchase at once.
In step 3, a setting (![]() ) provides the “product” code which defines your per-order postage and packing charge for this form. You can also select an option (
) provides the “product” code which defines your per-order postage and packing charge for this form. You can also select an option (![]() ) on this step to offer free post & packing over some threshold. A further setting lets you set the amount, for example for orders over £30.
) on this step to offer free post & packing over some threshold. A further setting lets you set the amount, for example for orders over £30.
Also at step 3, the form provides the same settings as for other forms which take payment, for phrasing your thank you depending on payment method selected and arranging a template for email confirmation.
Steps 2 and 3 also deal with low or sold out stock. In step 3 a setting Limited stock lets you say how many items remaining (from the inventory) will trigger a low stock alert (which appears as part of the variant/quantity selection). Error messages (![]() ) in steps 2 and 3 provide the wordings. Styling for these is in CSS, if you want to change it.
) in steps 2 and 3 provide the wordings. Styling for these is in CSS, if you want to change it.
additional information
During check out (Fig 4), you can also, optionally:
- solicit an additional donation
- if they make a donation, then also solicit a Gift Aid declaration
- ask if you can add them to a mailing list for further contact
- require them to accept terms and conditions
If we don’t match the email address they provide, we create a new contact (just as an event ticket purchase would).
The postal address they provide may be different from the membership record. In that case, the address represents just a delivery address.
Sales fulfilment (trading → online sales)
When someone successfully places an order,
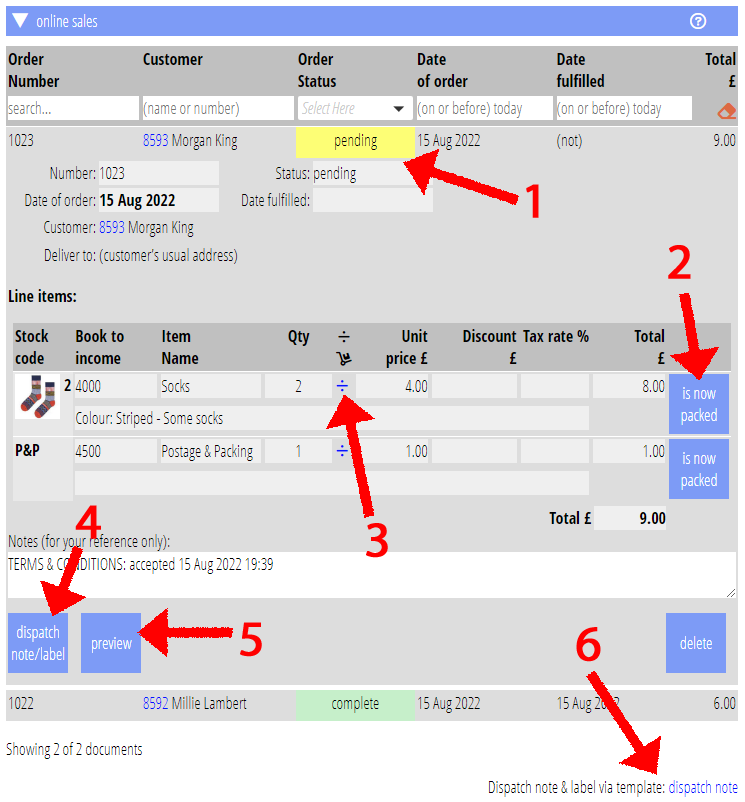
- it shows up in trading → online sales (Fig 6). A sale is very like an paid invoice. In fact, this is exactly how it is stored. So sales also show up in reports, reconciliation and so on in the same way as invoices. Presentation of sales also looks quite similar to invoices, but you cannot change them.
- The sale also generates an interim transaction. Cameo reconciles that automatically, just like others. If the customer makes a donation, the form splits the attribution between the sale and the donation. (Each product – especially postage and packing – can also book to different book-keeping account codes as part of the product definition).
- the thrice-daily summary notifications of new items now includes sales completed since the previous notification (you can subscribe only to those including sales with the notification tag #ImportedSales). Previously those notifications only included new members, new contacts, renewals, and member updates.
shipping
A sale is pending (that is, pending delivery) initially (Fig 6: 1).
As you pick and pack items, click the is now packed button to say you’ve done it (Fig 6: 2). If you can’t do the whole quantity requested at once, you can divide the item into two quantities, and come back for the rest later (Fig 6: 3).
Any items that are packed (the button has been clicked) are included in a dispatch note/label. Produce this using the button with that caption (Fig 6: 4).
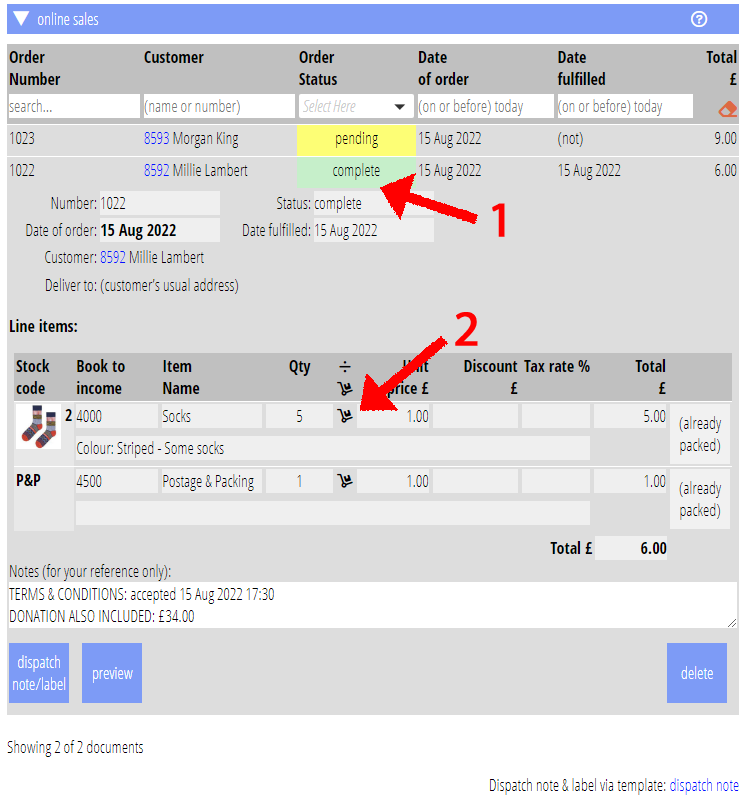
We don’t include items you include in a dispatch note again: a sack-barrow icon by the item indicates that it has already been included in a dispatch note (Fig 7: 2). You can also preview this document without affecting the status (Fig 6: 5) . When you complete all items, the whole order changes from pending to complete (Fig 7: 2).
The dispatch note is provided by a template which services task “dispatch note”. As with other places where a template services a task, you can generate a proforma at the end of the section (Fig 6: 6). As this is intended for posting, we make a letter template intended for printing. We also generate suitable stationery and a subordinate template which the merge can repeat for each line item in the order.
stationery
The first page of the stationery generated for the template provides an address label to stick on the parcel. The second page provides a packing list to enclose with the parcel. All the same trading substitutions as for invoices are available for inserting the order details.
In higher volume operations it is quite common to use peel-off stationery. The paper comes with a die-cut rectangle, intended to include the name and address. You peel that off the page and stick separately on the package. It is easy to adjust the default template’s stationery to achieve this just by rearranging the pages and boxes which the merge flows text into.
You don’t have to use the default stationery provided: you can replace or update it extensively to suit.