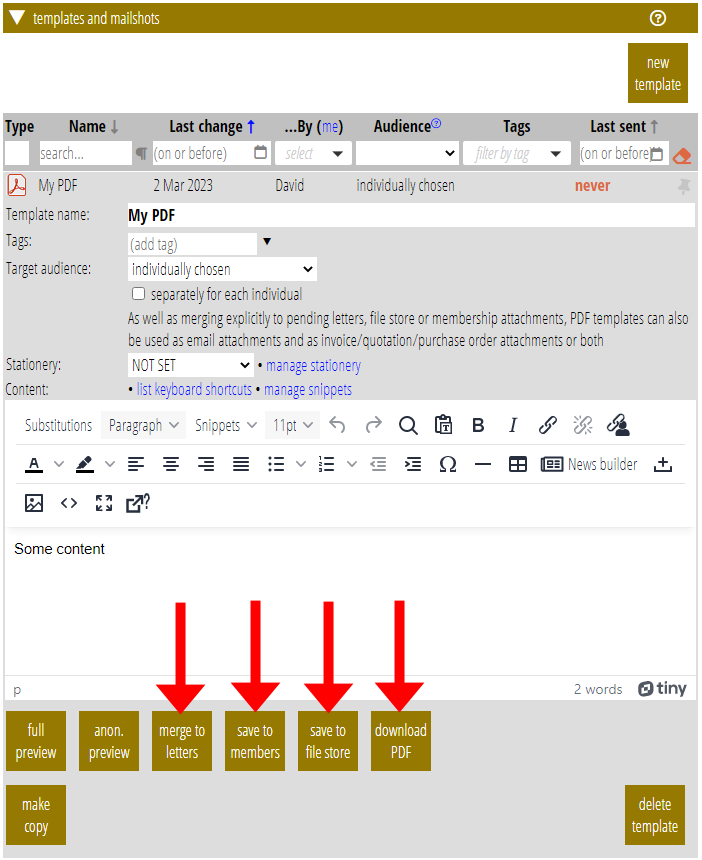
Letter (and PDF) templates (Fig 1), along with separately-defined stationery, offer paper-like, paginated layouts for printing or attaching personalised content. Merge membership records with a letter/PDF template to produce pages for each membership you merge with.
Letter templates are for printing. PDF templates are the digital equivalent. You can print them, of course, but you can also:
- use them as email attachments,
- attach them to memberships, or
- or keep them in the file store.
Email attachments include trading documents: attaching a formal invoice to a covering email, for example.
Contents
Working with letter and PDF templates
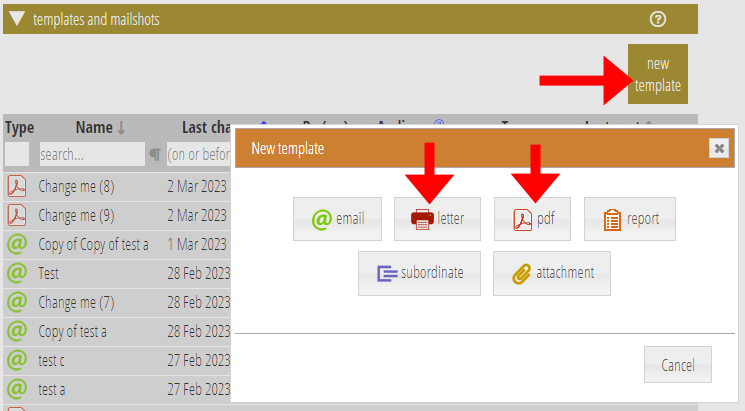
PDFs and letters work in exactly the same way. The difference is the file format and what you can do with them afterwards. You can convert a letter template to a PDF and vice-versa: use the button provided at the bottom of the template (Fig 2).
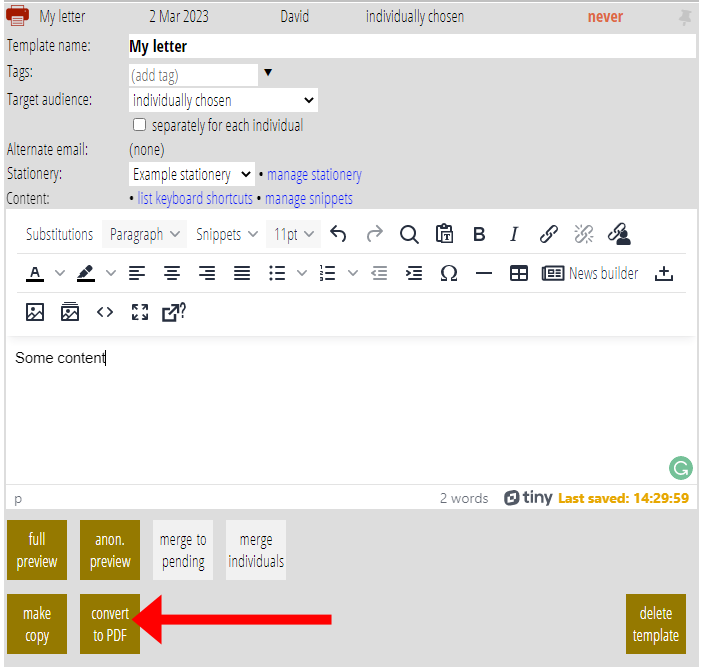
Data is merged from a list, individually chosen, ticket or invoice information and so on, in exactly the same way as emails. Substitutions work the same too. A merged set of letters ends up in communications → pending letters (Fig 3).
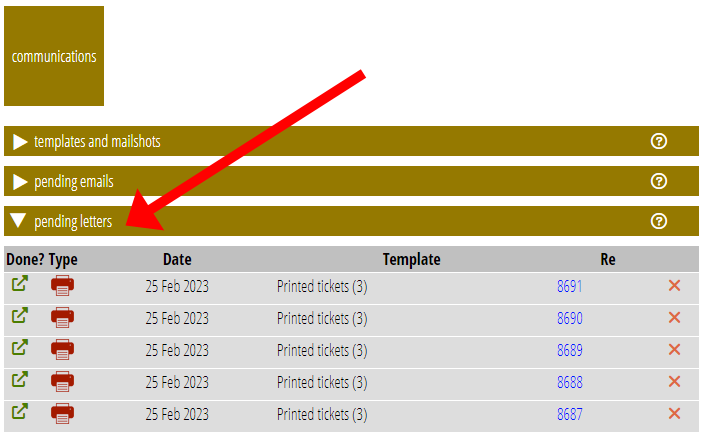
You can also merge PDFs into pending letters. But you also have other options for where to put a merged PDF (Fig 4).
Stationery
overview
- Letter and PDF templates identify an item of stationery, which says where the content should go on the page.
- That stationery defines numbered boxes where the merged content from the template flows from box to box in numerical order.
- Use one of the “in next box” styles in the template editor’s format menu to force the content to start in the next box in the stationery rather than just filling a box and moving to the next.
editing stationery
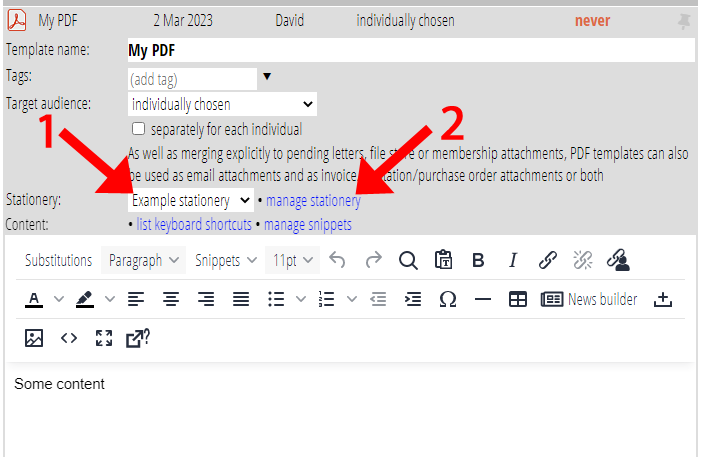
Stationery says where your content should go on the page. Select the stationery your template should use from the stationery menu in a letter or PDF template (Fig 5: 1).
Edit stationery using the manage stationery link alongside (Fig 5: 2). Then, edit the item of stationery you want:
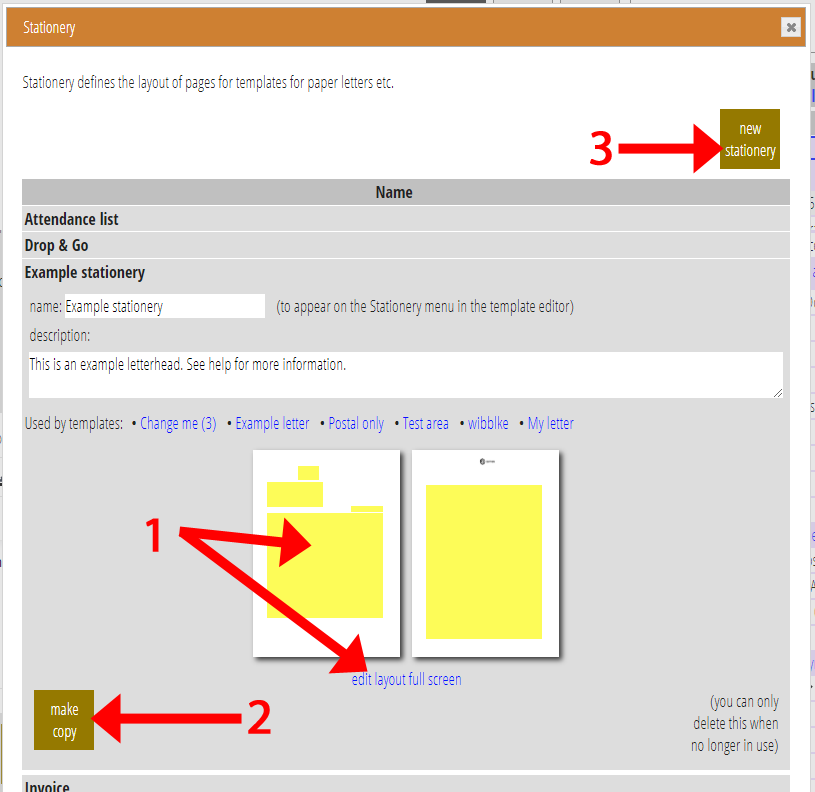
- click the edit link or the thumbnail (Fig 6: 1),
- copy (Fig 6: 2), or
- make a new one (Fig 6: 3).
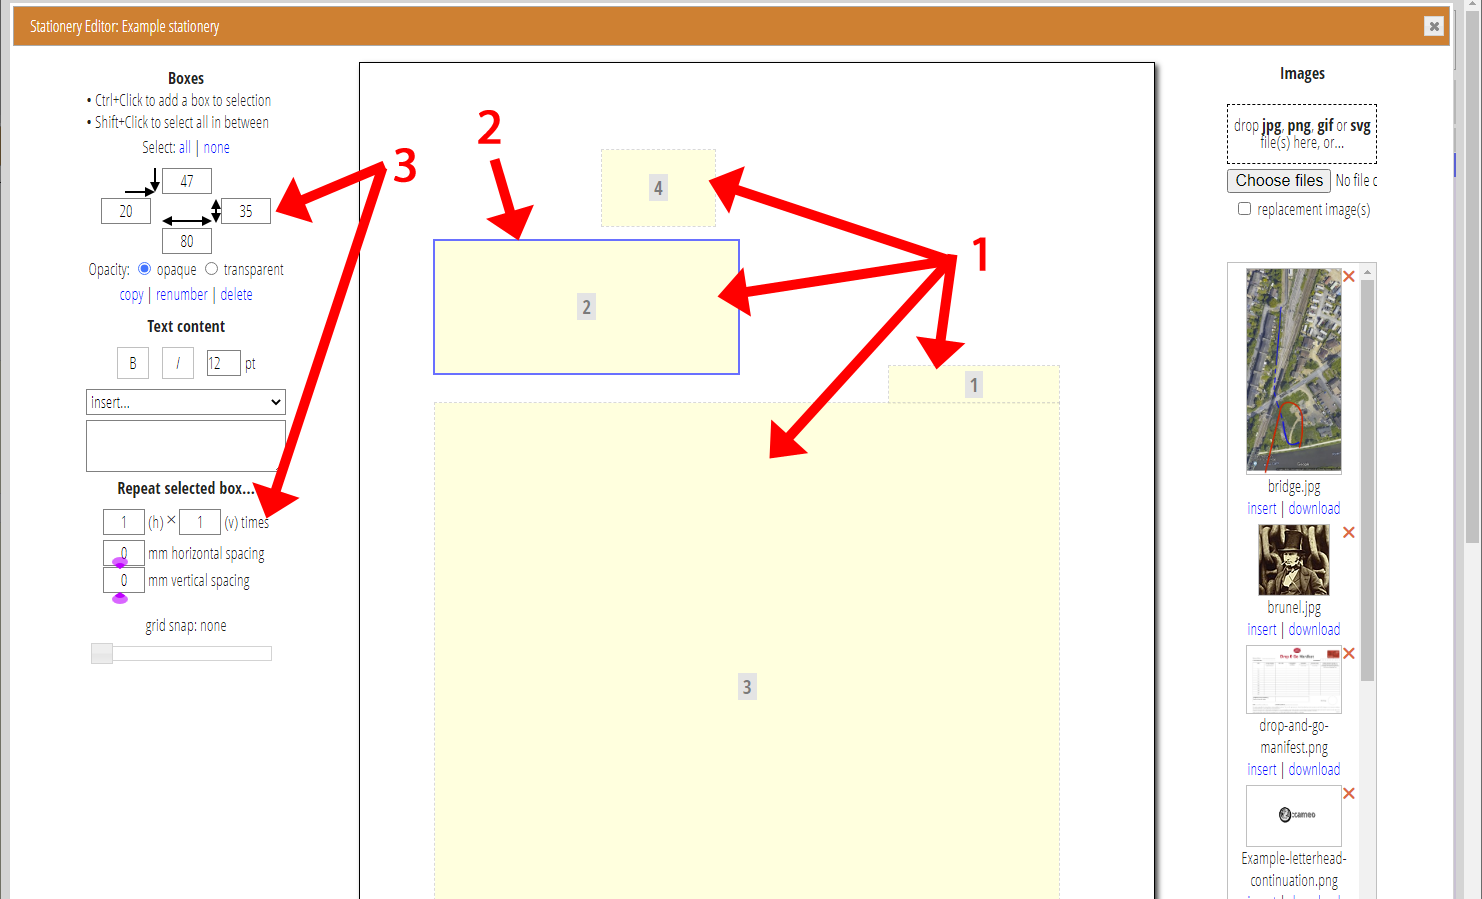
An item of stationery comprises numbered boxes. Your merged content from the template flows into these, in numerical order (Fig 7: 1). This is similar to how products like Adobe InDesign work. Rather than linking boxes together, though, they are sequentially numbered instead.
Create a box by clicking on the background of the preview area in the middle of the stationery editor. (Clicking on an existing box selects it: selected box is outlined in blue: Fig 7: 2). As well as drag-and-drop, controls are provided for precise adjustments:
- box size (Fig 7: 3)
- alignment with other boxes
CTRL+Click to select (or deselect) additional boxes to align with – outlined in blue dashes. SHIFT+Click to further select that and all boxes in between there and the main selection.
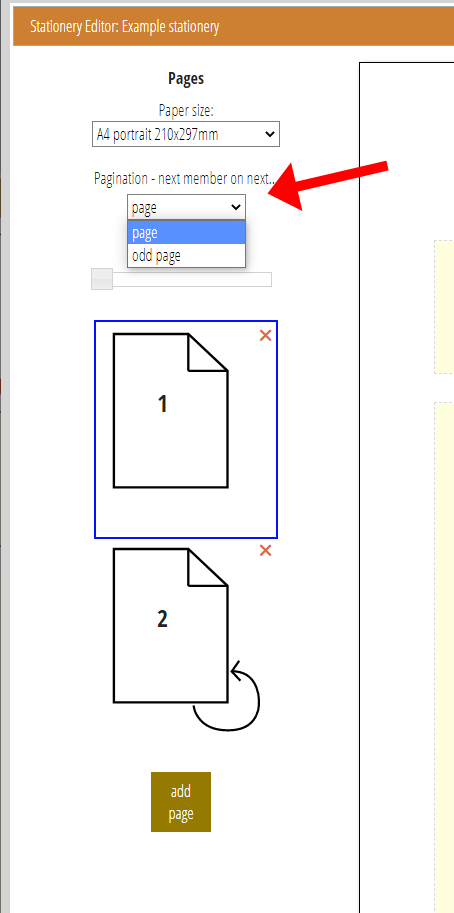
pagination
During merging, when all the boxes are filled on a page, the content starts a new page. All pages may have the same layout. Or you may choose to have a different first page (typical of a letterhead with continuation pages). Choose the kind of pagination in the stationery editor’s left column (Fig 8).
Depending on the stationery pagination option, when you start merging the next membership record:
- it starts at the first box of the first stationery page again,
- optionally leaves a blank page (if you are printing on both front and back of sheets of paper, also known as duplex printing), or
- in the next box (typical of mailing labels; incidentally, Fig 8 does not show this option because the stationery already has two pages and next box and multiple pages don’t work together), or
- the next row of a table (typical of pre-printed forms, ditto).
You can also:
- put fixed text or images in boxes (they don’t then take any content from the template), and
- provide an image as the background for the whole page. This lets you design the equivalent of pre-printed stationery.
Because stationery is designed for print, you should use much higher image resolution than you would in a typical email.
start in next box
Normally text from your merged template content flows into one box and, when it is full, continues in the next box or page. So text you want to appear in the first box should come first in your template and so on.
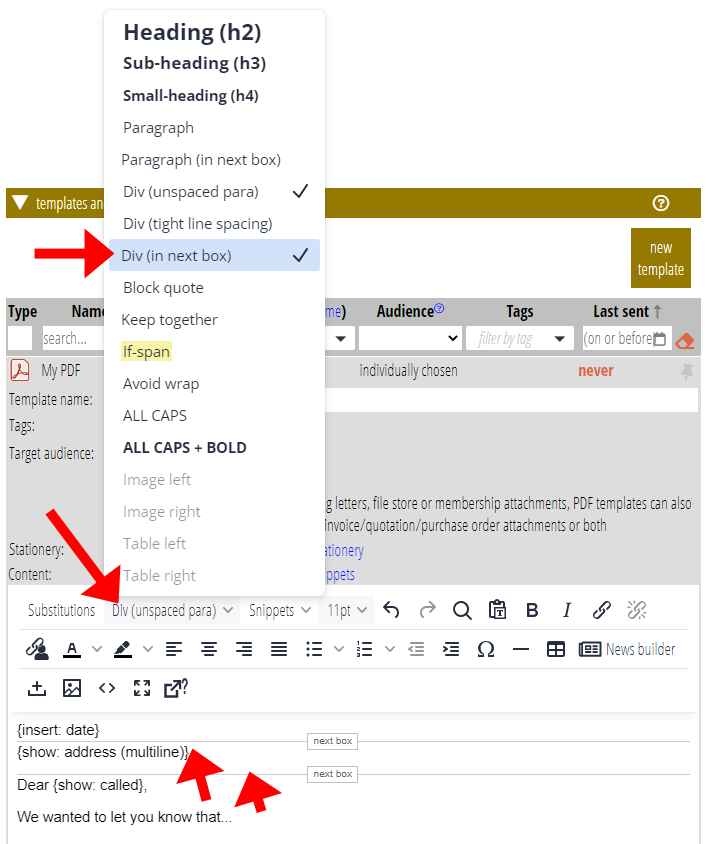
Often, though, you want to force your text to start in a new box even if there is space left in the previous box. Consider a letterhead box for the recipient’s address, for example. You’ll typically want the text after the address to start in the following box (perhaps the main body of the letter), not to start in the address box.
To do that, with the caret in the template text that should start in the new box, select either the paragraph (in next box) or div (in next box) from the template editor’s format menu (Fig 9). Use div when you don’t want additional spacing between paragraphs. Paragraphs that start in the next box are indicated by a divider in the template content (Fig 9).
mailing labels
Typical mailing labels come as sheets of die-cut, peel-off, sticky-backed labels laid out in a grid of say 2 × 5 or 2 × 8 on a sheet.
The only practical difference from a letter is that you choose next box on same page for the stationery’s pagination option (Fig 10). Each new member record will start in the new box anyway, so you don’t need to format the address in your template to say so.

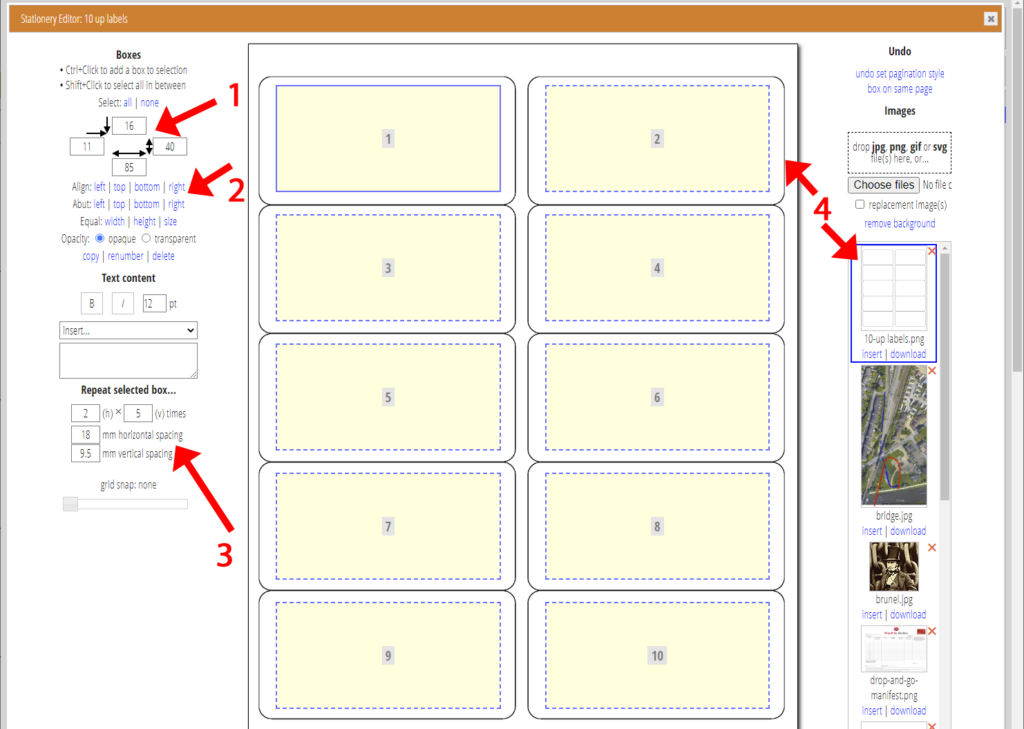
Don’t forget, you will need some margin for each label, not least to deal with inaccuracy in how the sheets pass through different printers. So define your boxes to be smaller than the actual labels and inset a bit from the actual label edges (Fig 11).
The stationery editor works in millimetres, so you can measure the layout of your label sheet to inform the positioning (Fig 11: 1).
Alternatively, many brands of labels come with a printed or downloadable sheet showing the layout. You could scan or download this and use the image as a background guide while you position your boxes (Fig 11: 4; see below for inserting the image; don’t forget to remove it again, or you’ll print it). The alignment (Fig 11: 2) and replication (Fig 11: 3) options will help too.
including images
You can use images in three different ways with letter templates:
- as the background for a whole page (as in Fig 11, for example)
- as the fixed content of a stationery box (Fig 12)
- (less often) flowed into a box from the template content (but see article about signatures for an alternative way of handling these).
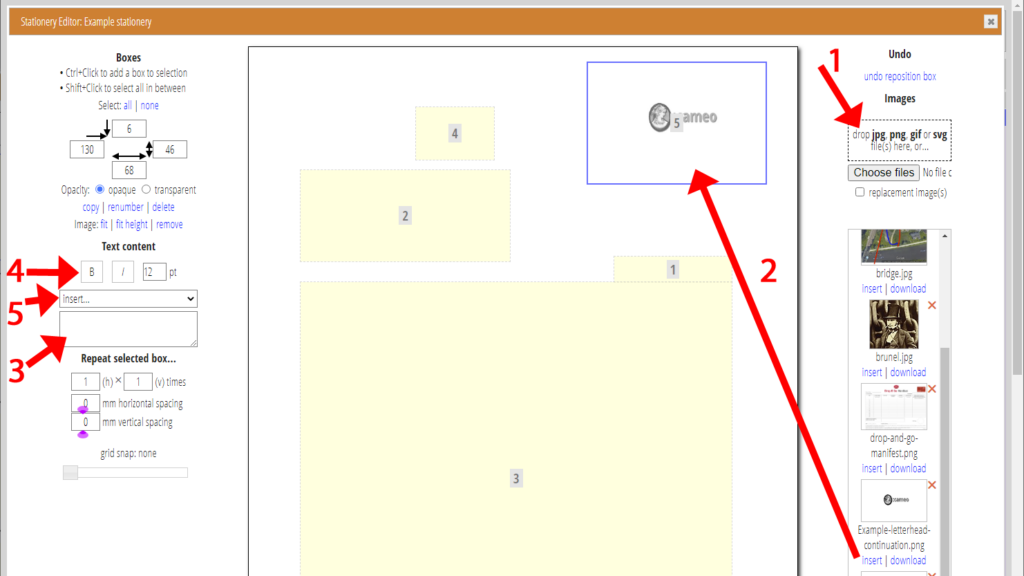
In all these cases, upload the images you want to use into the right column of the stationery editor using the controls at the top of the column (Fig 12: 1). For printing, use images created or scanned at 300 dots per inch (11.8 dots per millimetre).
Click on an image to use it as the background. The stationery editor assumes this resolution when sizing an image for the background.
Select a box and click insert to put an image into it (Fig 12: 2). Alternatively, drag the image onto a box (selected or not). The image fills the box horizontally (leaving a blank area at the bottom or cropping vertically, depending on the aspect ratios). The image does not, therefore, have to be 300dpi in this case, but if it is a lot less it will appear fuzzy when printed.
including fixed text
With a box selected, enter the text you want to put in the box in the control provided in the left column (Fig 12: 3) and apply limited formatting to it (bold, italic, size and justification; Fig 12: 4)
You can also include any of the {insert: ...} substitutions (either type them or choose from the insert menu above, Fig 12: 5). Particularly useful for letters are perhaps {insert: date} to go in the date box of a letter and {insert: organisation address} or {insert: organisation address (one line)} to include the organisation’s address somewhere on your letterhead.
While you can’t have both text and image in a box at the same time, you can overlap boxes to achieve that effect.
tables
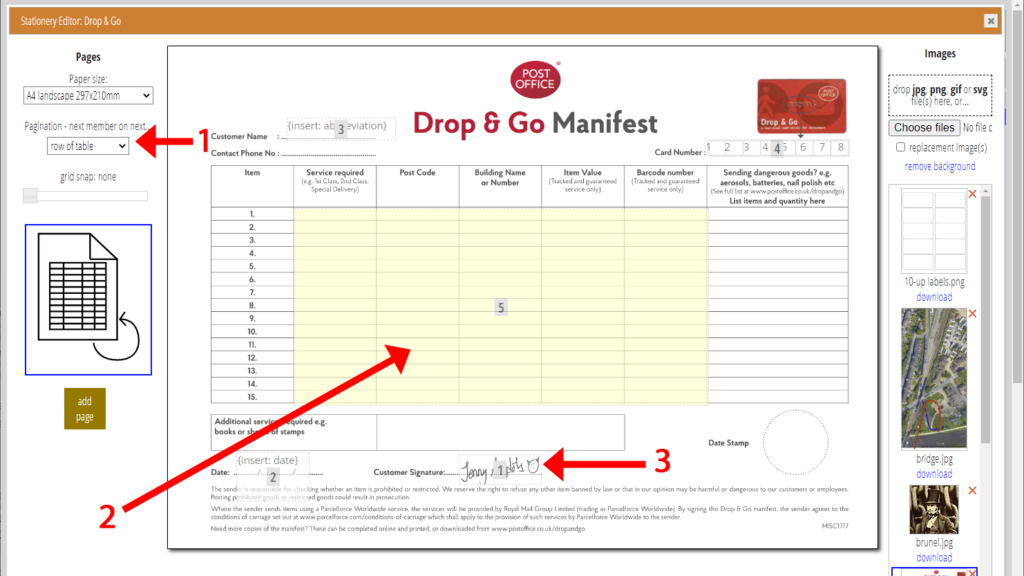
The row of table stationery pagination option (Fig 14: 1) lets you insert a table from your template into a big box on your stationery (Fig 14: 2). This is like mailing labels, but instead of a box for each label, the records form a new row in the box for the table (and if it overflows, then the same box on the next page).
This is intended for use with pre-defined paper forms (such as order forms), providing fine control over the layout. (If you just want a spreadsheet of membership data, use a report template instead).
Your layout may well have other boxes which have fixed information, such as your organisation address, or your signature (Fig 14: 3).
The content of a template which uses tabular stationery should just be a table with a single row (with one or more substitutions in each cell to provide the relevant data). Create the table using Cameo’s table builder control on the template editor toolbar. That gives you fine control over the cell widths and heights so they fit the pre-printed form you are filling in.
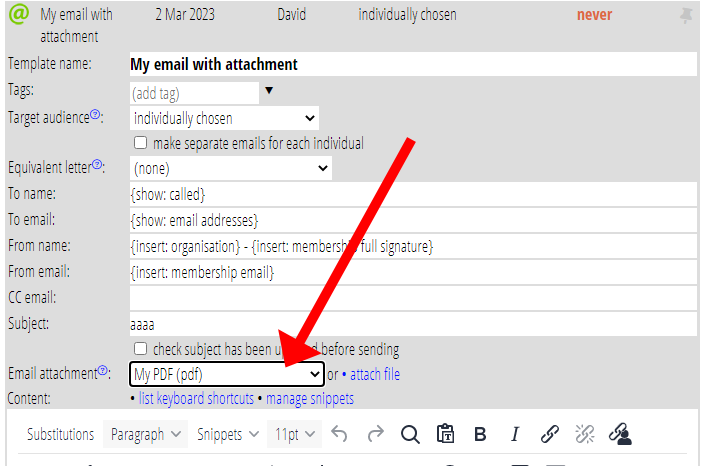
PDFs as email attachments
To use a PDF as an email attachment, create both the email template and your PDF template as usual. Then, in the email template, choose the name of your PDF template from the email attachment menu (Fig 13).
When you merge the email, it also merges the PDF for the same audience (with a separate file for each) and attaches the resulting PDF files to the emails.
If you are using Cameo’s trading documents, like invoices, you can use the controls alongside template selection to make email, PDF attachment and stationery for it all in one go, all pre-linked together. You can then just customise these, for example with your logo.