Responses to the questions form link structured data to a membership record. So, you can use them to create additional data sets for members and/or contacts, as an alternative to adding custom fields to every membership record. This is particularly useful when:
- you want them to add their own additional details. Do this via the questions form, of course, which you can provide a personalised link to.
- data only applies to a limited proportion of the total membership. This means you need not burden all the membership records with extra custom fields when they only apply to a few people.
- you want to store multiple different data sets.
For example, consider running an application process for a job, course or grant. You might ask people to complete additional details such as date of birth, national insurance number or whatever, and/or upload a CV or personal statement.
Contents
Make a form
Start by making a new form type questions in forms → form editor (Fig 1).
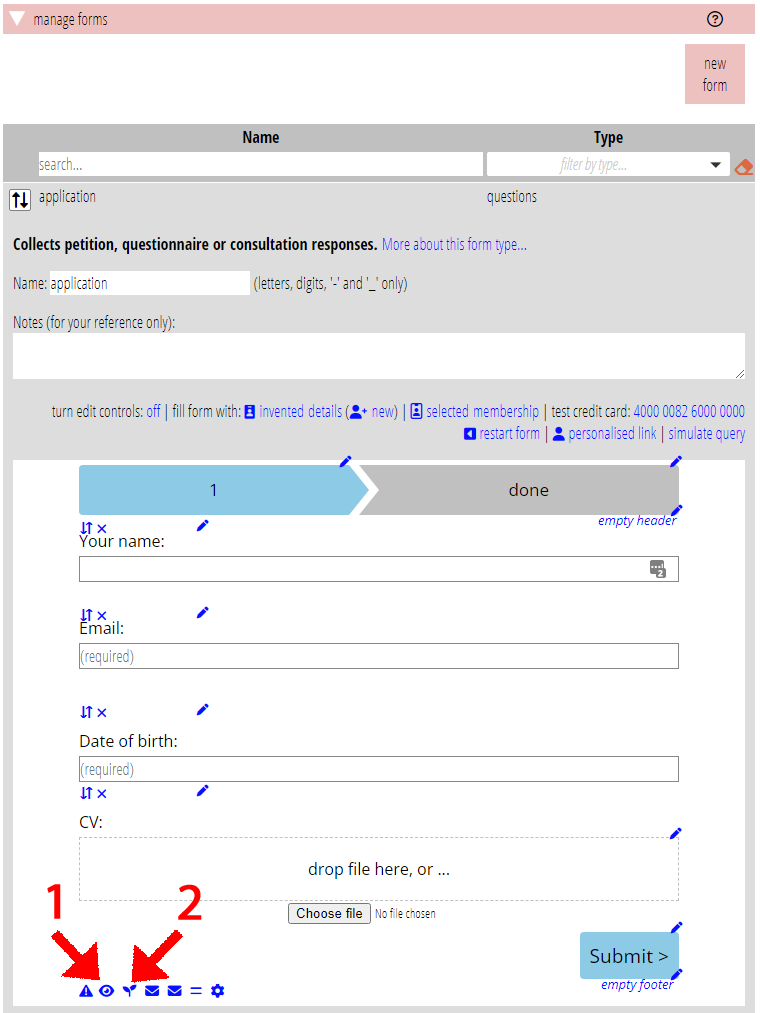
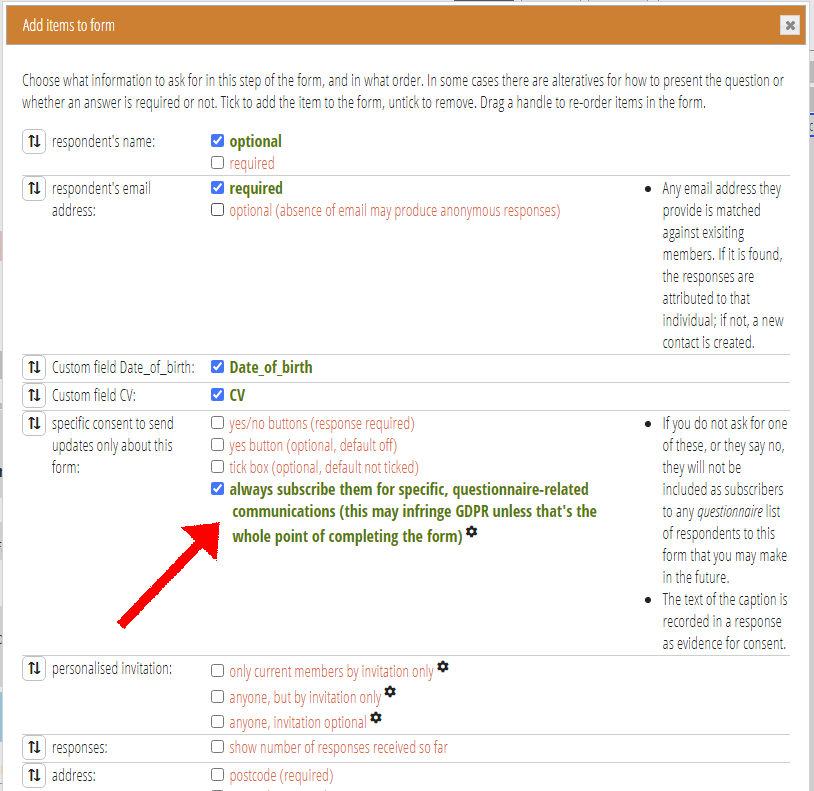
To help locate people later who have this additional data, you should choose always subscribe them for the specific consent option (![]() Fig 1: 1, Fig 2) rather than asking them. As we’ll usually be dealing with existing members here, general consent doesn’t matter, as it only applies to contacts added by the form.
Fig 1: 1, Fig 2) rather than asking them. As we’ll usually be dealing with existing members here, general consent doesn’t matter, as it only applies to contacts added by the form.
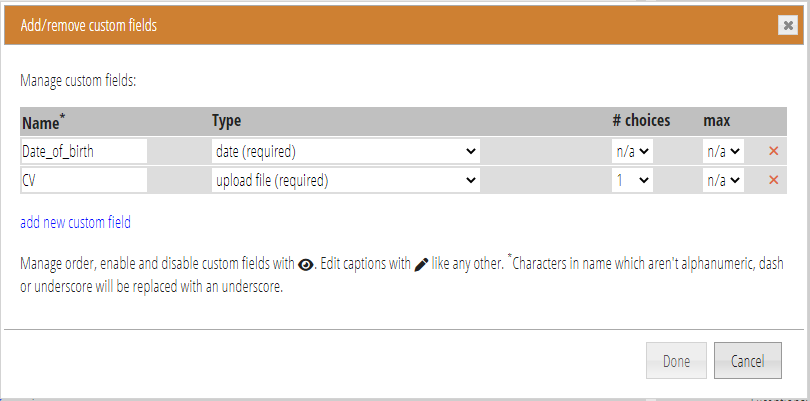
Define custom fields (using the seedling icon ![]() Fig 1: 2, Fig 3) for each of the additional properties you want to store. (The membership record already provides things like address, for example, but let’s say we want Date of Birth and CV file). You can always come back to the form to add others later.
Fig 1: 2, Fig 3) for each of the additional properties you want to store. (The membership record already provides things like address, for example, but let’s say we want Date of Birth and CV file). You can always come back to the form to add others later.
(Note: date fields can be in any sensible format, with European or American interpretation of dates like 4/3/2020 according to how your copy of Cameo is set up. Unlike Cameo itself, however, you can’t use relative dates like tomorrow).
If you plan to have them submit their own data, then embed the form on your website. You might want to password-protect the page if it is not for general use (WordPress does this easily), or restrict the form only to people arriving via personalised links (see below).
You might also choose to add some or all of the new data manually.
Personalised links
If you send them a personalised link to the page where your form is embedded, it will complete their name and email for them. It helps ensure the data links to the correct person.
You may want to restrict the form only to the people you send invitations to. To do that choose one of the personalised invitation form options (![]() ) to restrict to only:
) to restrict to only:
- current members, or
- anyone
with an invitation.
You also have choices about how to present the information derived from the personalised link (like name and email), other than just pre-filling some of the boxes. Again using form options, you can:
- display boxes but disable interacting with them (and show them greyed), using show boxes when personalised,
- don’t display the boxes at all that would otherwise be displayed for visitors without a personalised link, also using show boxes when personalised, or
- choose the option for personalised details which provides a customisable paragraph of text into which you can substitute the details determined by the personalised link. That option is really only appropriate when the form is restricted only to personalised links.
Add data manually
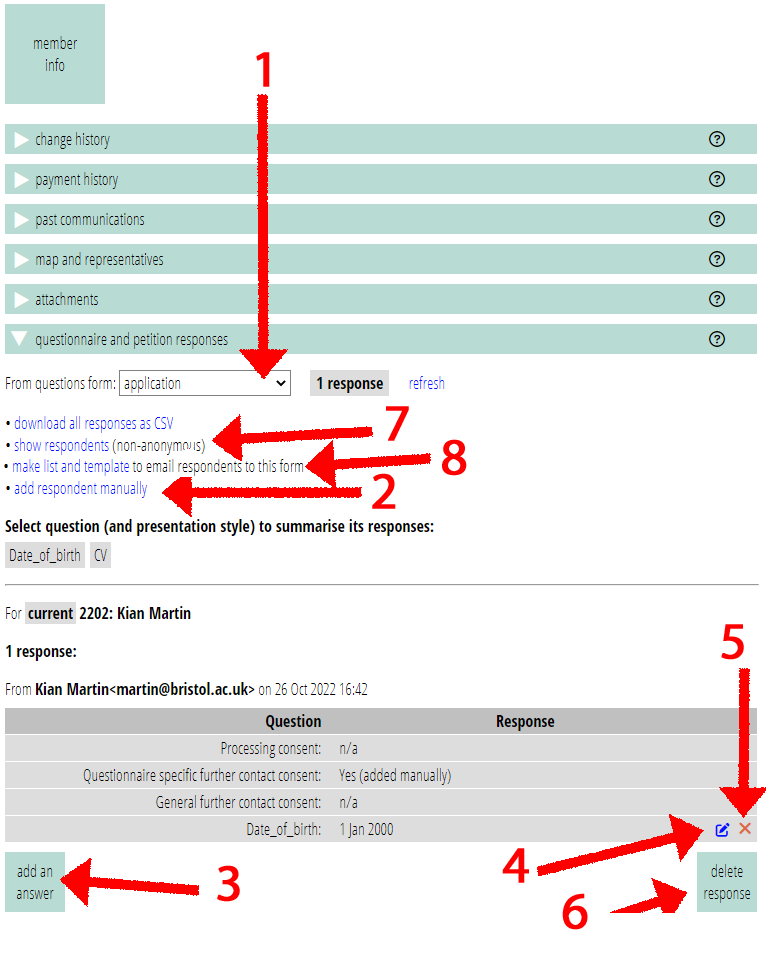
To add data manually, go to member info → questionnaire and petition responses. Choose the name of your form (Fig 4: 1).
Locate the person you want to add or amend data for. You can search for them by any of Cameo’s usual means.
If they have already submitted some responses through the form, you can also find them with the show respondents button (Fig 4: 7).
If not, add an empty response for the selected membership with add respondent manually (Fig 4: 2). This is like filling in the form but with empty answers. This means the show respondents and list subscribers will include them (see below) as if they had completed the form.
(Alternatively, if you have made the form available, you could just fill in the form on their behalf. Note that you can’t do this in form editor in a live version of Cameo, as that is only a simulation.)
Either way, you can then add, edit or delete specific answers. With the relevant response shown (possibly empty, other than consent information):
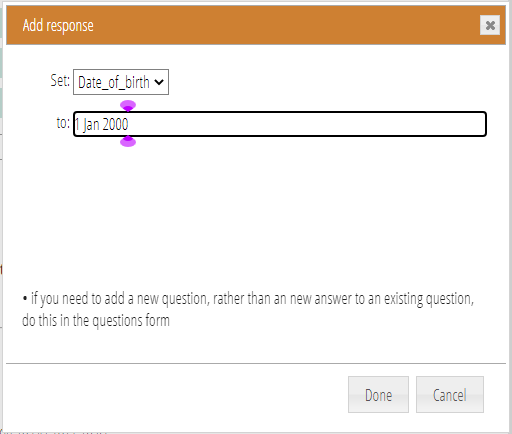
- to add an answer to a question not already answered, click the add an answer button (Fig 4: 3). Choose the question to answer, then enter the answer (Fig 5).
- to edit an existing answer, click the pencil icon next to the answer. Then change it (Fig 4: 4, Fig 5)
- to delete an existing answer, click the delete icon (✕) next to the answer (Fig 4: 5)
You can also delete an entire set of answers with delete response (Fig 4: 6). We no longer treat the person as a respondent. For example, they might have withdrawn their application.
Locate and email people with this data
You can locate people who have this extra data in two ways:
- as above, use show respondents in member info → questionnaire and petition responses (Fig 4: 7), or
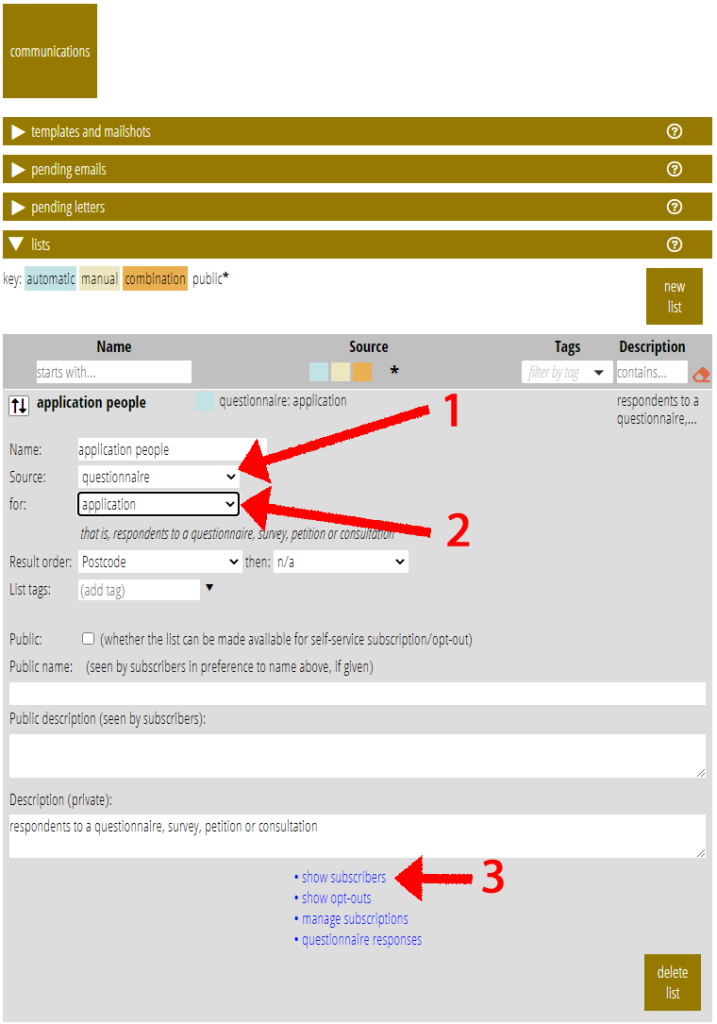
- make a list, with source questionnaire (Fig 6: 1). Select the name of the questions form (Fig 6: 2). Then use show subscribers (Fig 6: 3). (Note that if you didn’t set specific consent in the form as above, you will not see anyone, as that controls their subscription to the list).
With a list, you can then send them email etc. Make a template with that list as its audience, in the same way as any other template. Only one person in a household will usually have the additional data. Therefore, you should probably address your template to an individual only.
member info → questionnaire and petition responses has a short cut to make both a suitable list and proforma template. Click make list and template (Fig 4: 8) underneath show respondents.