
Cameo’s stationery, in the Communications menu, provides layout for paper templates, such as letterheads and label positions. It has always been possible to put images in stationery both as background and in boxes anywhere on the page. But now, stationery can also include boxes for simple text as part of the page design. These can include “insert” substitutions (such as organisation name and today’s date) -– those which aren’t derived from a membership record.
For letter-style templates, where each record generates one or more pages, it was already possible to achieve this, by including the relevant text in the template. For example, the date for a letter can just be flowed into a box on the stationery page with {insert: date} in the same way as the membership-related substitution in Dear {show: salutation}.
But consider producing a report containing a paginated table listing certain member details, where each page is dated in the header and has a running title in the footer. We could do the footer before using an image, though that’s not ideal. And the date was not previously possible at all. This kind of layout is similar to labels, where the pagination is set to box on samepage, but they don’t usually need marginalia.
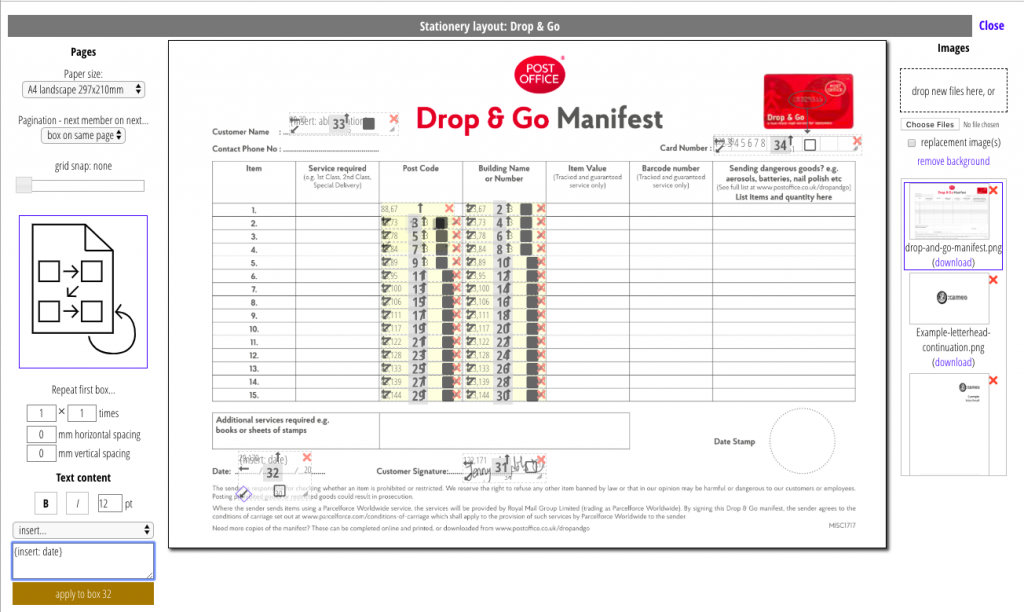
Text box content is controlled from the Text Content area in the bottom left of the stationery editor. Each block of text can have its own size, emboldening and italics. This applies to the whole text: you can’t vary this for single words, for example.
Insert substitutions are also offered on a menu above the
text. Selecting one places it at the caret position in the text. For letters and the like, where the same record applies to the whole page, this can also be achieved using the same substitution in the template text; the new text boxes are most useful for the box on same page option when multiple record data is flowed onto a single page.
The text and its styling from the controls are transferred to a box on the page by clicking the button underneath. The text is applied to the highest numbered box by default, but if you select a box by clicking any of its alignment controls, text will be applied to that box instead. Conversely selecting an existing text box will put its text and styling into the Text Content control section when you select it, so you can edit existing content and then re-apply it.