
Tags have been added in various sections of Cameo over time, to help categorise and filter things. This piecemeal history has meant that they looked different and were managed differently for different kinds of item, even though they largely do the same things.
Now, these implementations have been brought together, using common code. As well as providing a common presentation style, this aids maintenance. It will also make it much easier to add tags in new places in future if that is useful (for example, forms would be a possible candidate).
The way Cameo now manages tags is quite similar to the way they are done in WordPress 5.
Tags currently appear in:
- file store
- reminder messages (both listing and adding new)
- templates
- lists
- forms
- events
- calendar appointments
- invoices, and other trading documents
- stock items (inventory)
- book-keeping accounts
Contents
File store refresh
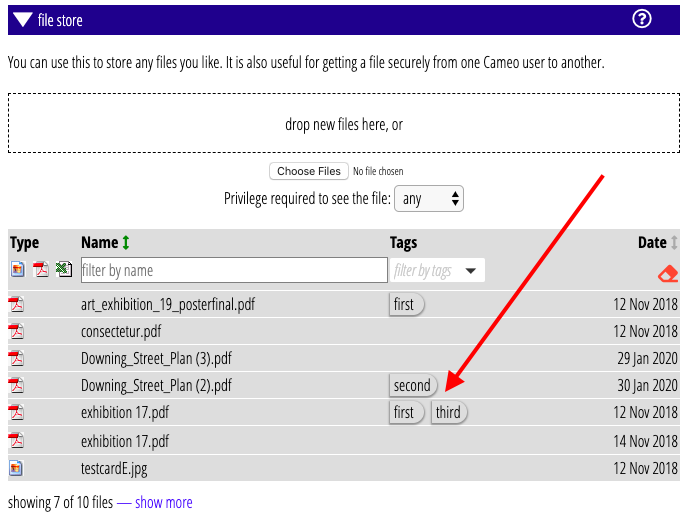
The File Store in the Library menu used to list all the properties and actions for each file in one large-ish row of the table of files. To accommodate tags better, the file store has also been changed to be more like other sets of items (such as templates or lists) where you get a summary, usually on just one line, clicking on which opens up the detail. There is no difference to what you can do with a file, there’s just more space to do it in!
Displayed tags
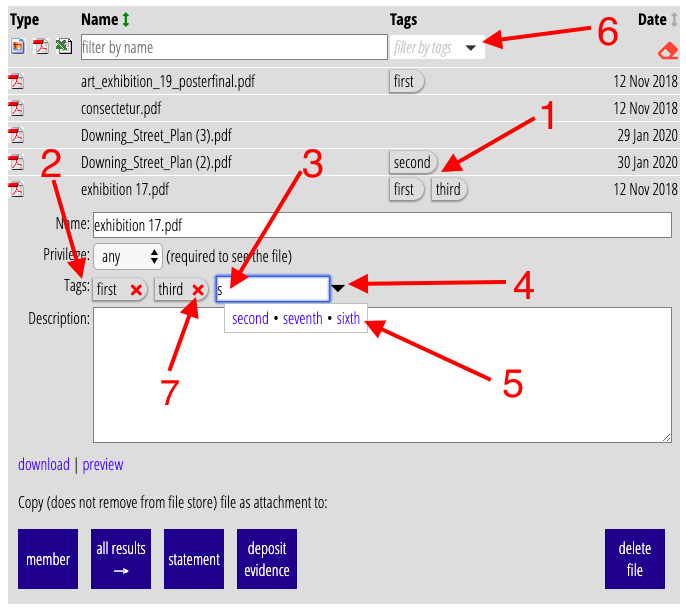
Where tags already assigned to an item are just displayed, not changed, for example in summary rows or in reminder messages, they are shown as a list of tag names styled somewhat like “luggage labels” (Fig 2: 1).
Adding a tag
Where tags can be added, in the detail for an item, there are three elements:
- a list of already assigned tags (Fig 2: 2)
- a box to type a tag to add (Fig 2: 3)
- a small down arrow to list and choose from any of the available tags (Fig 2: 4)
When you start typing into the box to add a tag, any available tags that start with the prefix you typed so far (and aren’t already assigned) and pop up just underneath the box (case-independently; Fig 2: 5). You can either:
- complete typing the word (adding it with Enter, or just click elsewhere), or
- click on one of the prompts to assign that tag.
If you type a tag that doesn’t already exist, it will be added to the list of available tags as well as those assigned to the item.
Removing a tag
Just click the × with the tag in list of already assigned tags (Fig 2: 7). This doesn’t remove the tag from the list of those available, just from that item.
Filtering by tag
In the tags menu at the top of the tags column (Fig 2: 6):
- select one or more tags,
- dismiss the menu by clicking elsewhere,
- only those items with any of the selected tags assigned to them will be displayed.