
Mailing labels are die-cut sheets of sticky-backed paper suitable for printing in a laser- or ink-jet printer.
Typically there are eight to twenty or more labels per A4 or US-letter sheet (which is usually abbreviated to eight-up or twenty-up). You would usually buy a pack of say 25 or 100 sheets at a time. Most office supplies companies sell them. Avery is the market leader, so often label suppliers lay out the labels in the same way as Avery products so they can use the same placement in software.
You can prepare mailing labels in Cameo using:
- a list, which determines who labels are produced for
- a letter template, which says what information to show on the label – name and address, for example, but also some abbreviated text which helps collation – and
- stationery, which says how the labels should be laid out on the physical page
Sometimes recipients need special attention. For example, they may need additional postage because they are mailed abroad. You will want to catch these to give them the attention they need: Cameo offers various techniques to do this.
Contents
Making labels
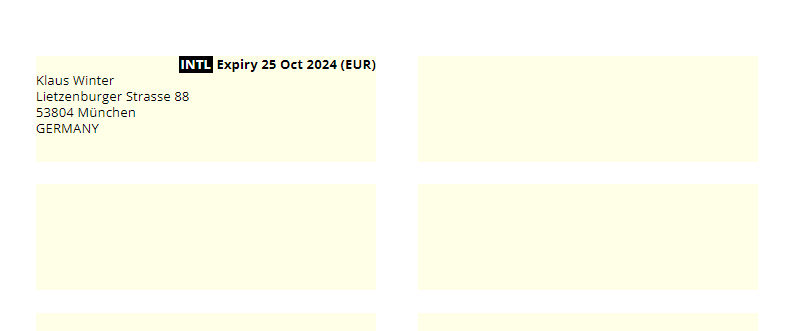
Fig 1 shows a typical label at the top of a sheet of blank labels. You get this if you preview a label template. As for email previews, this uses just one membership as an example. The light yellow indicates the areas into which the template flows content (in this case, each separate label); the yellow does not print (on the final product).
This example shows someone with an international address who has been put in a delivery round called EUR.
mailing list
Start by making a list which identifies the people you’ll make labels for. In communications → lists, click new list, then the list source to identify the people you want. Useful sources are:
- without email which identifies members who do not have an email address (for some or all individuals, as you choose)
- current postal only which identifies current members that
- don’t have an email address
- have their delivery method set to Post or Hand, and
- have a postal address in their record
But you can use any list source you like. You can also combine another list with one of the above. That refines any selection criteria further, by intersecting with a post-only list. People are selected if they appear in both lists.
Choose custom label sequence for the result order. For emails, the order you produce them in doesn’t usually matter, but for letters and labels, it is helpful if they come out in a useful order. Custom label sequence is designed for mailing labels. This primarily sorts the labels by delivery round (see below), so that all those in a round print together. However, it also separates out any labels with a delivery note (any text in that field in the membership record) at the start, so you know to give those special attention.
template
Then, add a letter template. In communications → templates and mailshots, click new template, give it a name, then choose letter as the type of template. Select your list as the template’s audience (Fig 2: 1).
If you need to send the labels to someone else to print for you, you can choose PDF instead of letter for the template type. Then you create a PDF file which you can attach to an email (or put it in Cameo’s file store for them to retrieve if they can have access). Everything else is the same. Take care to delete the email and/or files afterwards, as these comprise personal information subject to the non-retention requirements of GDPR.
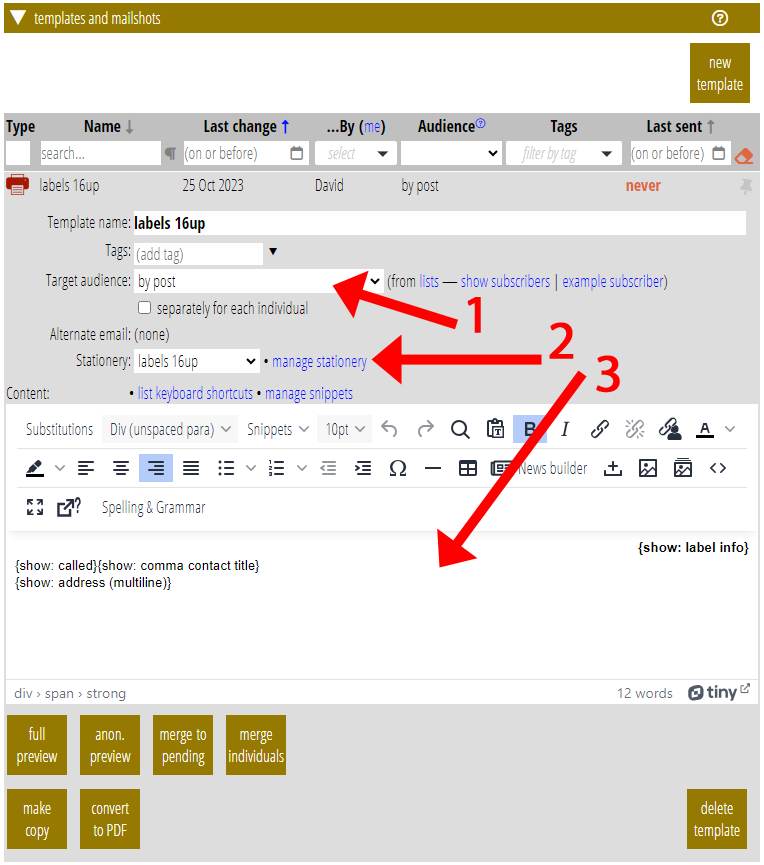
Fig 2: 3 shows typical content for a label.
- It’s slightly smaller font size than the default: we’re going to make 16-up labels here, as an example. These are relatively small, so we want to be sure all the information we want on each label actually fits
- We’re using the {show: label info} substitution in bold and right justified at the top of each label (see below)
- If a contact and it has a (job) title, we’ll include it after the name
- The {show: address (multiline)} substitution formats the address from the multiple address fields in the record over several lines as you would expect for a label (or envelope).
{show: label info} composes together several fields relevant to mailing labels, highlighting some of them (black/white reversed):
- the delivery note, if any, from each membership record
- for contacts, the short label text for their contact type, if any, as given in organisation settings → contact types
- INTL for international delivery (highlighted)
- expiry date (for members, highlighted if overdue)
- delivery round (as in the membership record)
- number of copies, if not one (as in the membership record)
Then, we need to assign the letter template some stationery. Click manage stationery (Fig 2: 2).
stationery
Stationery determines how the template content flows onto a printed page. For a typical letter, content flows from one box to the next (for example, date, address for window envelopes, the body of the text), along with any fixed content which forms the letterhead; each new record starts a new page.
However, for labels we’ll use each box to represent a separate label, and start each new record in the next box, rather than the next page.
At the top of the list of stationery, click new stationery. Give it a name, for example labels 16-up. Then click the thumbnail, or edit layout full screen to prepare the layout. In the stationery editor:
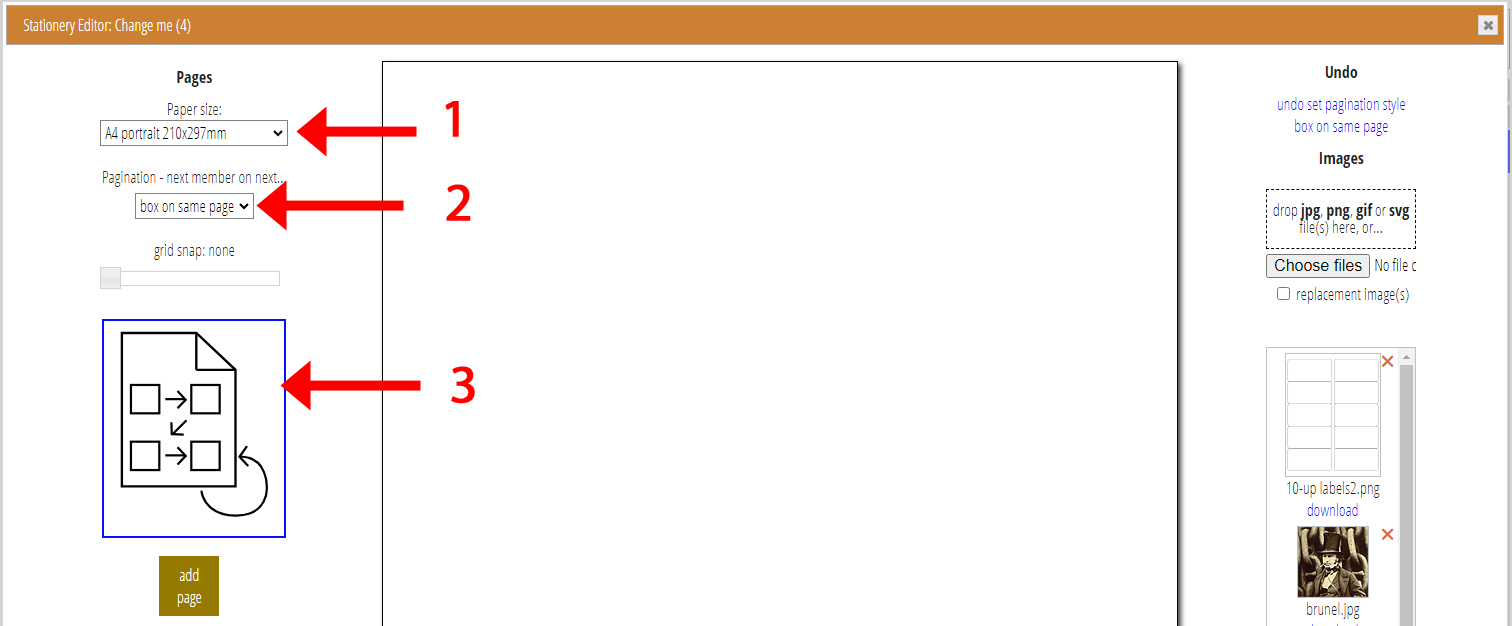
- Select the paper size (of the sheet, not each label! Fig 3: 1)
- For pagination choose next member on next.. box on same page (it’ll start a new page when it has filled all the boxes on the first; Fig 3: 2)
- You don’t need any additional pages (they are for things like continuation pages of letters; Fig 3: 3).
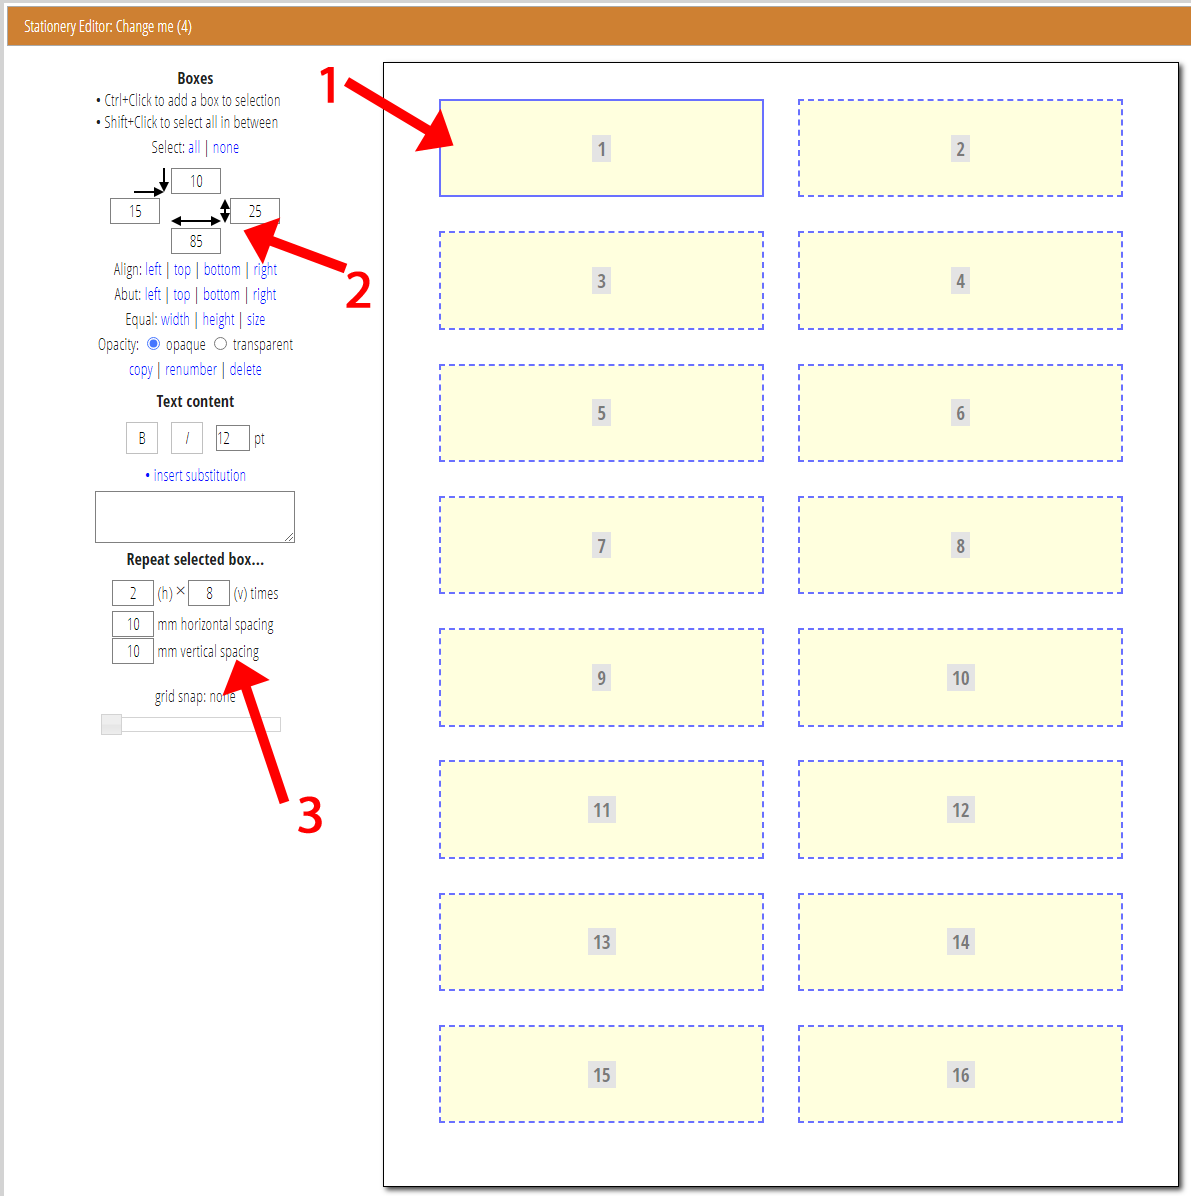
To add a box to represent a label where we’ll insert text from the template, click somewhere in the page representation in the middle (Fig 4: 1). Adjust the size and offset from the top left of the page according to your particular labels. You can do this in two ways:
- measure the millimetre width, height and offset with a ruler, and enter the measurements in the boxes provided (Fig 4: 2)
- import a template image of the page (actual size, 300dpi) and use that as the background of the page, temporarily, and align your box to that
We recommend using boxes slightly smaller than the labels (say 5mm all round), as there is no internal margin in the box. Obviously, take that into account when setting offsets.
Then replicate the boxes using repeat selected box for as many horizontal and vertical labels as there are on your sheet. For example, for 16-up (2 across, 8 down) labels you would enter 2 and 8 in the repeat selected box h and v fields with appropriate gaps between the cut lines in horizontal and vertical spacing fields (Fig 4: 3).
This example (Fig 4) assumes the labels are 95mm x 35mm, butting up together both vertically and horizontally. We’ve then allowed a 5mm margin all round each label, so there is 10mm between boxes in each direction. The values you supply will depend the number and positioning of labels on your own sheets.
Close the stationery, and select it’s name for the stationery of the template.
Many printers do not print with the top left at 0, 0! When you have prepared stationery try an anon. preview for the template. That type of preview includes the box outlines when printed. If the print mis-aligns from the actual labels, measure by how much, and take that into account to adjust the stationery.
Using delivery rounds and copies
Each membership record (including contacts) has a field for:
- delivery round, and
- number of copies.
Print both on the label using the {show: label info} substitution, as shown above (Fig 2: 3). We only show number of copies when not blank (i.e. they only need one).
Select delivery round for each membership from among those you define in organisation settings → delivery rounds. Use the already-provided MAIL as default.
For hand deliveries, each delivery round identifies a geographical area and who delivers to people in that area. Generally, if you change someone’s address, Cameo will prompt you for a new to also change delivery round. Hand delivered rounds can also keep track of where the deliverer gets their package, and where the same person delivers more than one round.
However, you can also add “rounds” for different postage categories, such as European postage and Rest Of World, in addition to the default MAIL round. You could also define a “round” where you want to batch up separately addressed packages into a parcel for common delivery (all your councillors at the Town Hall, for example).