
A new substitution {ticket: add to calendar ...} in combination with a new form type Calendar lets you offer add to calendar links in your emails for event bookings. E-tickets, booking receipts or later mailshots related to the event can include these.
Contents
Calendar form
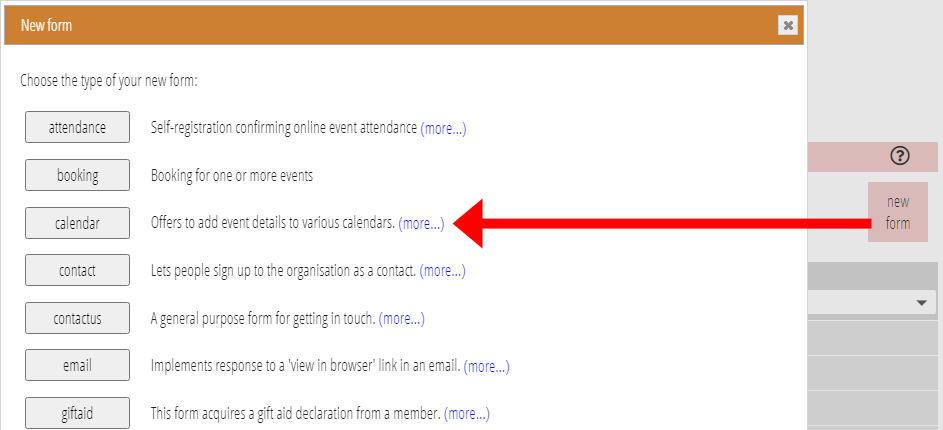
Add a new form in the usual way, selecting the new Calendar type (Fig 1).
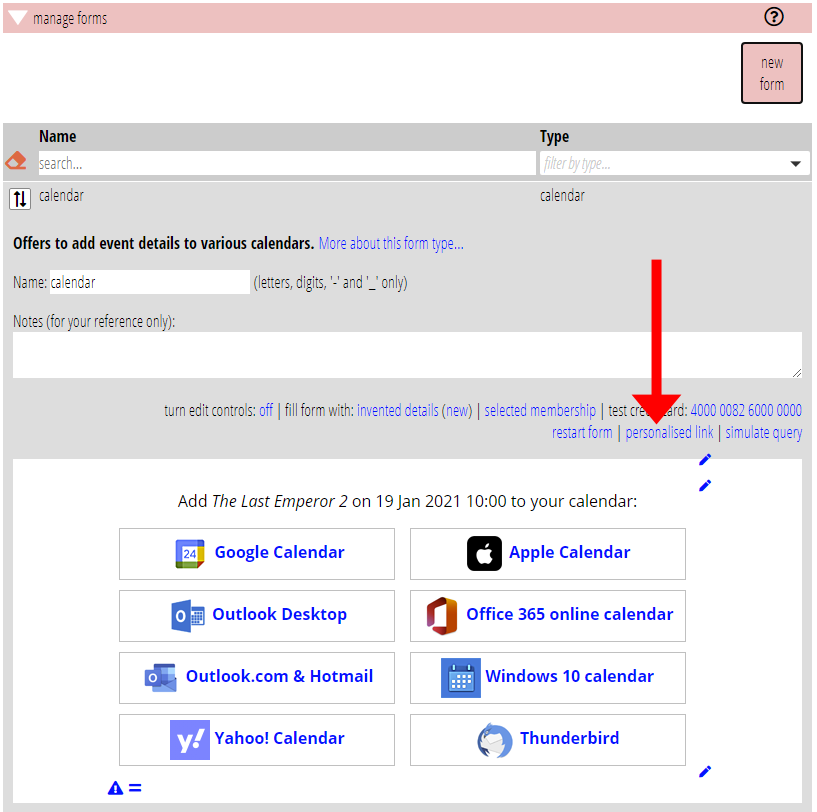
To customise the wording, preview the form by selecting a member with an event booking. (The event must be in the future). If you need to make a booking specially to do this, you can always cancel it again afterwards. With that membership selected, click personalised link just above the form preview (as shown in Fig 2).
You can add a header and/or footer and change the wording of the prompt in the usual way. You can’t change the buttons for various calendars, though.
Embed the form in a page on your website as for any other form.
Linking to the form
Add to calendar links can appear in templates whose audience is either:
- services tickets. That is, a template that automatically sends e-tickets or a booking receipt when booking a place through the booking form. Or
- a list with source Event attendees or Event assigned (for later mailshots sent manually).
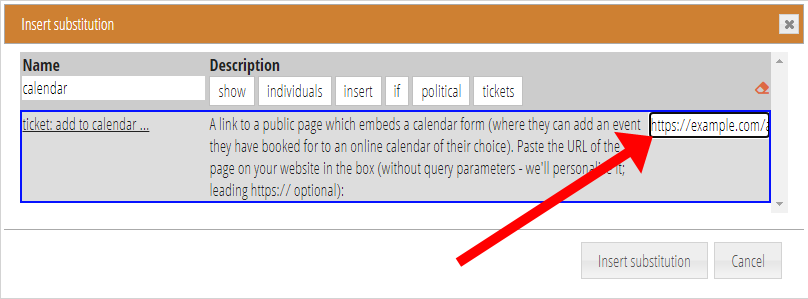
Insert the link using the new substitution {ticket: add to calendar ...}. When you select the substitution from the Substitutions menu (Fig 3), you need to provide a URL. This is the page on your website where you embedded the calendar form (Fig 3).
The text of the link is add to calendar. When someone clicks it in their email, they’ll go to your calendar form. The link is personalised so the calendar form knows who they are and which booking and event it refers to.
Manually adding the link.
If you prefer text other than add to calendar for your link, or if you have changed the names of the query parameters for the form, you can provide the complete link and its URL manually.
The URL for your link should be that of the page where you embedded the calendar form, with two additional query parameters:
msg={insert: email identifier}reference={ticket: booking reference}
If you changed the names of the query parameters when setting up the form, replace msg and reference to match.
So if your form is at https://example.com/add-to-calendar, and you changed the email identifier to be emailid, the complete URL for your link in your template would read:
https://example.com/add-to-calendar?emailid={insert: email identifier}&reference={ticket: booking reference}