
Boxes in stationery control where content from a letter template is flowed onto a page as it is merged. Previously, boxes were manipulated using controls around the edges of each. These were not terribly obvious (especially as the stationery section is only used occasionally). More importantly, controls on small boxes overlapped, so were hard or impossible to access. Therefore, the controls have been reorganised.
A new box is added by clicking on the page background, as before. You can still still drag it to move it on the page or drag out from the bottom right corner of the box to resize it (though there is also now another way to do both of these).
Contents
Selection
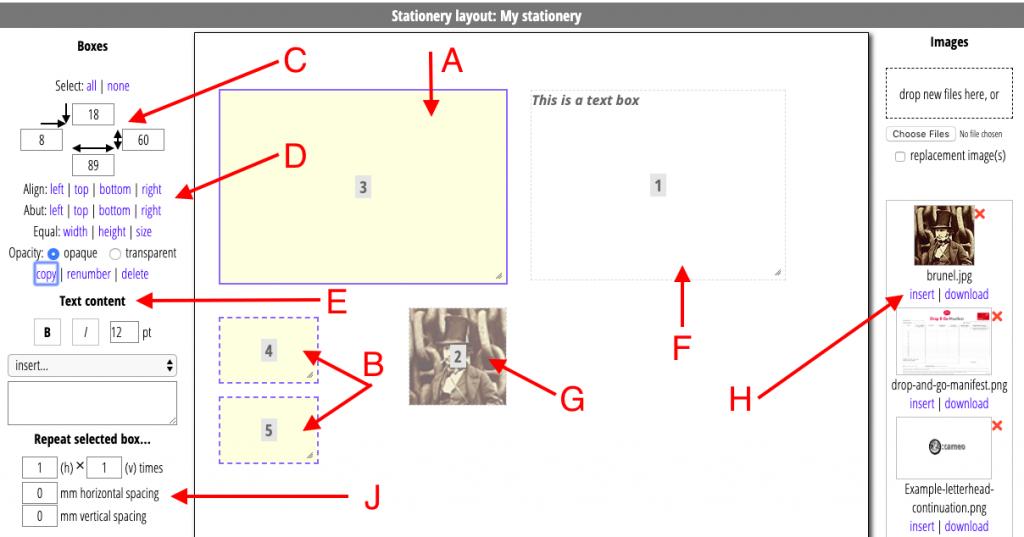
All the other controls are now in the left margin above the page controls. These are activated by selecting a box, which you do by clicking on it. It is outlined in blue when selected (A; click again to deselect).
Some controls work on more than one box: for example, aligning one box to another. Select additional boxes with Ctrl+Click. These secondary selections are shown with a blue dashed outline (B). Or Shift+Click to select all the boxes in the area between the primary selection and the box clicked.
Once there is a suitable set of boxes selected, you can then manipulate them with the controls. For example, you can align the top edges of all the secondary selections with the top of the primary selection.
The position (top left in millimetres relative to the page), width and height of the primary selection is shown are the boxes at the top (C). You can change these to adjust the size and position of the primary selection numerically as an alternative to dragging the box. If there are any other boxes selected, these are also adjusted, by the same relative amount (not the absolute value entered for the primary box).
Controls
The other controls (D) do the following (most of which you could do before):
- Select all the boxes on the page, or deselect everything.
- Align top, left, bottom or right edges of two or more boxes.
- Abut the secondary selected boxes to any of the edges of the primary selection.
- Set the widths, heights or sizes of the secondary selected boxes to be the same as the primary.
- Set the background opacity of all the selected boxes to opaque or transparent (the control shows the current setting of the primary selection).
- Copy all the selected boxes (each new box is positioned 5mm below the corresponding original).
- Renumber the selected boxes: the primary becomes 1, and the secondary selections 2, 3 etc in the order they were selected, with any unselected ones at the end in their original order. Order is important because content from the merged template is flowed into boxes in their order in the stationery. Also higher numbered boxes are placed on top so when opaque, they obscure any overlapping underneath.
- Delete all the selected boxes.
- Turn the primary selection into a text box (E, F; or, by removing the text, into an ordinary box), style the text and add substitutions.
- Turn the primary selection into an image box (G) with insert under an image (H); alternatively drag and drop the image onto any box.
- With an image box selected, remove the image to turn in back onto an ordinary box, fit the box to the image (assuming it is 300dpi), or fit the image to the box by adjusting the height to match the image aspect ratio. Fitting images was not available at all previously.
- For pagination which flows the next record into another box on the same page (such as mailing labels), you can repeat the primary selected box (J) to create a grid of boxes with the given separation (gutters). Any secondary selections are removed, leaving the additional boxes selected. This means you can try the repetition as often as needed while not affecting unselected boxes.