Some Cameo plugins for WordPress websites use custom fields to tell the plugin about some aspect of the page. A box to control custom fields should be visible below the main editing area on WordPress’ page editor (Fig 1: 1). If you don’t see this, you need to turn it on. This article shows the steps to do that in WordPress 5. This hidden-by-default is a non-obvious feature of WordPress in general; it doesn’t have anything specifically to do with Cameo, except that Cameo makes use of WordPress custom fields.
Once you have the custom fields box visible, you can enter the name and value of the field. Once you have added a field in one page or post, it will be available on a menu of custom fields, so you don’t have to re-type it.
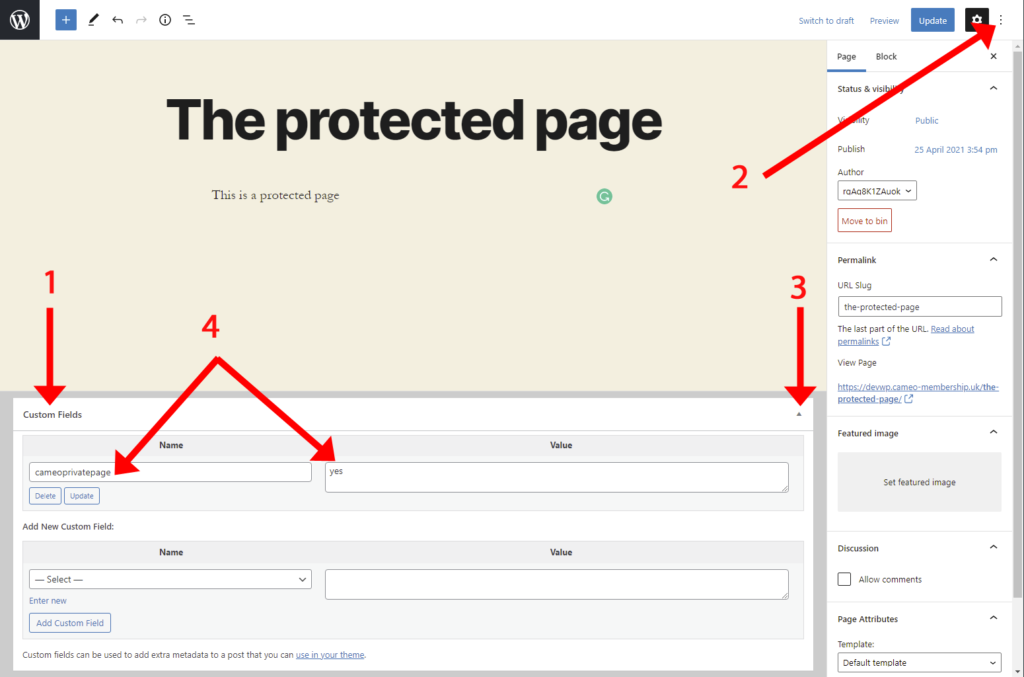
You can minimise the custom fields box when not in use to avoid distraction when editing (Fig 1: 3).
Revealing the custom fields box
You only need to do this once:
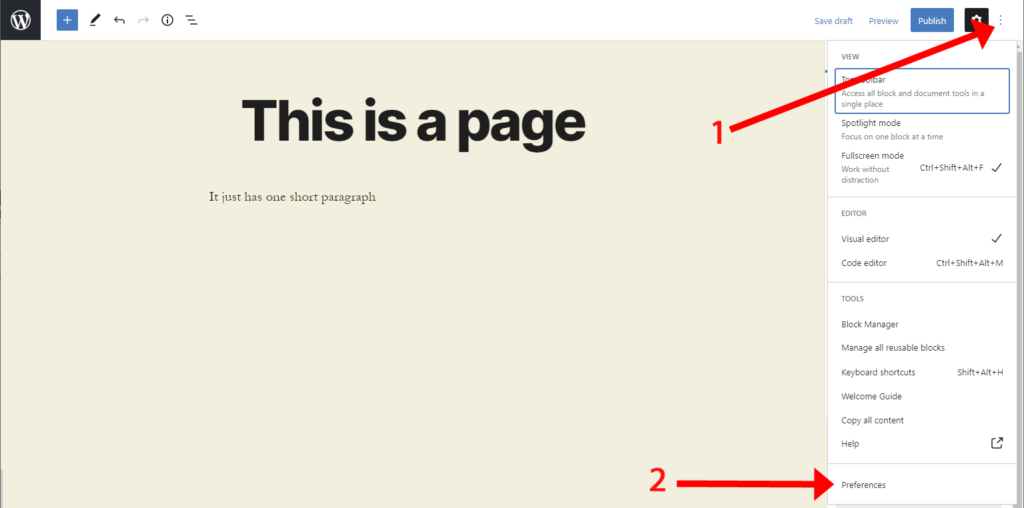
- Click on the options menu, the three vertical dots next to the cog-wheel icon at the top right of the page editor (Fig 1: 2, Fig 2: 1)
- choose Preferences, right at the bottom of the menu that pops up (Fig 2: 2; this refers to preferences as to how you want your editor page to look)
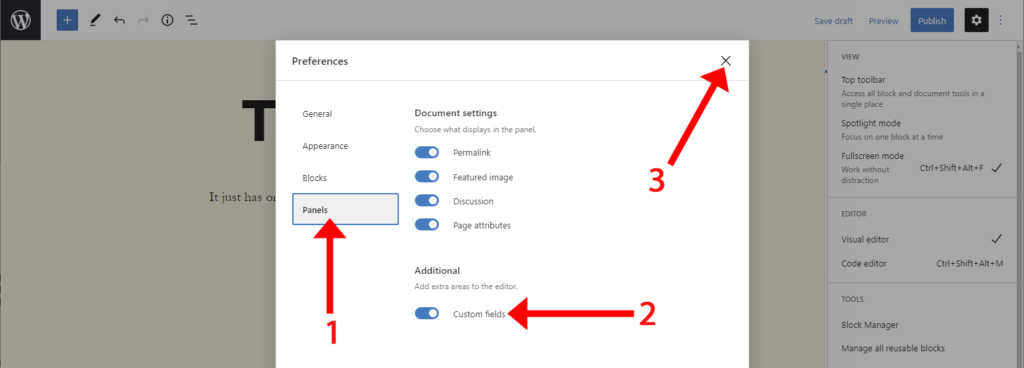
- choose Panels on the overlay that appears (Fig 3: 1)
- turn on Custom fields under Additional (Fig 3: 2)
- Close the box with the × in the corner (Fig 3: 3; there is no explicit Save).