
A new plugin for WordPress, called cameoeventslistings, is available for download in the WordPress Plugins section of the Forms menu. The plugin provides two WordPress 5 editor blocks which you can insert in a page to show:
- short summaries of multiple events, and
- longer, single event listings
WordPress obtains these from Cameo according to the criteria you set in the WordPress block options.
Contents
Background
Cameo holds information about events so it can offer bookings, tickets and communication with attendees. The bookings form provides booking facilities. However, most events-based websites have two stages before booking:
- listings of forthcoming events, possibly by category, such as “music”, “comedy”, “theatre” etc. (These would be represented in Cameo by tagging the event with those categories). Possibly also past events
- individual pages for each event giving more detail about the performer, times, the venue, maybe reviews. You could even include a video trailer.
Generally, you would expect links from the former to the latter, and links to a booking page in both.
Consider Cambridge Junction as an example. This is their music events page. There are two kinds of summary:
- boxes listing the events (in the middle column), and
- music highlights in the right column which include a thumbnail picture, but less venue information.
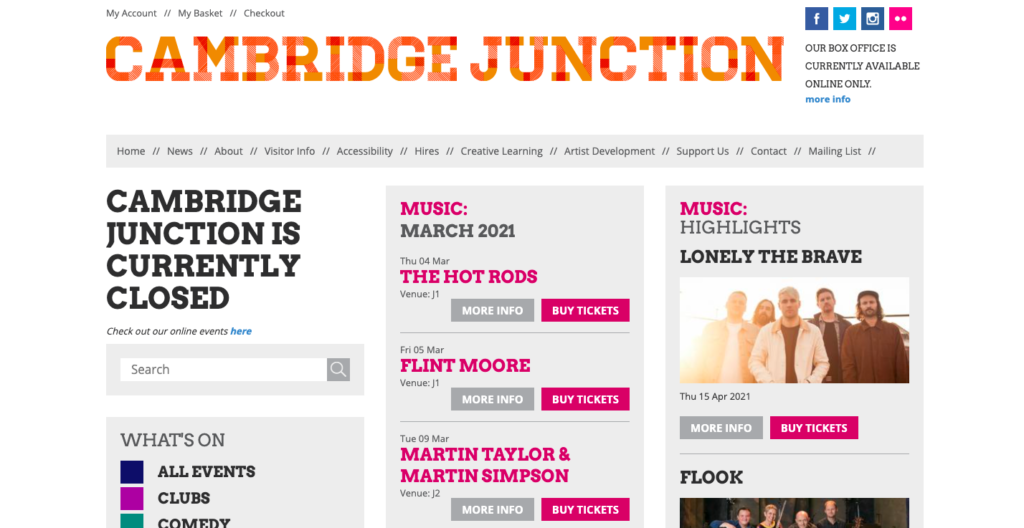
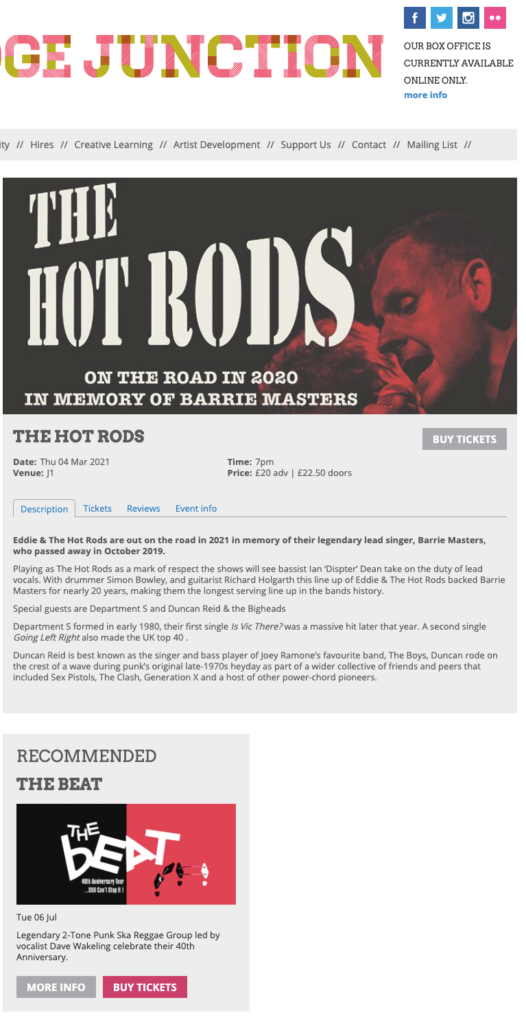
If you follow a more info link, you get to a page with more detail about the event. In this case, some of the information is in separate tabs. That’s just a detail of presentation (displaying different content interactively). Notice also the recommended area at the bottom. This shows related events – in much the same way as the summary page highlights.
It is this kind of pre-booking information that the cameoeventslistings plugin provides. Clearly you could prepare each of these pages manually in WordPress. However,
- the information is already present in Cameo, and re-entering it manually is error-prone, time-consuming and unnecessary duplication.
- manual page-management requires constant attention as time passes. Applying some automation to the process relieves this burden: WordPress can keep these up-to-date based on event information in Cameo.
About WordPress blocks
WordPress version 5 introduced Gutenberg, a completely new editor for pages and posts. The new editor makes pages from blocks. You edit each block independently. Controls for each block depend on the kind of block. See this introduction to blocks, with more links at the end for further reading.
Just headings, images and paragraphs make up many pages. Each is a block. But blocks offer more complex layouts including columns, galleries of photos, pull quotes and many others. Lots of plugins now offer a huge range of additional, different kinds of block. This Cameo plugin does just that.
You would often now use a block where you might previously have used a shortcode or a widget embedded in a page.
Useful short-cuts
An aside: Gutenberg has many useful keyboard shortcuts (modelled loosely on Markdown). For example:
- start typing into the default paragraph block with two hashes, to convert the block to a level 2 heading (three for h3, and so on).
- start with an asterisk and you convert to a bulleted list
- start with a greater-than to convert to a citation block
- enclose text in asterisks, to embolden, as an alternative to CTRL+B or clicking the Bold button
- similarly, use underscores to italicise
- and backticks to insert inline code formatting.
Installation
This plugin only works in WordPress version 5, using the block editor for pages and posts that that version introduced.
Installation is the same as any other manually installed WordPress plugins. Obtain the plugin file from the Cameo WordPress plugins download section. Then install it on your WordPress site.
Cameo Events Summary WordPress block
In WordPress, add a new post or page in the usual way. Insert any fixed content needed at the top or bottom of the page. You may have different pages for different kinds of event (future vs. past, for example, or different kinds, identified by their tags, like the Junction music example above).
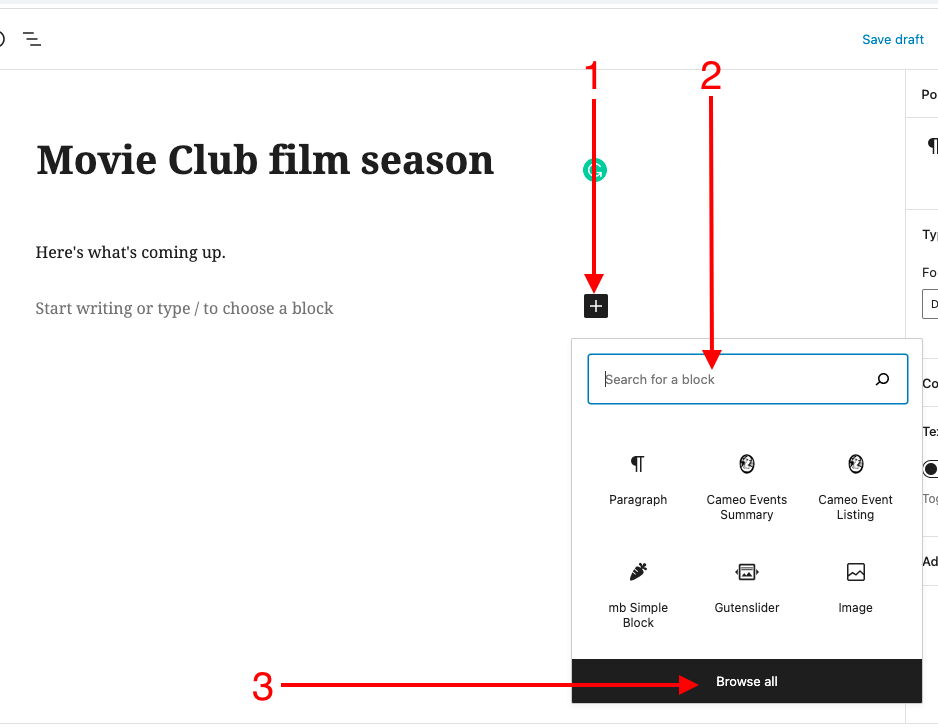
Then, insert a Cameo Events Summary block. The first time you do this, you may have to hunt for the block (listed under Widgets). After that, it will usually be available in the frequently used blocks.
Click the + to insert a new block (Fig 3: 1). Then, locate the block by starting to type Cameo in the search box (Fig 3: 2). Alternatively, click Browse All (Fig 3: 3). Click its name to insert it.
Block controls
With the summary block (Fig 4: 2) selected, the block controls are available in the panel on the right. WordPress outlines a selected block in blue. It also shows the Cameo logo in the block menu just above the block. That indicates the block type (Fig 4: 1). With these you can:
- choose what information to include and in what order (Fig 4: 3)
- future or past events, or either
- how many to show
- more info and booking link text and target URL (Fig 4: 4).
_E_in the link is substituted with the event name so that the target page identifies the event for booking or more information. - event selection (Fig 4: 5). Similar to Cameo’s reservations section and also Cameo’s Booking form options, you can select which events to summarise based on:
- event name(s),
- tag(s),
- venue(s),
- date(s), or
- specific event number(s)
(or any combination of these). You can use comma-separated lists of selectors when you have more than one.
The Junction example revisited
Recall The Junction example in Fig 1. This has two sets of summaries (all the “music” events, and highlighted music events). How would you achieve that with WordPress and the Events Summary block?
To do this, you would add two Events Summary blocks. Put one in the middle and one in the right column of your WordPress page. To make columns in the first place, use one of WordPress’ column blocks. Alternatively, use one of the many plugins that offer more varied arrangements of columns.
The middle column would show those tagged “music”, say, and the right-hand column those (also) tagged “music-highlights”. You would use those criteria for your event selection respectively in the block options. Set the WordPress block options appropriately for those blocks to control the differing order and visibility of details in those two columns (Fig 4: 3).
Cameo Event Listing WordPress block
With a suitable link, which includes a query parameter with _E_ , for More info in the summary, the target page of those links would include the single event listing block. That block reads the query parameter to decide what event to show. The plugin takes the information (mostly) from the event’s full description field in Cameo.
You will probably only need one or two pages to cover all your individual event listings: the plugin substitutes nearly all the page content.
Insert the block in the same way as the summary block.
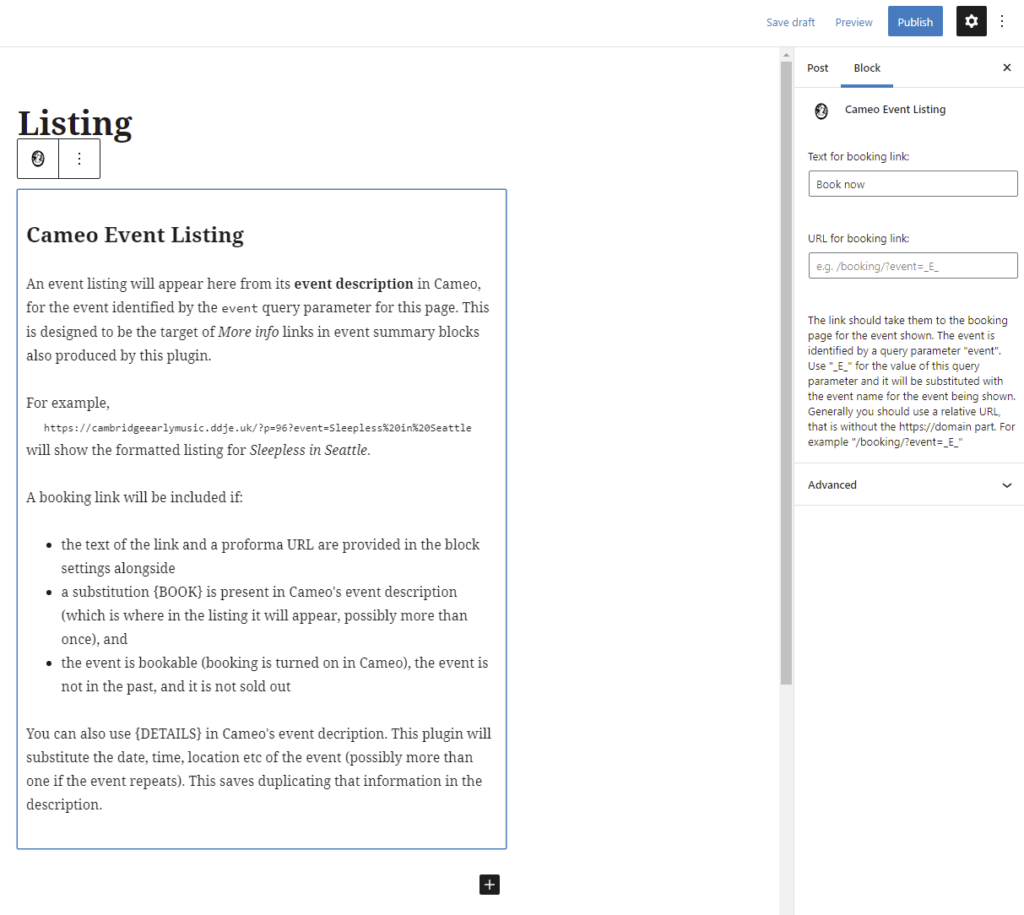
Neither the editor nor preview can preview actual event content as neither has the query parameter identifying the event. However, you can manually append the query parameter to the preview page URL to see it.
The block options are much simpler than the summary block. Just set the booking page link (positioned by the {BOOK} substitution in the event description) in the same way as for the summary block.
Block re-use
If you need multiple pages with slightly different event-selection criteria, WordPress lets you save a configured block for re-use. This avoids re-entering all the same information for a similar block: just change the small bits that are different.
To do this, click the block menu (the vertical dots in the menu above the selected block). Then choose Add to reusable blocks.
Caching
The plugin avoids overloading Cameo by not repeatedly asking for event information. Instead, the plugin caches the pages within WordPress. It only usually refreshes the content on the first access each day.
However, if you are logged in to WordPress, then the plugin refreshes the cache each time. You can immediately see your changes.