
You can now offer to add event tickets and membership cards to both Apple Wallet on iPhone and Google Wallet on Android.
Cameo supports this with:
- a wallet form type, and
- a substitution
{insert: add to wallet}(in Cameo 11, this also includes the name of your wallet form,{insert: add to wallet form-name}).
[UPDATED September 2024: Google Wallet now available, article updated to reflect this]
[UPDATED September 2025: reflect Cameo 11 changes]
Contents
Background
Usually, you send tickets to events by email, which include barcodes. Scan these with the check.in app to let them in and mark them as used.
You can send a membership card as an email attachment. This can also include a barcode which opens a page on your website which confirms the status of their membership. For example, this allows members to obtain discounts that you have negotiated with retailers.
Passes in Apple Wallet or Google Wallet provide another way to do both of these. This includes presenting the same barcodes. They have a number of advantages:
- Tickets and cards are stored on the phone, so if a location does not have internet access, the passes can still be retrieved.
- Passes are easy to find. They don’t require searching through email.
- Notifications automatically send you to the pass when the time of an event approaches, or (in future) when nearing the event’s location.
- Scanning should work more reliably than from email, as the screen is automatically brightened.
- Passes are harder to forge. They are digitally signed.
Apple passes are only usable on iPhone (and iPod Touch, and also Apple Watch when used in conjunction with an iPhone). However, visitors to the form can click the button on Safari on Mac or iPad, which will add the pass to the account’s linked iPhone, or download an Apple pkpass format file on other browsers.
Google passes can be added to a Google account in any browser where a user is logged in to a Google account, but they can only be presented in the Google Wallet app on an Android device. Google will prompt for login if not already logged in.
Wallet form
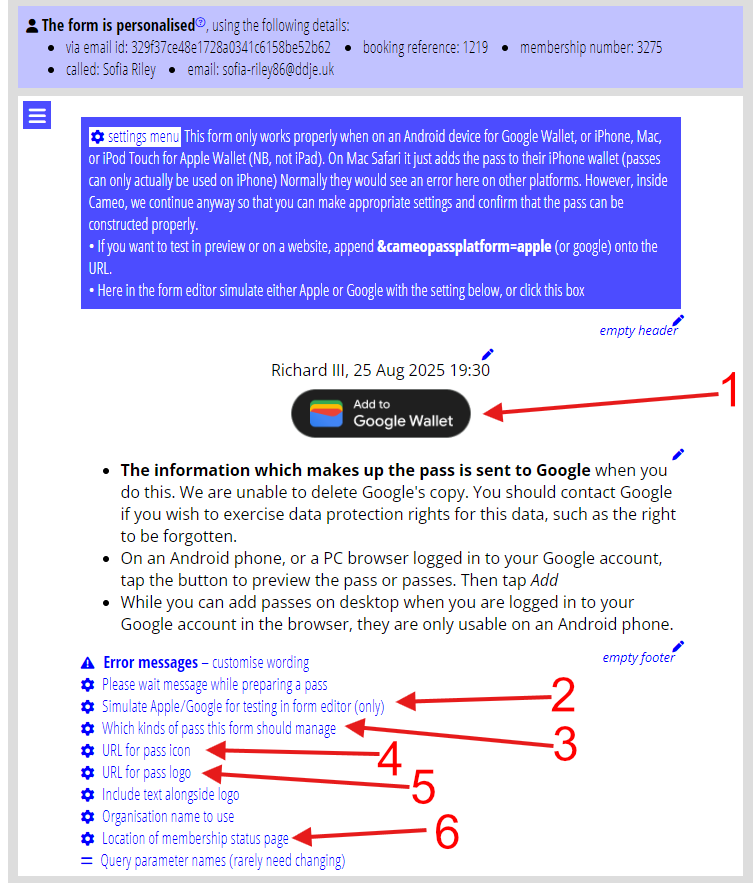
The wallet form type (Fig 4) provides a simple form which responds to a personalised link in an email (usually presented as add to wallet buttons, see below). That generates the appropriate kind of pass and its details. The link identifies which email it came from. That in turn knows whether it is a ticket email or not. If it is a ticket email, the email (and therefore the form) knows which booking it refers to.
When preparing the form you may need to see the result for both Apple and Google wallet, especially if you want to customise the text below the button. That text is different for each platform. You can switch between the two, independently of what it would do automatically, using the relevant setting (Fig 4: 2).
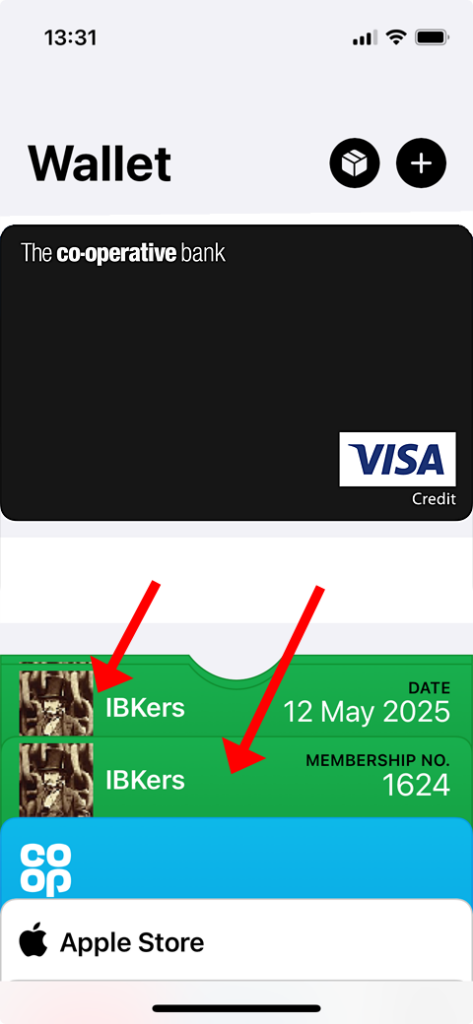
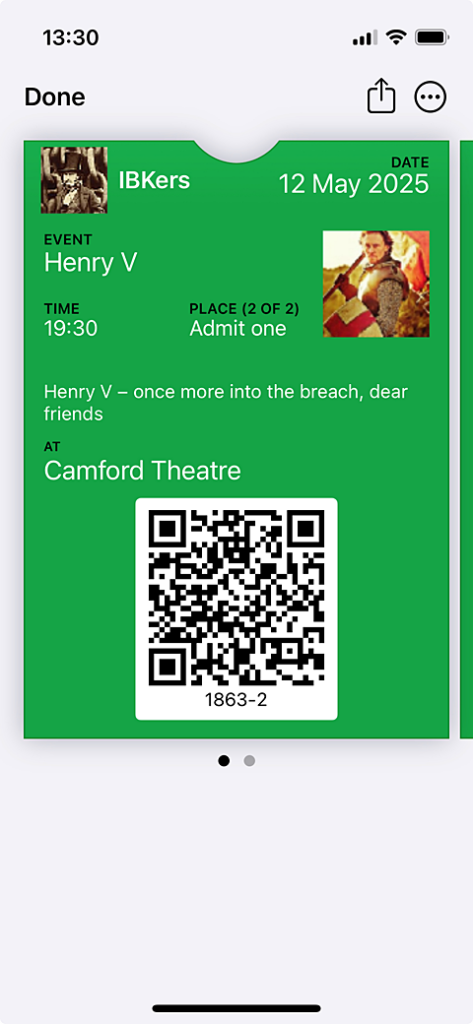
The form presents a button to add the pass(es) to the wallet, either Apple or Google (Fig 5: 1). In principle, for multiple tickets, it should be possible to add them all at once. Unfortunately there is currently a bug in iPhone where this doesn’t work properly. However, Apple Wallet groups tickets for the same date and opens them together, so getting at the next barcode is a simple swipe (Fig 2). Google Wallet does indeed add all the tickets at once, so there is only a single button (Fig 4: 1) and groups them in the wallet.
additional resources
The pass automatically includes most of the details needed from the booking and event details, for a ticket, and from the membership record for a membership card. For tickets, this includes the thumbnail picture for the event if you have one (Fig 2).
However you must provide three additional images, as form settings, for the form to include in the pass (two for Apple, one for Google). These will be URLs referencing images, typically in your media library. You can choose them (and upload them, if you have set up uploading to your media library) with the usual image selector.
- Apple: An icon, typically a simplified, square organisation logo (Fig 5: 4). Apple Wallet uses it very small in any notifications associated with the pass. The form samples it to be the size needed by the pass.
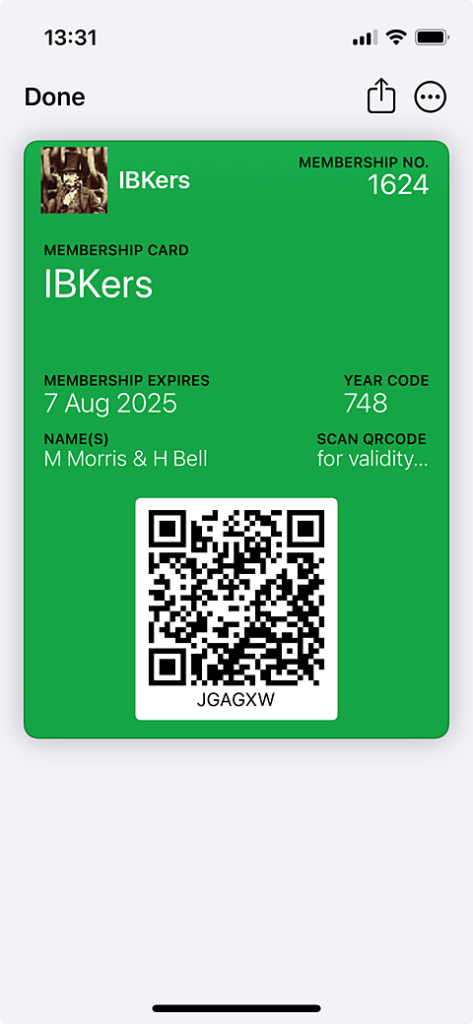
- Apple: A somewhat larger logo for your organisation (Fig 5: 5). This appears at the top of the pass (Fig 1, 2, and 3). It may be rectangular, so might include your organisation’s name in the image where appropriate. Alternatively, you can include the organisation name as text using the relevant setting. In that case, the logo needs to be smaller, perhaps square, to allow space for the text. Again, we sample it to the required size, 50 pixels high.
- Google: A square logo (which Google clips to a circle).
Before Cameo 11, for membership cards, you should also provide a further URL in the form settings: the location on your website where the status form is located (Fig 4: 6). That URL is embedded in the QR Code and is where they would be directed when it is scanned.
The wallet form sets pass colours from the style set for forms, in forms → colour scheme and style.
Add to Wallet button
You will need Add to Wallet buttons emails:
For tickets, the button should appear in the ticket email near the existing barcodes. For membership cards, it would appear in enrolment and renewal confirmation emails (the same templates where you might include a membership card attachment).
Insert this button with the {insert: add to wallet form-name} substitution (before Cameo 11, there is no form-name in this substitution). Newly generated ticket templates include this as standard. You would need to add it to existing templates.
Before Cameo 11, you also need to supply a wallet URL in organisation settings → organisation details. This locates the page on your website where the button takes them when tapped. That page should embed a wallet form. The form needs a personalised link to work; the buttons provides that. In Cameo 11, the wallet form knows where it is located, so can substitute that automatically.