If WordPress provides images for your emails, you can now upload images into your WordPress media library directly from Cameo.
[Update May 2024] As well as uploading image files, you can now also paste a copied image direct to your WordPress media library.
Contents
Background
You can use the image selector to choose an image to include in an email. By default, this shows you the most recent images uploaded to the the image library nominated in organisation settings → organisation details. Very often this is a WordPress media library.
To add new images, you previously had to log in to your WordPress dashboard and upload the images there. Now, however, you can upload images directly in Cameo’s image selector.
One-time settings
Naturally, you are not allowed to upload files to WordPress without appropriate permission. You only need to supply this permission once (only Cameo administrators can do this). Some WordPress installations need this even to access the media library. In that case you would most likely already have set the necessary permission.
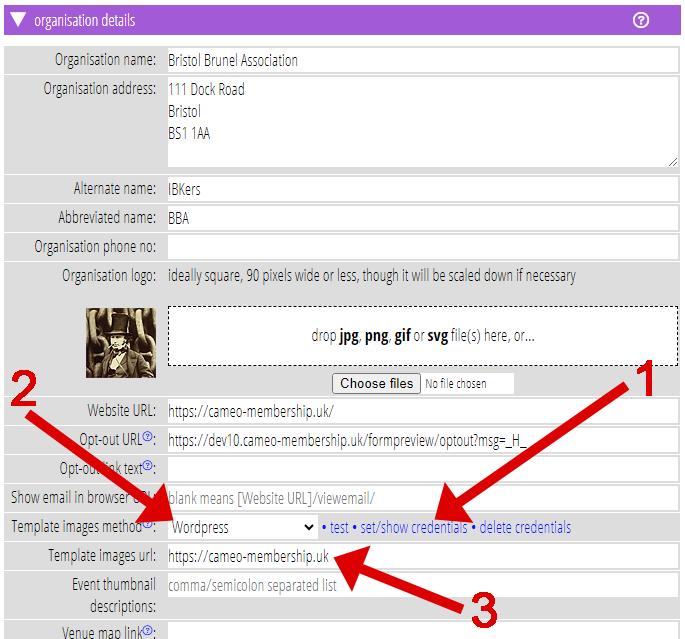
To give Cameo permission, use set/show credentials in organisation settings → organisation details. Find this control next to the template images method: Fig 1:1. You must also have set template images method to WordPress: Fig 1: 2. Clicking on the set/show credentials link explains how to get these credentials, which you obtain from WordPress. You must also supply the URL of the WordPress website where the images are located (Fig 1: 3) – usually you have already set this.
We recommend you add a new user to WordPress for just this purpose. That use needs to have permission to add posts (e.g. Author). Cameo needs a separate API Password for that user. Obtain this from the User page in WordPress. This is not the user’s main password for interactive logins (see the credentials box for details).
Upload
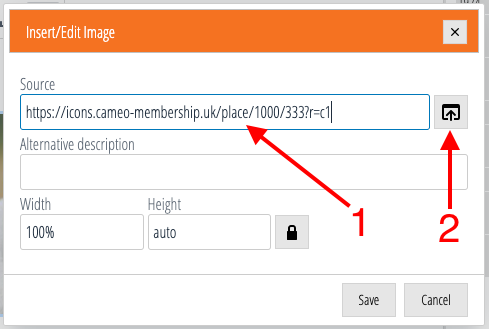
To upload one or more images, visit the image selector first using the image button in the template where you want to add an image. Then click the image selector button to the right of source the URL box (Fig 2: 2).
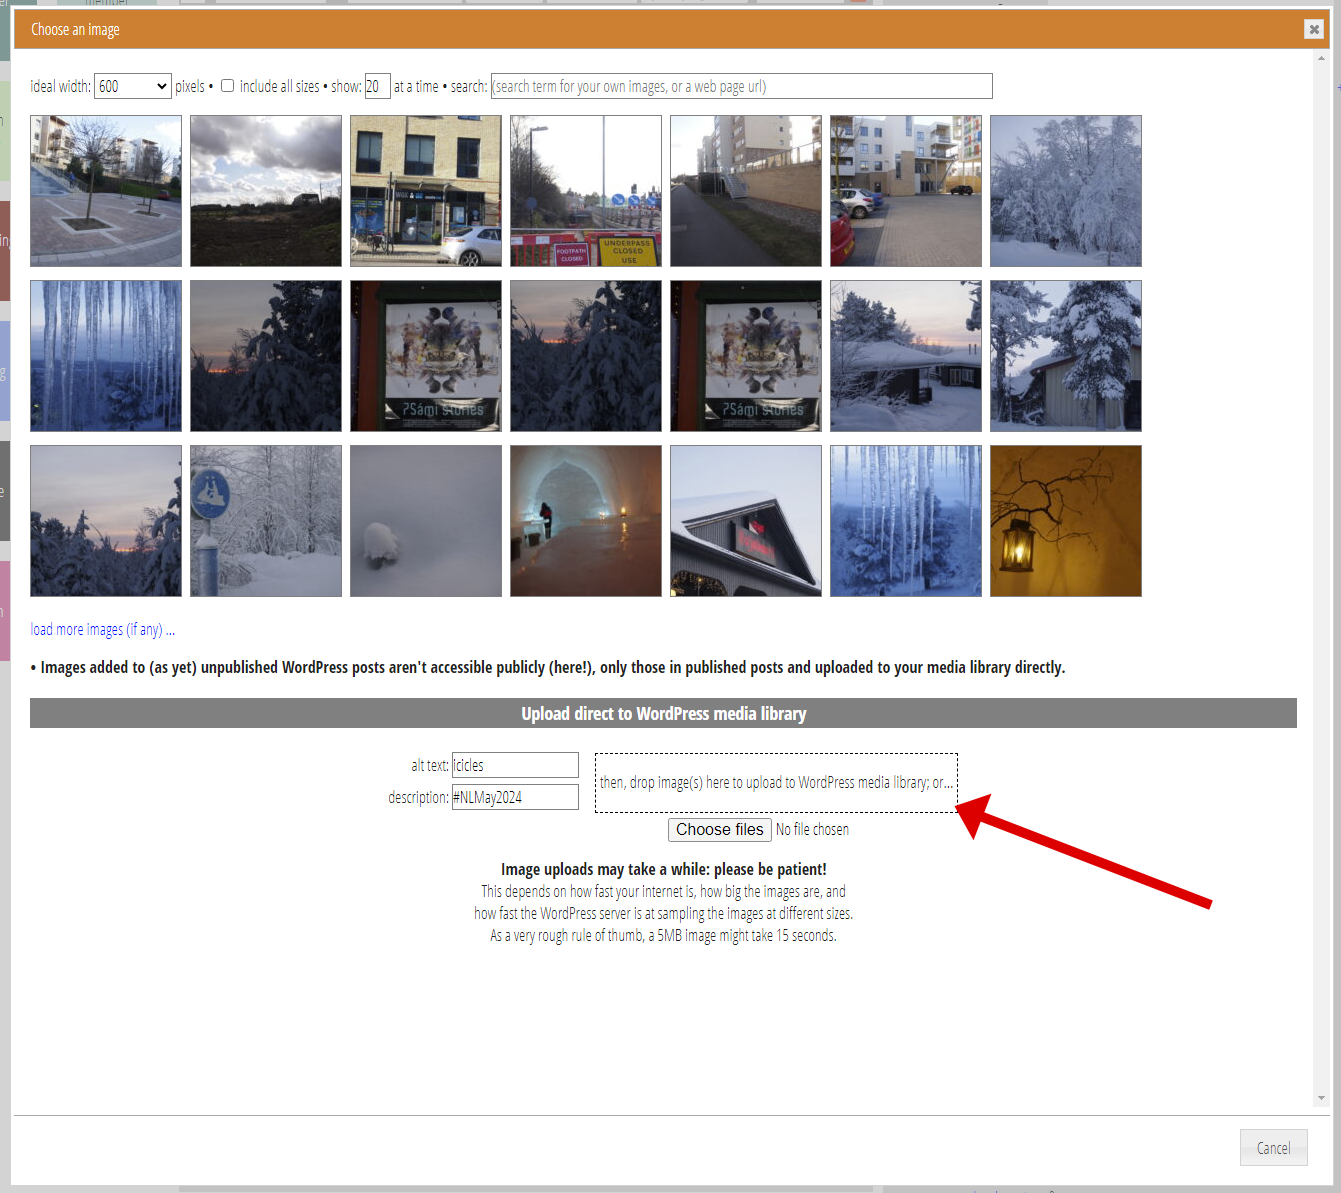
This loads thumbnails of available images. Now, there is also an additional subsection below the thumbnails for uploading new ones (Fig 3).
Before you supply the images, fill in the alt text and description boxes.
- Alt text is essential (though you can add it later if you want). This supplies a short phrase about the image for people with sight difficulties. Also, the recipient’s email app shows the phrase if it can’t load the image. For example, someone has images turned off in their email app by default, which is quite common.
- Description is just used for your reference. You can use it to supply a word or phrase that you can later use both in WordPress and in the search box at the top of Cameo’s image selector to locate images again later. For example, NLMay20204 might be your search tag for images in a May 2024 newsletter.
Then:
- drag the images you want to upload from Finder (Mac) or File Explorer (Windows) onto the drop target alongside (outlined in dashes). Or alternatively:
- click the Choose Files button to open Finder/File Explorer to locate the images you want, or
- paste the image contents of your paste buffer either with the Paste image from clipboard link (not illustrated here: see later article), or using keyboard shortcut for paste: CTRL+V (PC) / ⌘+V (Mac).
wait
It takes several seconds to upload and process each file, just as it does when you upload to the WordPress media library directly. On a reasonable internet connection, file uploads of the kinds of size you’ll be using here don’t take long. WordPress takes most of the time calculating new versions of the image at different sizes.
select
When you have uploaded your images, their thumbnails appear at the front of the list in Cameo’s image selector. Choose one to insert in your template by clicking it, in the usual way.
Don’t forget to select the intended size for your image using the ideal width menu at the top left of the image selector.
Or if you only want to upload, not insert at this stage, you can just:
- press the Cancel button, or
- the × (close) button at the top right of the panel.
did you know?…
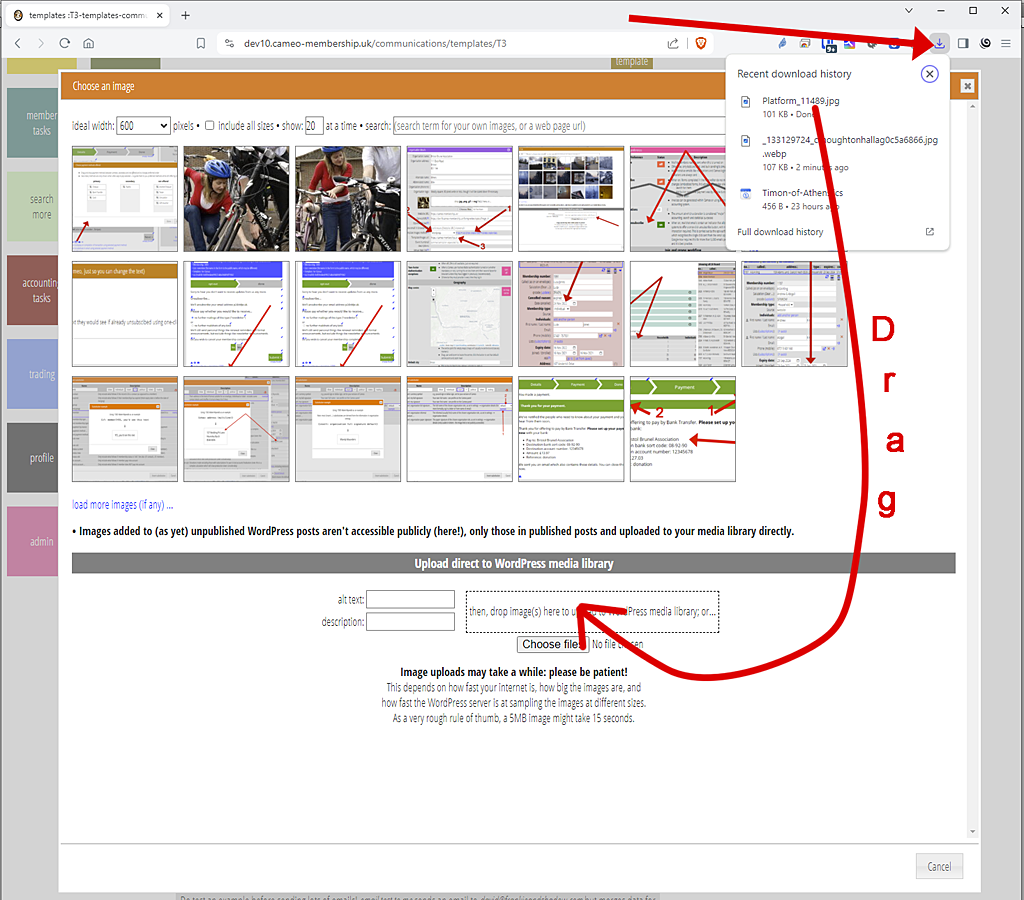
- In most browsers, if you download a file from somewhere, the browser shows that file in the its download list. You can drag and drop that too, without having to open Finder. In Chrome, find the list of downloaded files by clicking the downloads button to the right of the address bar (Fig 4). In Mac Safari, the downloads button is at the right side of the main task bar.
- You don’t have to have the Finder/File Explorer and browser windows side-by-side to drag and drop. You can either start dragging from the Finder, then, with your finger still on the mouse button, use ALT+TAB on the keyboard to bring the browser to the front, then drop the file in the box. Or you can drag the file to the browser’s icon on the task bar, still holding the mouse button down, hold over the icon for a short while until the browser comes to the front, and then move to the drop target and drop there.
These work on both Mac and PC and in Chrome, Firefox and Safari.