(Updated November 2021 to reflect changes in Scanner Pro app)
There’s a number of places where you can add files to Cameo, and you can do this in three ways:
- manual upload
- email attachment to Cameo
- direct addition from a phone scanner app
This article shows in detail how to do the last of these, a direct addition using Readdle’s Scanner Pro on iOS (iPhone or iPad):
- one-time set up
- sending scans to Cameo
Cameo uses a curiously named web protocol called WebDAV to do its communication with the scanner app. You can think of it as a generic tool for any website that supports it, that is similar to managing files with Dropbox, for example. However in Cameo’s case, you can’t explore existing files, it is used purely for sending files.
Contents
Set up
Once you have set up WebDAV for Cameo, you can just upload files repeatedly. But you have to tell Scanner Pro where to send files and who you are.
Before you start the scanner app, you need to obtain credentials from Cameo for connecting a scanner. It may be easier to do this on the same device so you can copy and paste the details rather than retyping them.
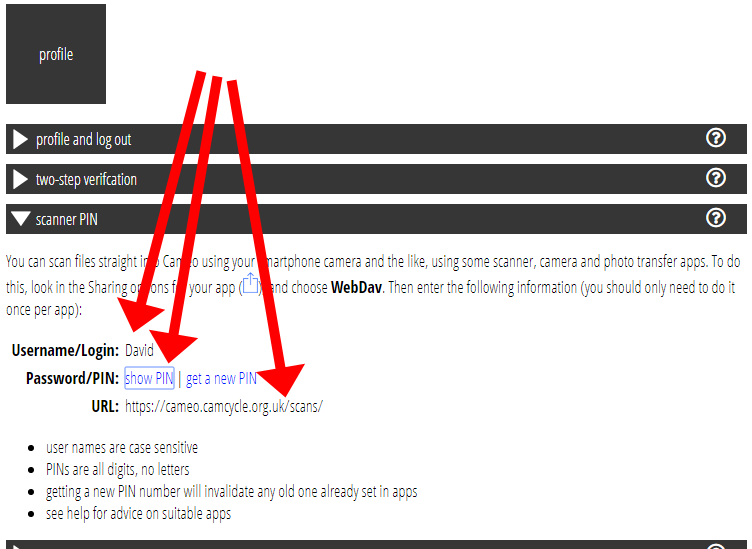
1: Go to Profile – Scanner PIN in Cameo. The details you’ll need are listed there. Click the show PIN link to reveal your 6 digit PIN number. (You don’t need get a new PIN unless the existing one is compromised.)
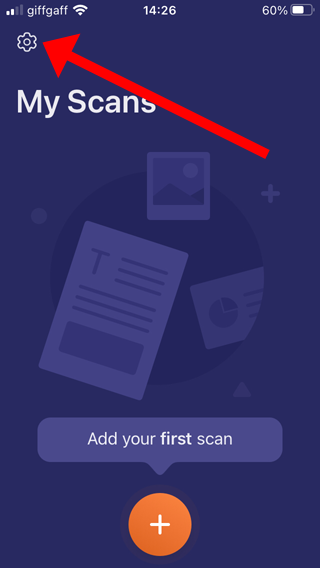
2: Start Scanner Pro and choose the Settings icon:
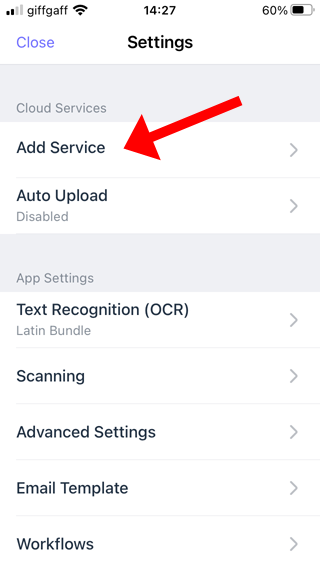
3: Under Cloud Services, choose Add Service
4: Choose WebDAV server as the service to add:

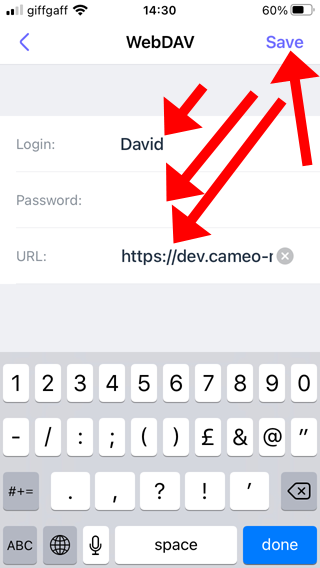
5: Fill in your credentials that you obtained in step 1, and press Save. Ideally copy and paste these to avoid mistakes – it’s quite fiddly to type a URL correctly! Note that the example they provide may show http://… but yours will always start https://… (that is, with an ‘s’ for ‘secure’).
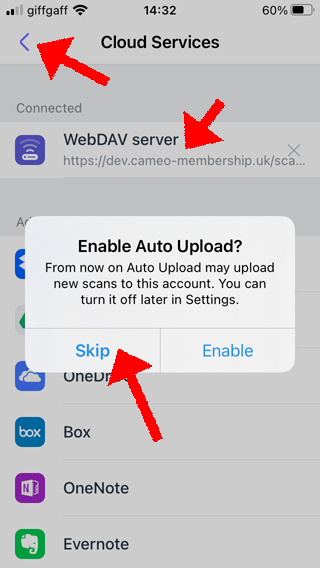
6: If you entered the credentials correctly it will show up in the list of services with the site URL. I recommend not turning Auto Upload on if asked, as you will need to update different scans to different places.
Tap the back arrow until you are back at the home screen, and you’re done.
Sending a scan to Cameo
Once set up, you’re ready to scan:
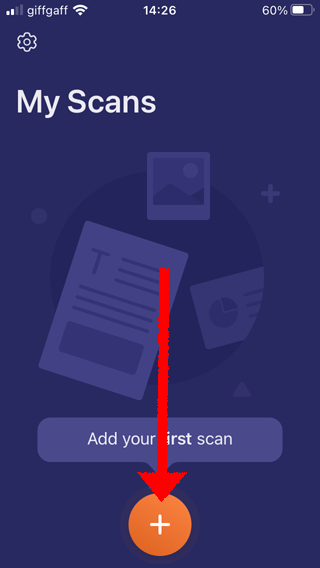
1: Do a scan starting with the big plus button on the home screen:
Briefly:
- use a contrasting background,
- hover over the page holding the phone as level as you can,
- the page outline as detected shows blue, when after a second or so of stability it will take the picture.
- Add more pages as necessary: it shows a page count in the bottom right next to an arrow to tap when you’ve got all pages.
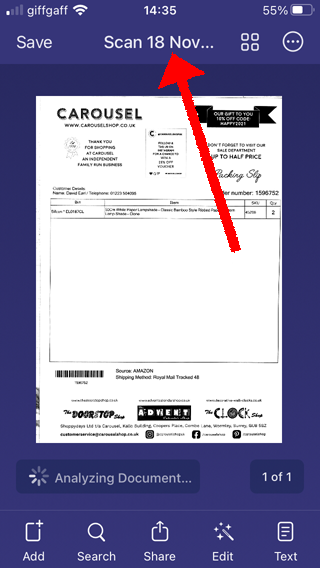
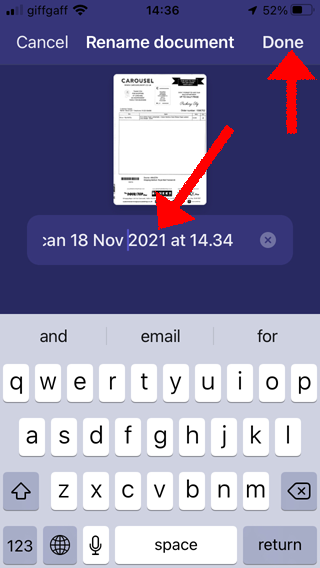
2: Change the name of the scan to something sensible by tapping in the name they invented for you above the page image. Don’t include a suffix such as “.pdf” – it will add that for you depending on the type of file you select later. Tap Done when you’re ready:
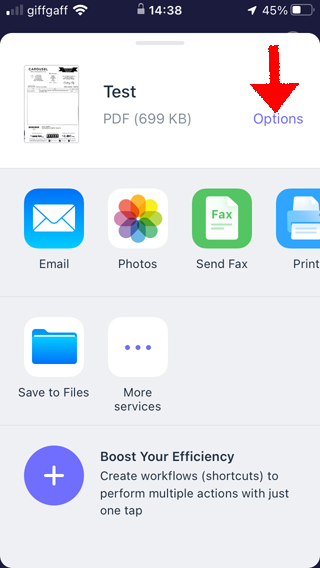
3: Tap the Share button:

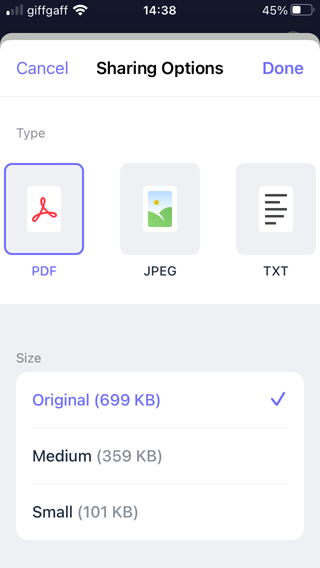
4: If you have purchased text recognition, you can either turn that on for all scans, or click Text (bottom right) to run it over this scan. Then when you upload the scan as PDF the file will include text as well as the scanned image, which is helpful for searching and copy and paste.
5: Set the file type you want to save at the top right (PDF for scanned documents or JPEG for more conventional photographs such as portraits). I find it is very easy to forget to do this, so make a point of checking. There are two different versions of the Scanner app, I think depending whether you have purchased text recognition (OCR) or not. So the file type may just be a simple pull down menu, or an options link showing a screen with more comprehensive options (illustrated below).
6. Then choose the WebDAV icon as the place to send your scan to. (If you don’t see the icon, see below.) (It is also possible to set up pre-set workflows which bundle some of the settings, and means you could name it Cameo rather than WebDAV, but that’s beyond the scope of this article).

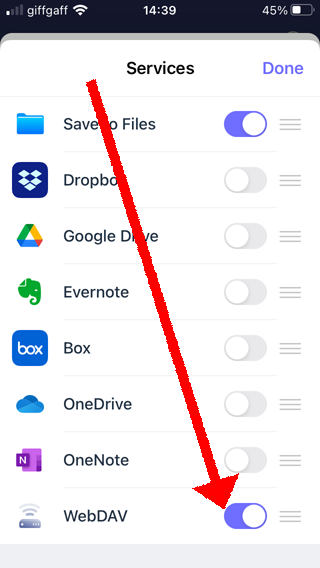
If you don’t see the WebDav icon, click More Services (sometimes labelled Add Service instead). Slide the switch to turn display WebDav in the list of available services to send to, then tap Done:
7: The different places you can upload to are shown as folders (remember this is more normally used to show you files, like Finder or File Explorer, but here it is “write only” – and don’t try to make a new folder at the top right – Cameo won’t let you).
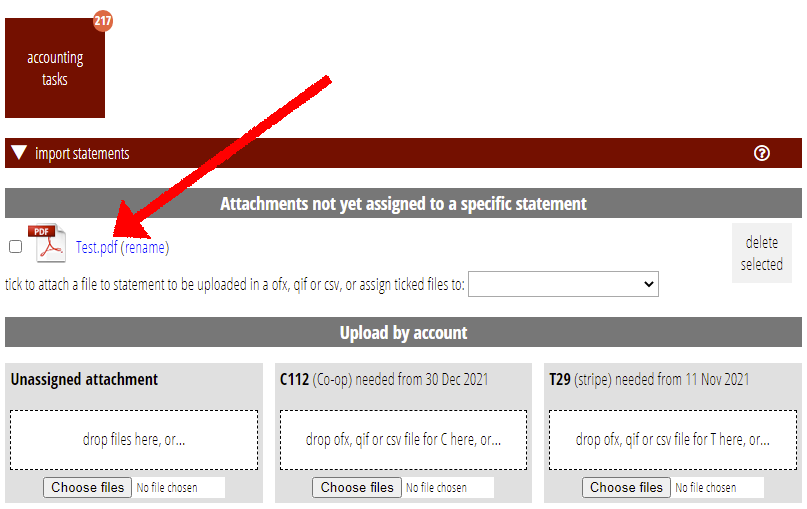
Let’s say you scanned a bank statement, so tap Import Statements:
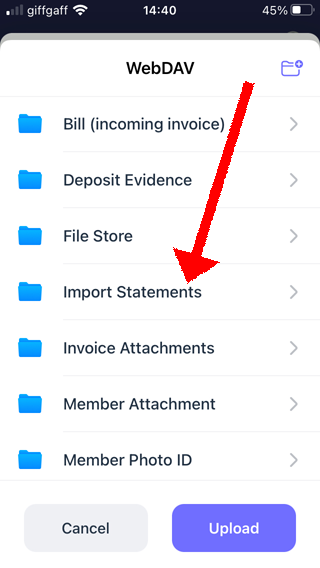
8: With Import Statements showing as the destination at the top, simply press Upload. The file will then upload. Any previous files you uploaded in the same session will show up in the blank area of this page later, but will be empty at the start of each session:

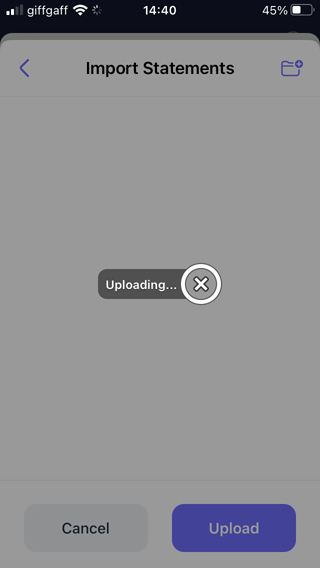
That’s it. If you look in Cameo you should now see your file in the relevant place (you’ll have to re-open the section if it is already open to see new files). So in this case in Import Statements: