
Sending emails to people who booked for an event is easier with a new button in the Reservations, Bookings and Attendance section on the Events menu . This doesn’t add anything you couldn’t do manually before, but it brings several steps together in one place.
To send email to event attendees, you need a list which selects them and a template which has that list as its audience. The email attendees button at the end of the Reservations section makes both for you in one go.
Contents
Select the event
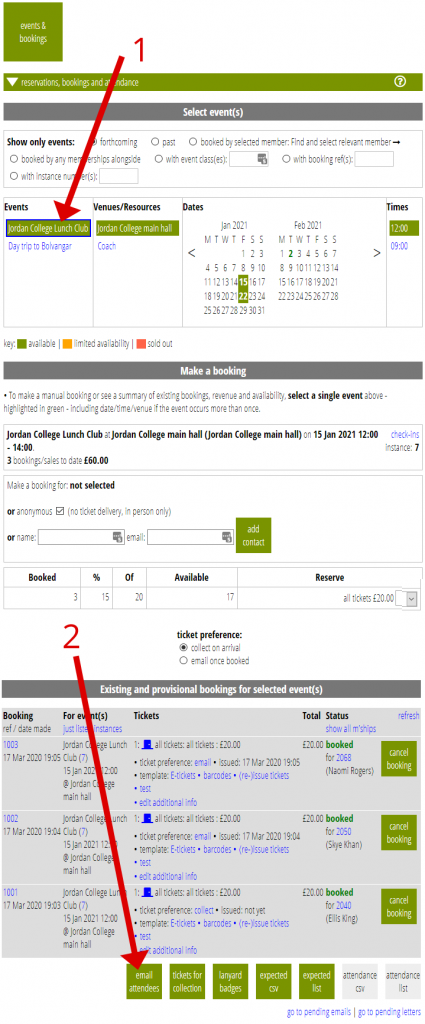
First, select the event you wish to email attendees for (Fig 1: 1).
The Reservations section has three parts:
- select one or more events at the top
- make a booking (which we can ignore here)
- list existing bookings at the bottom
Your selection can be a single event or more than one. If an event occurs several times on different days and/or different locations, you can select just one, some or all of those. You can also filter which events are shown using the smaller box at the top.
The (first few) existing bookings for the selected events are then shown in the last panel. To email all those who made bookings, press the new Email Attendees button (Fig 1: 2).
Make a list and a template
The button pops up a box (Fig 2); in many cases you won’t need to change the contents.
The box confirms which events this will apply to (Fig 2: 1).
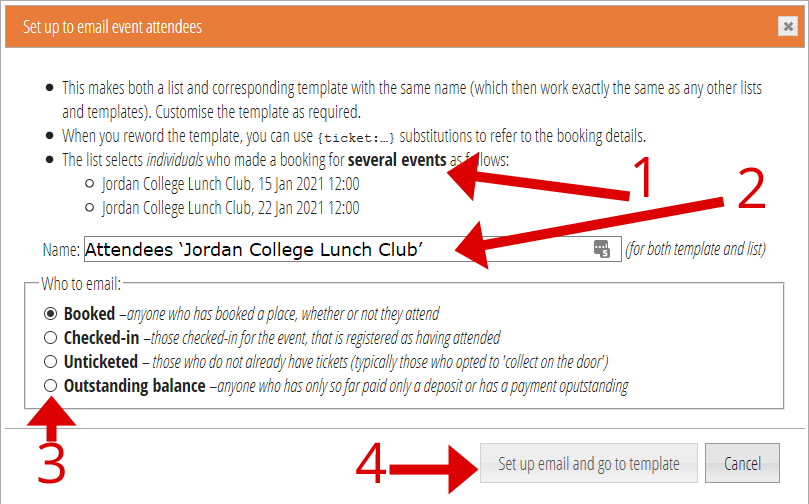
You then provide:
- a name of the template and the list (Fig 2: 2; for a single event, this will be filled in for you), and
- which of the attendees to select (Fig 2: 3):
- all bookings (the default),
- just those who actually attended (checked-in),
- people who haven’t already been sent tickets, or
- for events which just charge a deposit initially, anyone who has outstanding payment to make
When you click Set up email and go to template (Fig 2: 4) it:
- makes a list which selects those people (using the event attendees list source)
- makes a template with that list as audience
- adds some boilerplate content to the template for you to customise
- takes you to the new template to add your text (Fig 3).
Edit your template
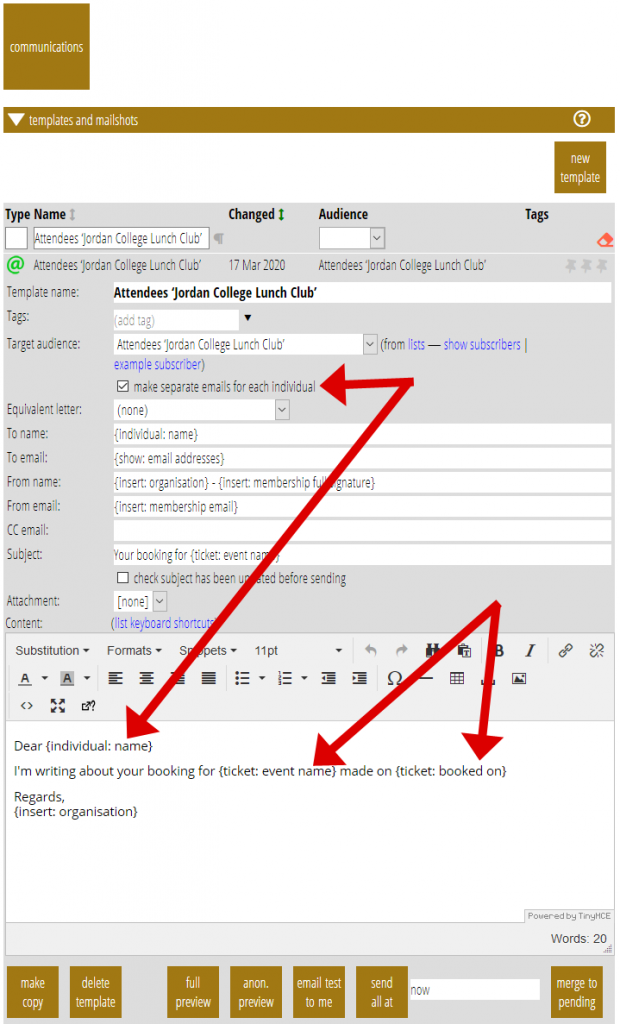
You can then test, merge, schedule and send the resulting emails just the same as any other template. Because the audience refers to an event (or events) you can use the {ticket:...} substitutions (from tickets on the substitutions menu in the template content editor, Fig 3: 2) to include details from the booking specific to the person who made it. For example, {ticket: event name} substitutes the name of the event and {ticket: booked on} when the booking was made.
Because a booking is made by one individual, for household memberships etc, the list selects only the one person who made the booking (otherwise someone who didn’t make a booking would receive an unexpected email). Therefore, the template is also set up to send only to individuals (Fig 3: 2), and you would usually want to use the individual’s name etc as the salutation, rather than the more usual salutation field.
See also more detail about how event attendees lists work when set up manually, or if you need to modify one.