You should find adding payment methods to forms that take payments easier with this group of changes.
We now set default payment confirmation messages in forms which take payments according to the payment processor they use. This makes it easier to set up these forms in the first place and harder to overlook where you need customisation. This applies to both:
- what the user sees on the last step of the form, after they complete payment, and
- in any confirmation message sent by email.
We have introduced two new payment processors:
- Cheque
- Simulate
You can now substitute organisation name and address into payment confirmation messages (particularly to make it easier to say where to send cheques).
The form editor now shows the settings (cog wheel![]() ) menu, for all forms, without the need to press a button to access it.
) menu, for all forms, without the need to press a button to access it.
You can add more non-payment-specific text (common to all payment methods) to the confirmation step of all the forms that take payment. This means you can reduce the text in the payment-specific bits to the minimum, related solely to the payment method.
Contents
Background
Form types which take payments:
- Join
- Renew
- Payment (arbitrary payments including making donations)
- Booking (event tickets)
- Invoice (taking payments for outstanding invoices)
- Shopping (cart for buying merchandise)
Each such form offers payment methods of your choice, using the payment methods button (![]() ). Select from the payment methods defined in organisation settings → payment methods.
). Select from the payment methods defined in organisation settings → payment methods.
In each payment method definition, you identify a built-in payment processor, which determines who takes the payment and how. When selecting a payment processor, you also provide credentials which allow the form to access your account with that processor.
For example, selecting Stripe means that the payment step of any form that uses it embeds Stripe’s card details box to supply things like card number and expiry date. It knows which account to pay into because of the credentials you give to Cameo obtained from your Stripe account.
Each form confirms the customer has completed payment after details (like card number) have been verified. You would typically say thank you for the payment and provide them with a reference number (their new membership number, for example, in the Join form). Most of these forms also optionally send a similar email to confirm.
But some payment methods must give the customer additional information they need to complete the payment:
- For bank transfers (BACS or Faster Payments), and Standing Orders, the customer needs know the account name and number, sort code, amount and reference to quote in order to set up the payment at their bank
- For a cheque, they need to know who to make it payable to and (if they are not handing it over in person) where to post it to.
- For all three of those methods it is helpful to phrase the email confirmation as a reminder to complete the payment in that way if they didn’t do so immediately: people commonly forget to do this almost immediately, when it requires action on their part!
Per-payment-method messages
Each payment method you offer on a form has a separate pair of confirmation and email messages. These are formatted and plain text respectively. You set these on the step of the form where the customer selects payment method even though they don’t appear until later. We do it here so you don’t have to keep going backwards and forwards over the payment to set the text for each method. This hasn’t changed.
Now, however:
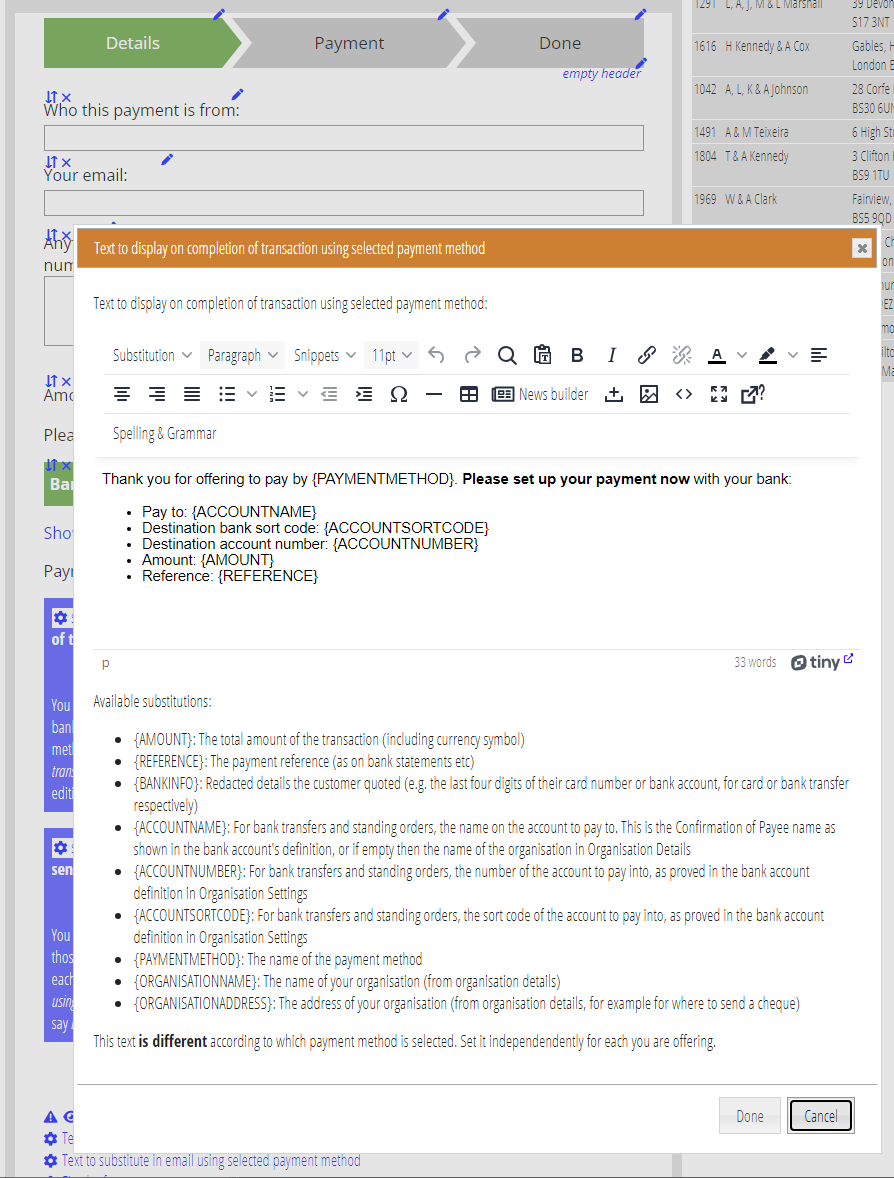
- The default messages differ depending on the payment processor used to handle the payment method (Fig 1). This means they are useful out of the box. In particular, bank payments now provide the account details the payee should use, without you having to work out what the message should look like; and for cheques it says who to make it payable to and where to send it.
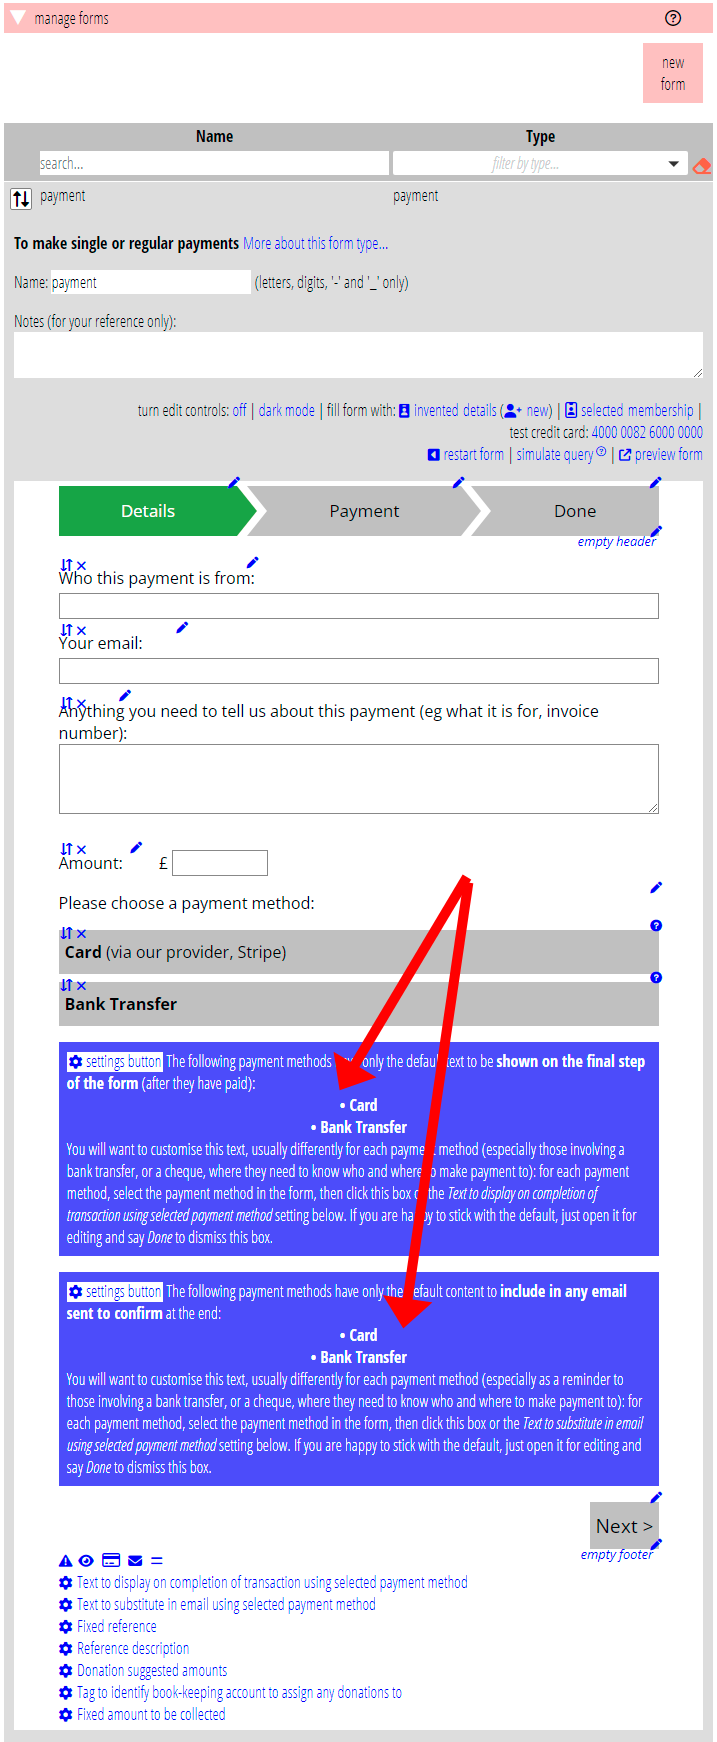
- The form highlights messages which remain set to the default, prompting you to at least review them (Fig 2). You could always do this from settings (
 ) but previously you needed to realise this was necessary.
New payment processors
- Cheque: strictly speaking the actual processor is a bank, and you would have previously used none as the processor selected to indicate there is no information to collect (as there is for credit cards, for example). We’ve separated this out now as its own processor so that it can have different default confirmation messages from none or bank.
- Simulate: this simulates taking payment details in the step of the form which asks for them. This only works in the Cameo form editor, or in test versions, but not in live forms. You provide as “credentials” a simple phrase, and quote that phrase back as the “payment details”. Use this in situations where you can’t use a test account with the provider. Don’t forget to replace it for live forms!
Select the payment processor for a payment method in organisation settings → payment methods.
More customisable text on form confirmation step
Previously, forms that take payment limited the content of the final (confirmation) step mostly to:
- a thank you message on a highlighted background, and
- the per-payment-method confirmation message previously set on the payment method selection step
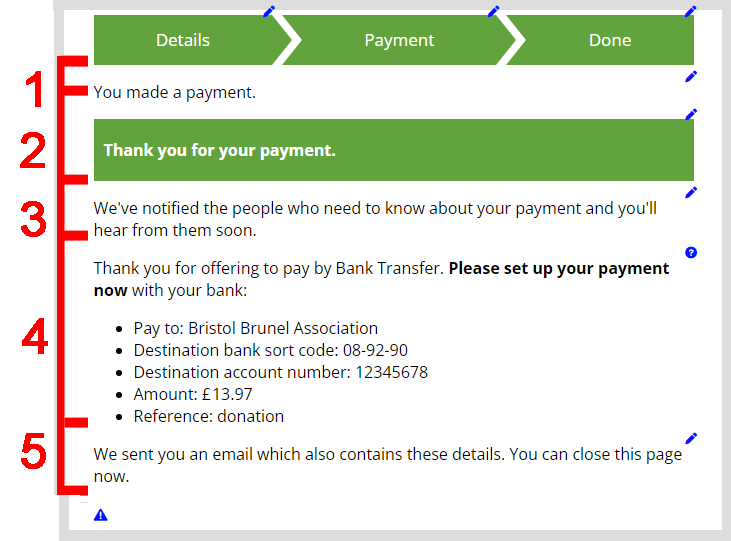
Now, though, all these six form types are consistent and comprise, in this order:
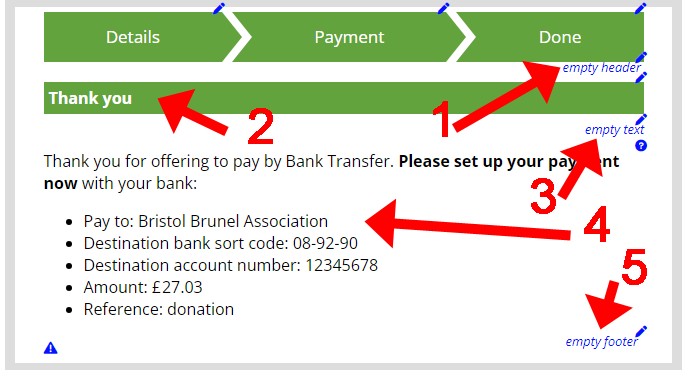
- A header message, below the step indicators and above the thank you message, initially blank (Fig 3: 1, Fig 4: 1).
- The thank you message, as before (Fig 3: 2, Fig 4: 2). However, these can all now substitute the relevant reference number (for example, new membership number in the join form or the invoice number in the invoice form).
- Some more arbitrary formatted text, a preamble (Fig 3: 3, Fig 4: 3). This allows for some generic text, such as explaining to the customer what will happen next, rather than have to duplicate any such text in all the payment method confirmations.
- The payment confirmation text, as above (Fig 3: 4, Fig 4: 4).
- A footer message at the end (Fig 3: 5, Fig 4: 5).
Form editor settings menu
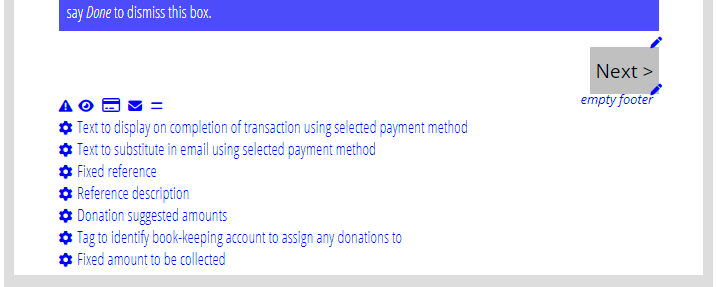
The settings menu (![]() ) is now displayed in full rather than requiring a click on the icon to open it up (Fig 5). This applies to all forms, not just those taking payments. Settings for forms are important, but were easily overlooked. This change makes them more obvious.
) is now displayed in full rather than requiring a click on the icon to open it up (Fig 5). This applies to all forms, not just those taking payments. Settings for forms are important, but were easily overlooked. This change makes them more obvious.