A new form type, Inventory, provides merchandise listings, sharing a shopping basket with the Shopping form.
These are to products as the event listings plugin (or Programme form) and the Booking form are for tickets.
Contents
Background
Merchandise sales have a lot in common with ticket sales, the biggest difference being they aren’t date-dependent.
Until now, though, the shopping form has only provided a limited way of presenting products for selection. For events, the WordPress plugin and its non-WordPress alternatives, the programme and event form types, offer a way of presenting a rich text description of events. Now, the Inventory form does the same for merchandise.
Inventory form
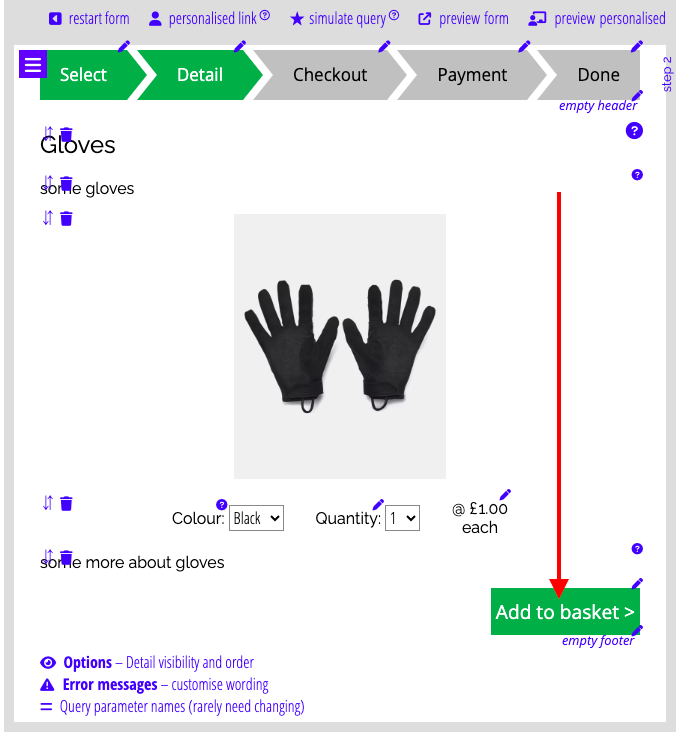
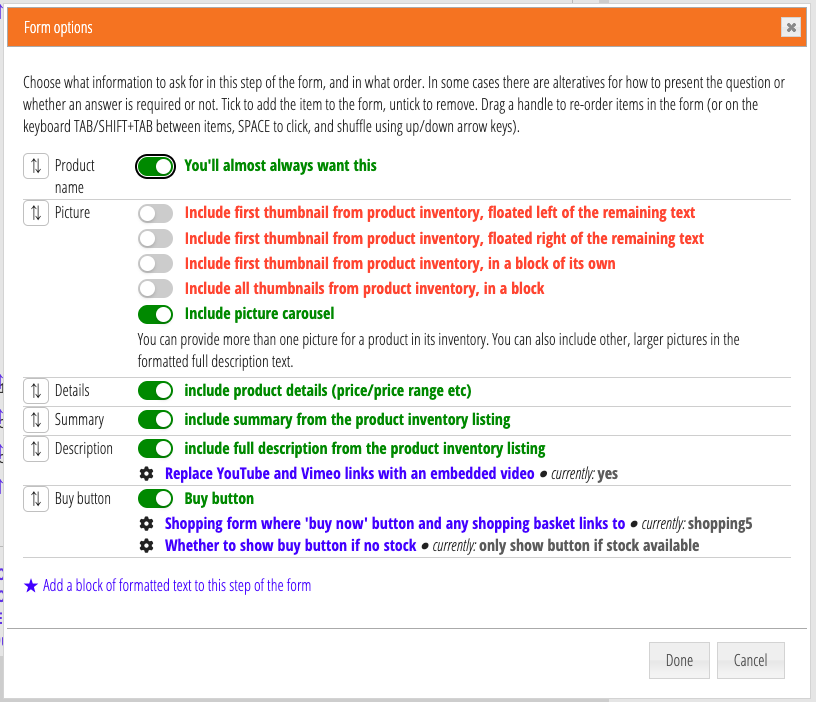
An inventory form presents product listings for merchandise selected from your inventory at trading → inventory and stock. Among the other product details, in particular, it shows the full product description from the inventory item. The form can also show a single product picture, or a selection of them, and/or you can include pictures in the full description. As usual in forms, you can choose what parts to show and in what order, in this case both the components of each listing (Fig 1) and the form as a whole (Fig 2).
Each item has a buy button. That takes them to your page embedding the shopping form, to choose quantity, any variants etc. You need to identify which shopping form to go to in the inventory form options. The buy button includes the product code in its target URL. That means the shopping form selects just that product, skipping its own product selection step.
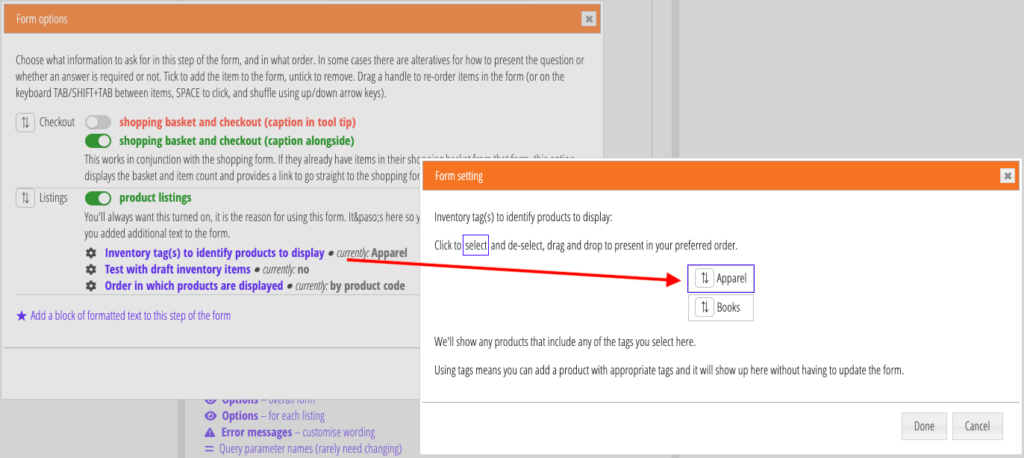
You choose which items the form displays by choosing one or more inventory tags in the form options. You can tag each inventory item. The form selects those items with a corresponding tag. This way, an item gets added to your website just by including the relevant tag: you don’t have to change the form or website each time you add a new product.
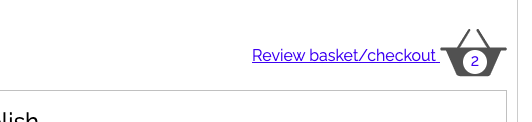
The inventory and shopping forms share a shopping basket. If there is an active shopping basket the inventory form displays it (at the top by default; Fig 3). Clicking it takes them straight to the shopping form’s review basket / checkout step.
Shopping form changes
To support the inventory form, the shopping form shares its shopping basket with the inventory form behind the scenes. That means the continue shopping button on the review basket / checkout step jumps to the page embedding your inventory form (providing you set the form option to do that, choosing which inventory form you want to go to). (That’s the opposite action to the inventory form opening the basket in the shopping form). The shopping basket is emptied on successfully completing checkout.
Independently of the inventory form, we have simplified the shopping form’s workflow. Firstly, with only one product variant, the form sets quantity to 1 by default. Then, it only offers a single add to basket button (Fig 4). Previously, it also had review basket/checkout and continue shopping. Now, the button takes you to the basket, where you can then continue shopping (via the inventory form if you want). However, in our environment (not being Tesco or Amazon!), most people are only buying one product so it makes more sense to go straight to the checkout step by default, and is much clearer, with fewer clicks, in the add to basket step.